Save 23% ($351) & Get a Free 1-1 Call with our Team ⏰ : 0d 2h 59m 43s
Tutorial: How to Use Argent Wallet | A Visual Guide For You
Argent is a mobile Ethereum wallet. It is non-custodial, meaning that only you have access to and ownership of your wallet’s private keys. For a simple explanation of what private keys are and how they work, click here.

This tutorial will go through how to set up an Argent wallet, as well as how to send, receive, buy, swap and earn yield on tokens via Argent.
Setting up your account
First off, you will need to download Argent’s IOS or Android app. You can do this by directly searching Argent in the app store/google play, but the safest way of ensuring that you are downloading the official app is by heading to ‘www.argent.xys’ and following the link to download from there.
Once this is done, open the app on your phone and click ‘create new wallet’.
You will then be instructed to create a username for your account. This username acts as your wallet’s Ethereum address. Note that you will have to pay a fee to activate this address, which will be deducted from your first deposit or purchase on Argent.
After you accept Argent’s T&C’s, you will need to enter and verify an email address for your wallet. Your email address will be used for security purposes only.
Similarly, you will be prompted to enter and verify your phone number. After this, you’ll have to create a passcode to unlock the wallet. You will also have the option to enable biometric security (e.g. face recognition) if your device offers such features.
You will then have created your Argent wallet!
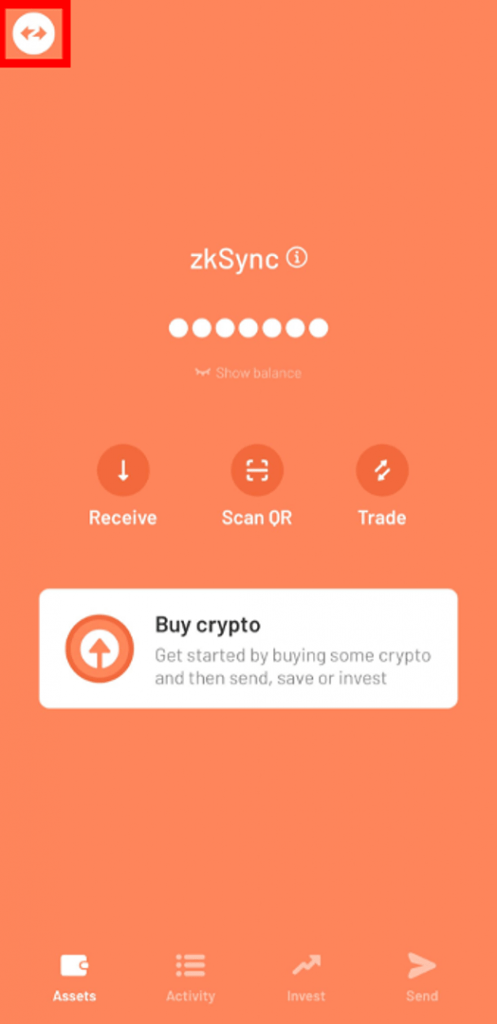
When you click on the switcher icon (highlighted in red in the top left-hand corner of the above image), you will be brought to the following screen.
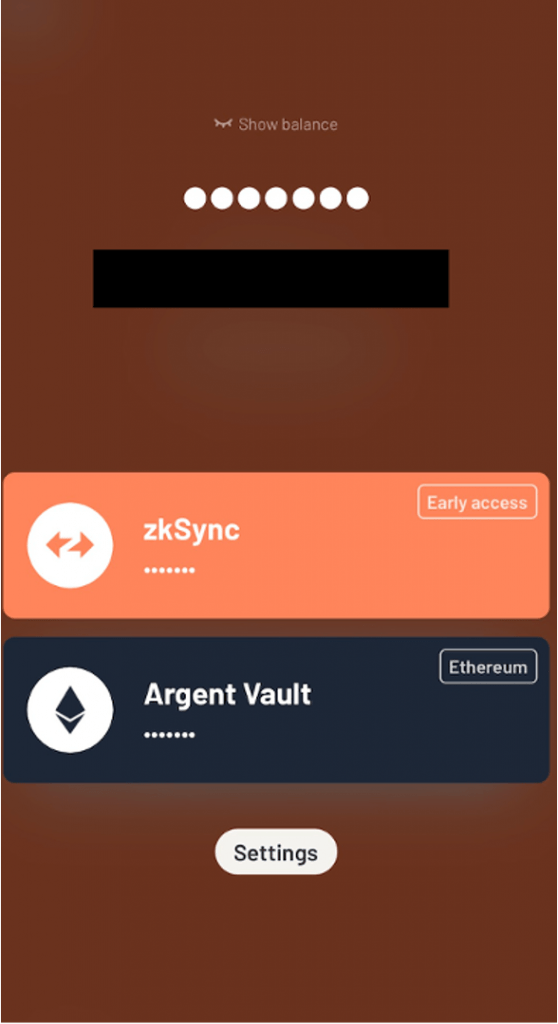
Here you have your ‘zkSync’ and ‘Argent Vault’ wallets. The zkSync wallet is a Layer 2 solution built on the Ethereum blockchain.
In simple terms, Layer 1 blockchains (e.g. Ethereum) have their own security mechanism that allows projects to be built on top of them. The projects built on top are ‘Layer 2s’ and are dubbed a part of Layer 1’s ecosystem.
The zkSync wallet was developed to facilitate quick and secure transactions while avoiding the extortionate gas fees on Ethereum.
zkSync is part of a group of layer 2 solutions called Rollups. In brief, Rollups work by bundling or ‘rolling up’ off-chain transactions into a smaller transaction that then gets sent to the Layer 1 (in this case, Ethereum) blockchain.
The Argent Vault is the original Layer 1 Ethereum wallet launched by Argent. While zkSync is the more affordable option, the Vault is still necessary for Argent’s social recovery or ‘Guardian’ system.
For most other crypto wallets, you will be given a seed or recovery phrase (a collection of 12-24 words representing your wallet’s private key). Instead of a seed phrase in Argent, you have ‘guardians’, which you use to verify security-related tasks (e.g. wallet recovery, transfer of ownership).
Argent will automatically be set as a guardian for your wallet, but you can add other devices (e.g. a hardware wallet) or friends and family members as guardians. Note that guardians will never have access to your wallet’s private keys or your assets.
Adding Guardians
In order to add Guardians, you will first need to activate your Argent address (by buying or depositing crypto).
Once your account is activated, click on the switcher icon at the top left of your screen and press ‘settings’. Following this, select ‘guardian’ followed by ‘add guardian’. 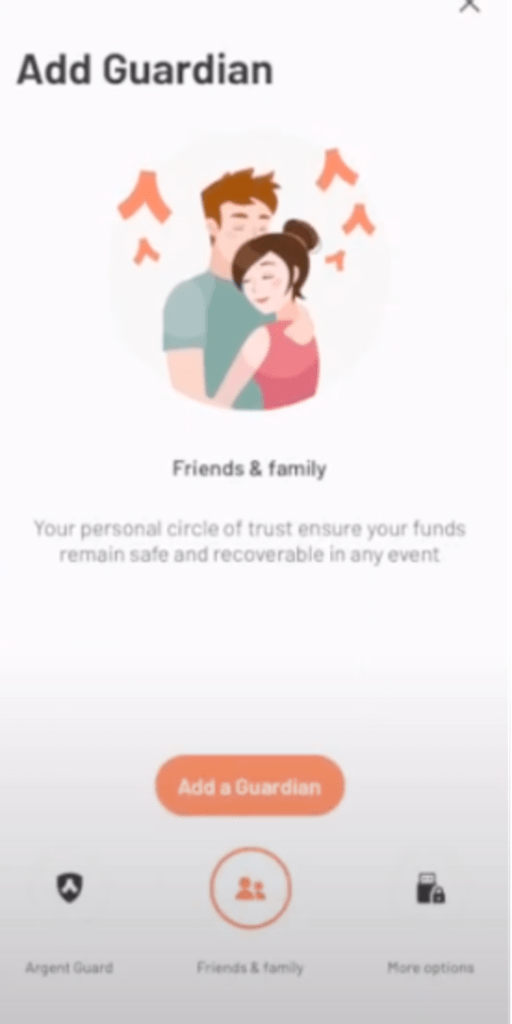
From here, the process is pretty straightforward; once you select the type of guardian you want to add, Argent will guide you through the remaining steps.
Note that you will have to pay a gas fee each time you add a guardian, and the number of guardians you’ll need to confirm your action will depend on the task. More information on guardians can be found here.
The current downside of using the zkSync wallet over the Vault is that the range of cryptocurrencies that can be traded directly using zkSync is much more limited. There are also fewer decentralised apps (Dapps) integrated on zkSync compared to the Vault. This is something that Argent intends to improve on over time.
When you first open your Argent wallet, you’ll be directed to your zkSync wallet by default. This tutorial will focus solely on the zkSync wallet, but the interface is similar for both.
Funding your account
There are a number of ways to fund your Argent wallet. We’re going to go over two of the most common methods: transferring funds from a MetaMask wallet and buying crypto directly via Argent.Depositing crypto from another Ethereum based wallet (MetaMask)
Start by clicking on ‘receive’ on your wallet’s homepage.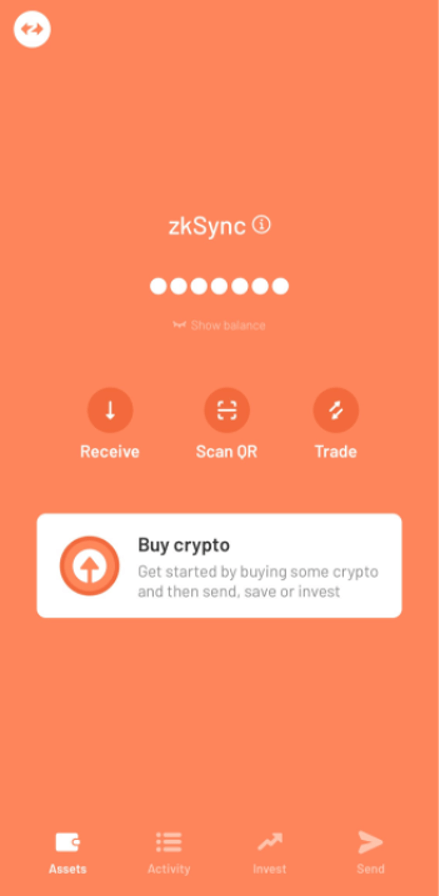 On the following screen, select ‘from another wallet’ followed by ‘MetaMask’. You’ll then be prompted to copy and paste your Argent username URL into your browser.
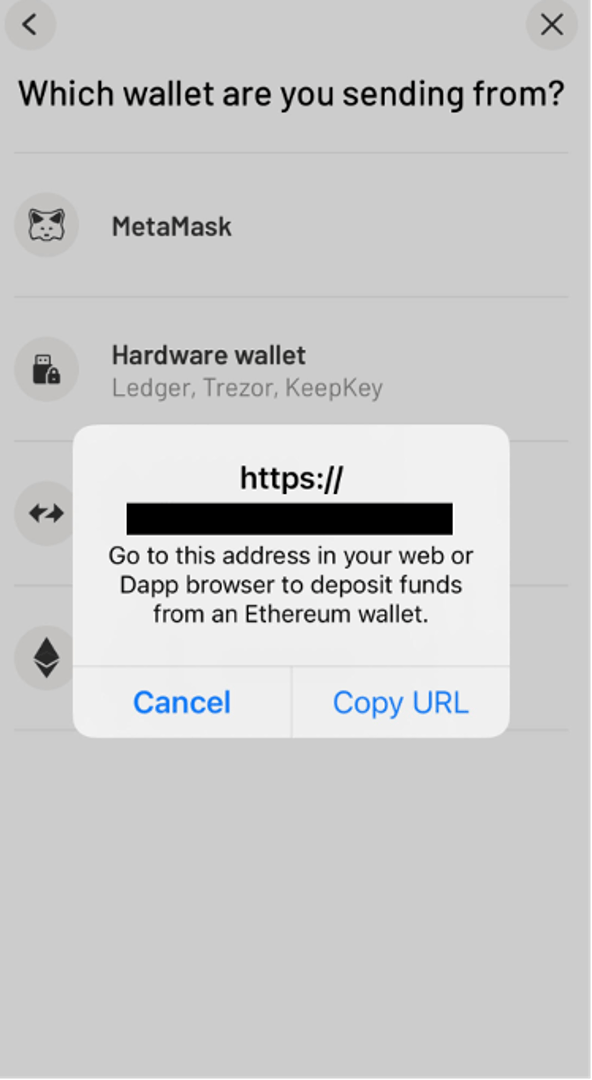
When you do this, you should be directed to a screen similar to the one below.
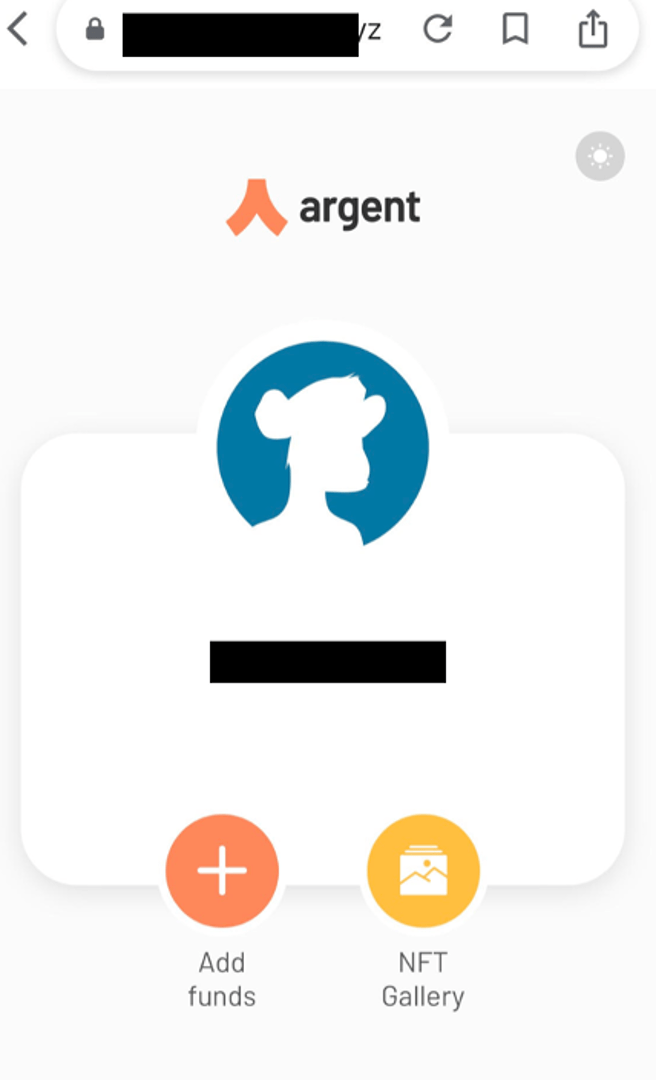
Select 'add funds', followed by ‘pay with MetaMask’. You will then be redirected to login to your MetaMask mobile app account, which you will need to download if you haven’t done so already.
After you login, a pop-up like this should appear.
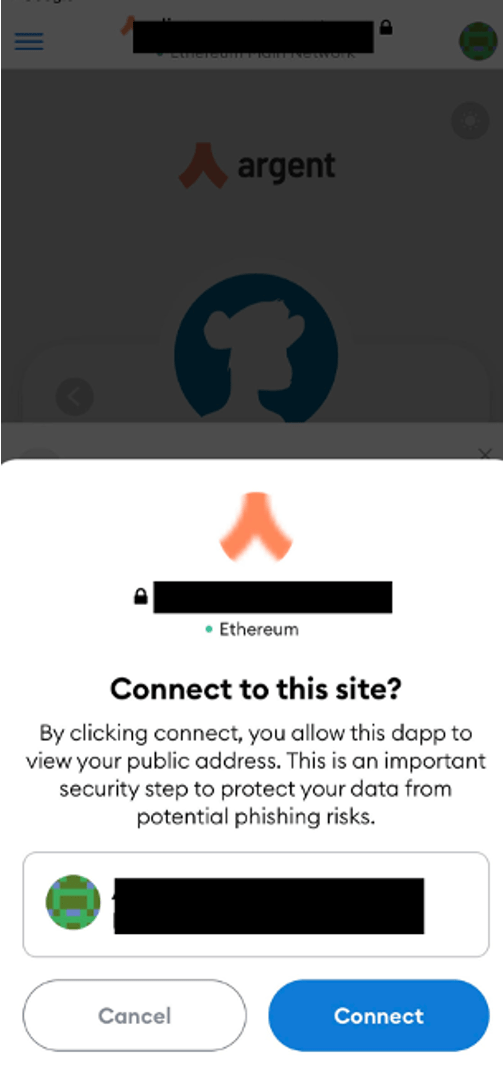
Once you click ‘connect’, you will be able to enter the type and amount of crypto you want to send from your MetaMask to your Argent zkSync wallet. Click ‘send’ to finalise the transaction.
Note that this process will require you to pay an Ethereum gas fee. In addition, this process does not support the sending of every crypto asset, so it’s important that you check the list of currently supported assets before sending.
Buying Crypto
To buy crypto using fiat directly on Argent, simply click the ‘buy crypto’ option on the homepage.
On the following screen, select the fiat currency you want to pay in and the crypto you want to buy. Currently, it is possible to purchase ETH, wrapped BTC, USDC, and DAI on Argent using the zkSync wallet.
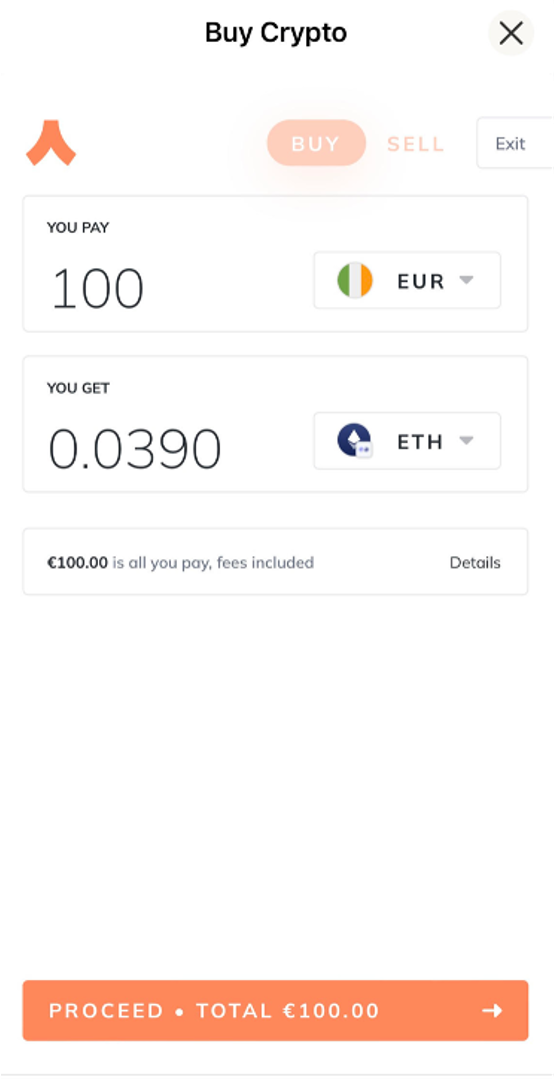
Once you enter the amount of fiat you want to spend, the corresponding amount of crypto you can expect to receive will be displayed. By clicking on ‘details’, you can view further details of the transaction.
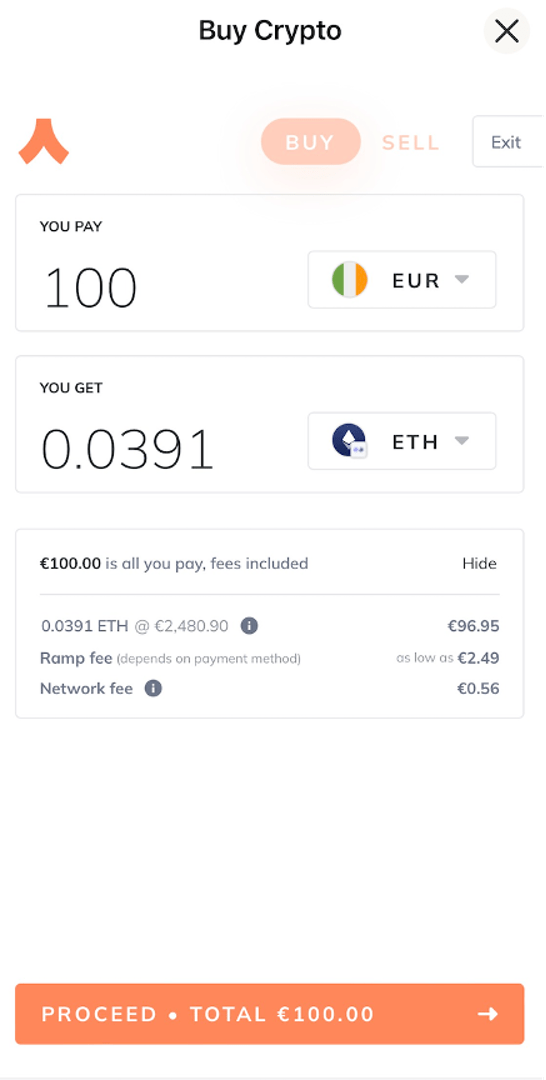
Once you are happy, click ‘proceed’ to continue. You’ll then be prompted to agree to the bridging service’s terms and conditions. You will also have to enter a verification code, that will be sent to your email address.
Next, you will need to choose a payment method. Again, the options that will be available to you will vary depending on your region.
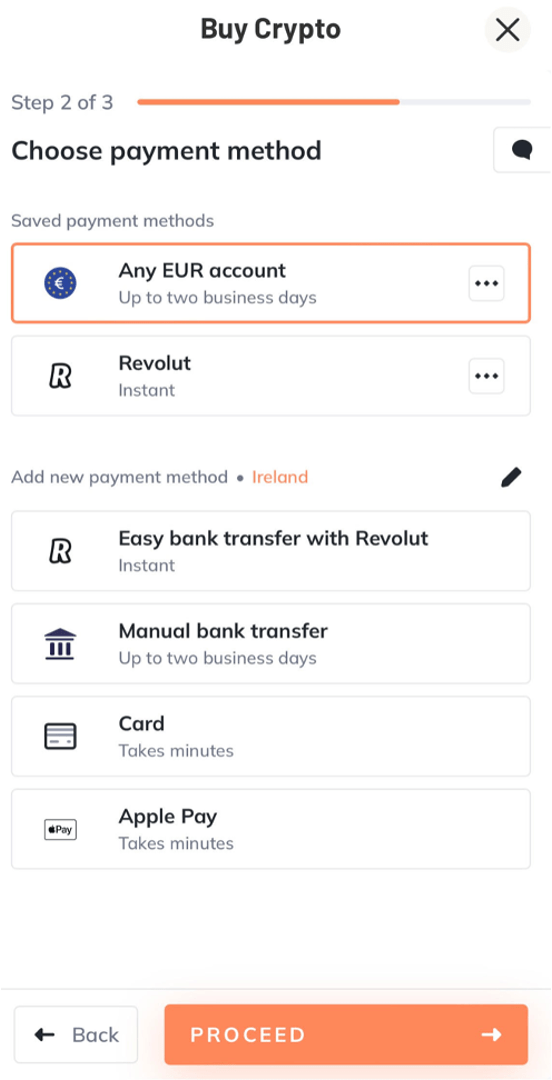
Simply click ‘proceed’ to finalise the transaction with the payment provider. Note that even though the payment partner may ask for a few details during your purchase, Argent has no access to such information.
Sending crypto
To send crypto to another zkSync or Ethereum address, start by pressing the'send’ tab.Note that you can easily send assets from your zkSync to your Vault by clicking ‘send to my Argent Vault’. This will require you to pay an Ethereum gas fee to activate your Vault, if it hasn't already been activated already. The charge will be deducted from your deposit.
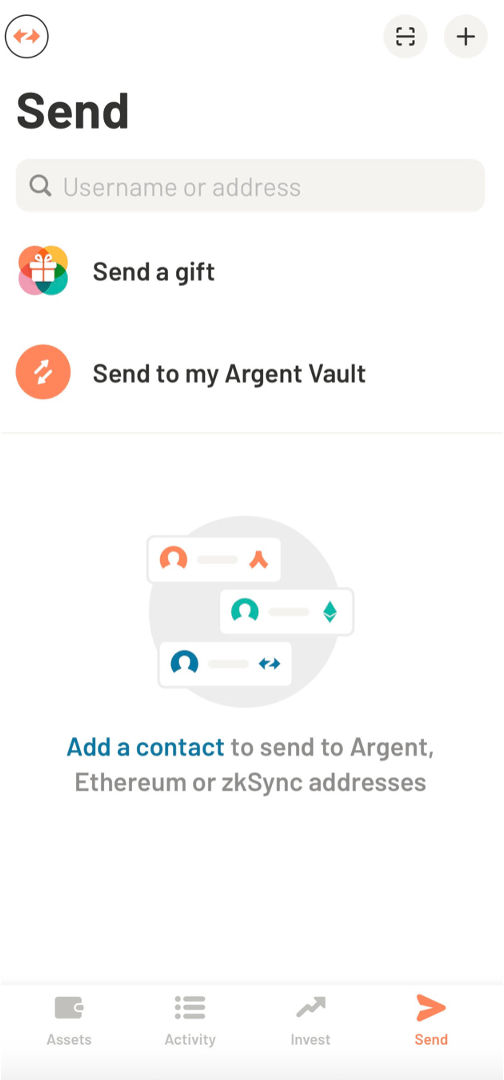
If you want to send crypto to another Argent, zkSync or Ethereum address, you will first need to add this address as a contact.
To do this, click on the ‘+’ icon. On the following page, you’ll need to enter a name and username or Ethereum address for the person/wallet you want to send it to. You also have the option to scan the address’s QR code.
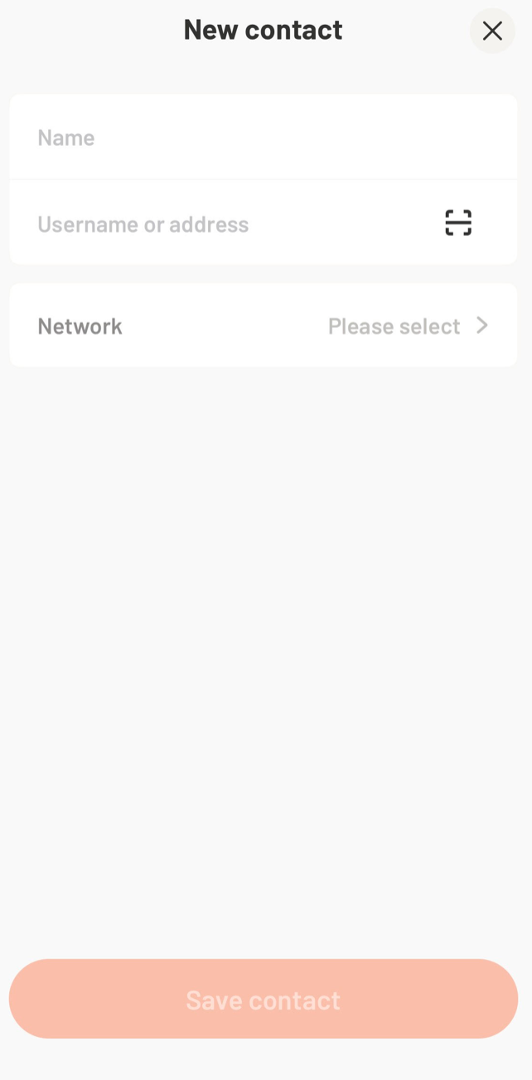
You will also need to select the network of the address you're sending to (i.e., zkSync or Ethereum). It’s important that you select the right network, so be sure to double-check this is correct. Click ‘save contact’ to create your contact.
Now when you navigate back to the send tab, the contact you added will be listed. Simply select this contact and follow Argent’s prompts to complete the transaction.
Exchanging Crypto
You can easily exchange crypto on Argent through Paraswap, a decentralised exchange aggregator.
This aggregator aims to give users the best price for their exchange (taking into account gas fees) by routing trades through 10 of the main decentralised exchanges, e.g. Uniswap, Kyber, & Curve.Argent may divide your trade across several exchanges. Once you make a trade, you will be able to see the exchanges that were used to make up your trade (e.g., Kyber 30%, Uniswap 70%).
To exchange your tokens, simply click on ‘trade’ on your wallet’s main page.
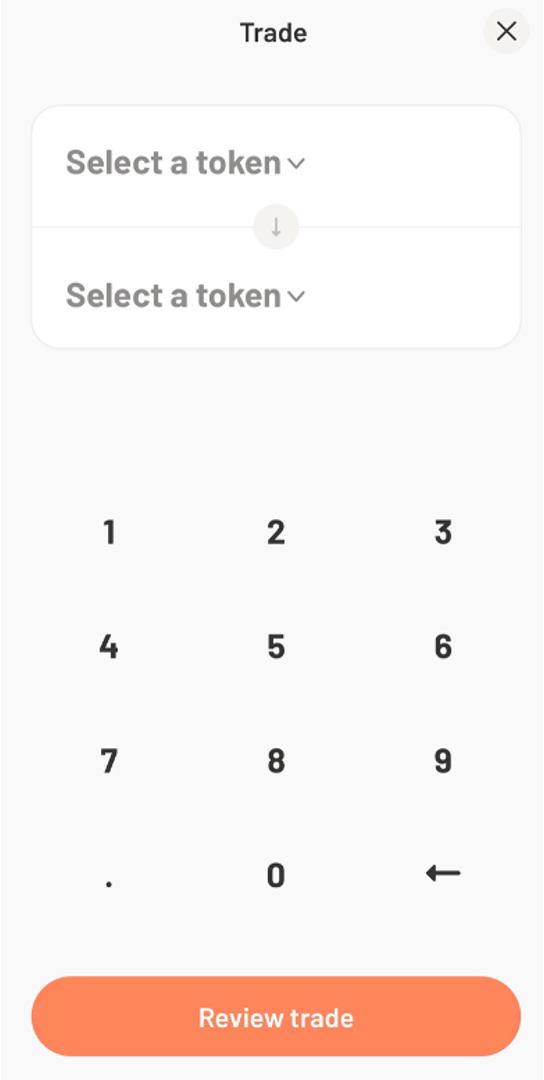
Next, enter the amount of the token you want to exchange or receive, and the corresponding amount of the other token will be displayed. Click ‘review trade’.
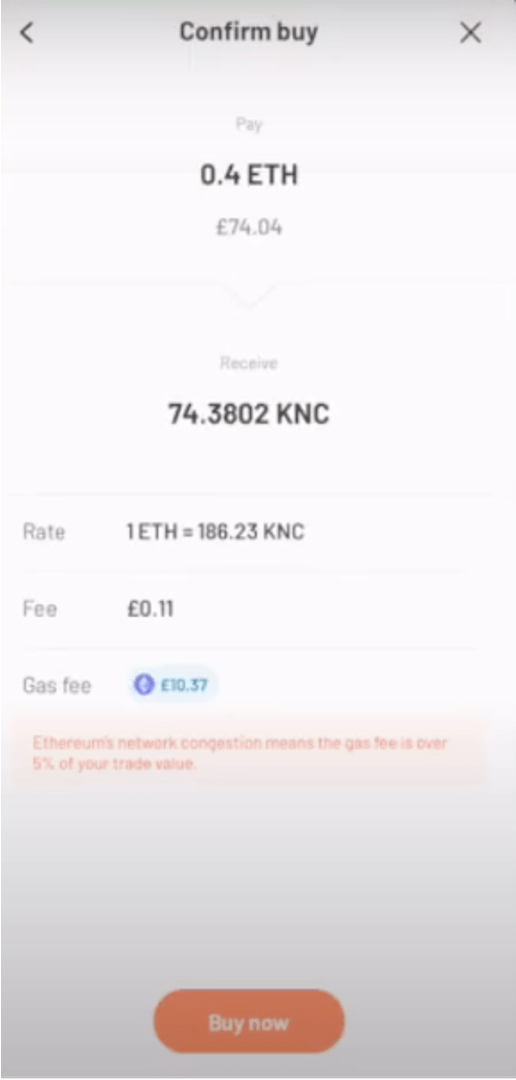 You will then be presented with an overview of the transaction, including the rate (i.e., price) of the swap and the associated network and gas fees.
Click ‘buy now’ to process the transaction.
Earning yield via Decentralised Applications (Dapps)
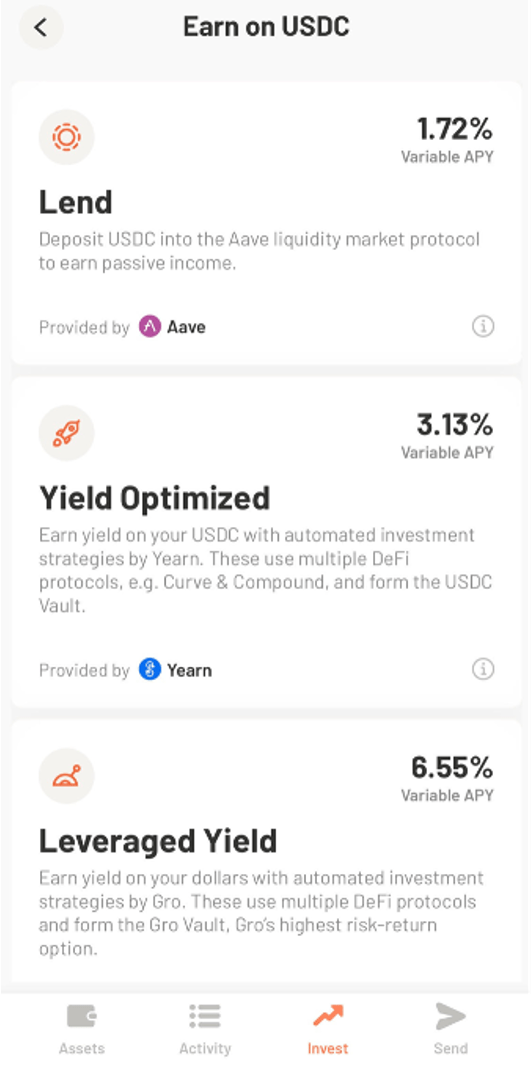
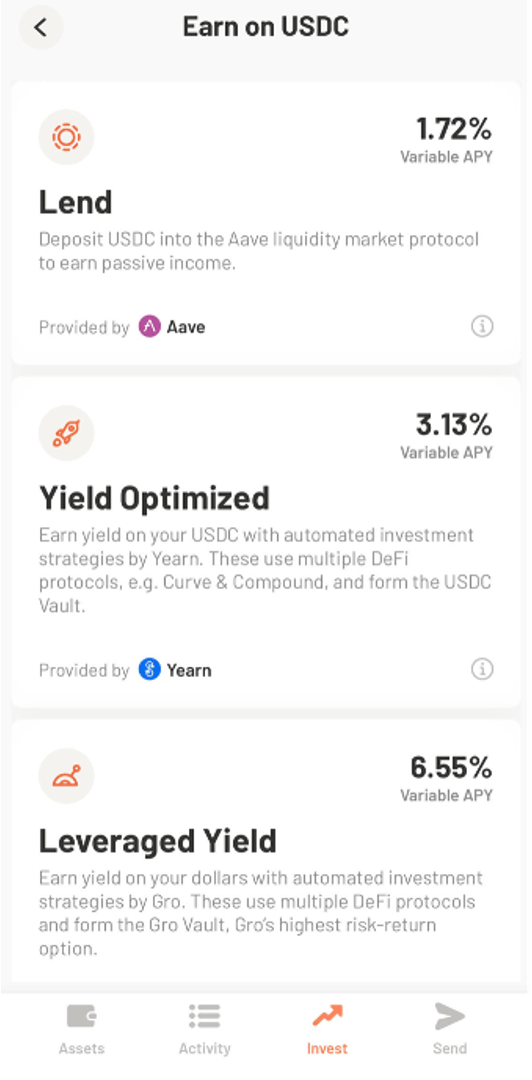
Argent has integrated several decentralised applications (link to Dapp article) that users can easily interact with directly through their Argent wallet.It is currently possible to interact with four DeFi protocols: Aave, Yearn, Gro and Lido to earn yield on ETH, USDC, DAI and wrapped BTC (wBTC) directly via your zkSync wallet.
The following section provides a simple overview of each protocol and how they can be used via Argent to earn passive yield.
Before you place any of your assets in these protocols, it’s important that you carry out your own research on the protocol and the risks involved, which include smart contract bugs and impermanent loss.
Aave – available for USDC and DAI
Aave is a lending and borrowing system that allows users to borrow, lend, and earn interest on crypto assets without intermediaries.Put simply; it’s a system of lending pools. Users can deposit the assets they want to lend, and these assets are then combined in a pool. Borrowers can draw from those pools if they want to take out a loan.
Example: USDC
Select the ‘Invest’ tab.
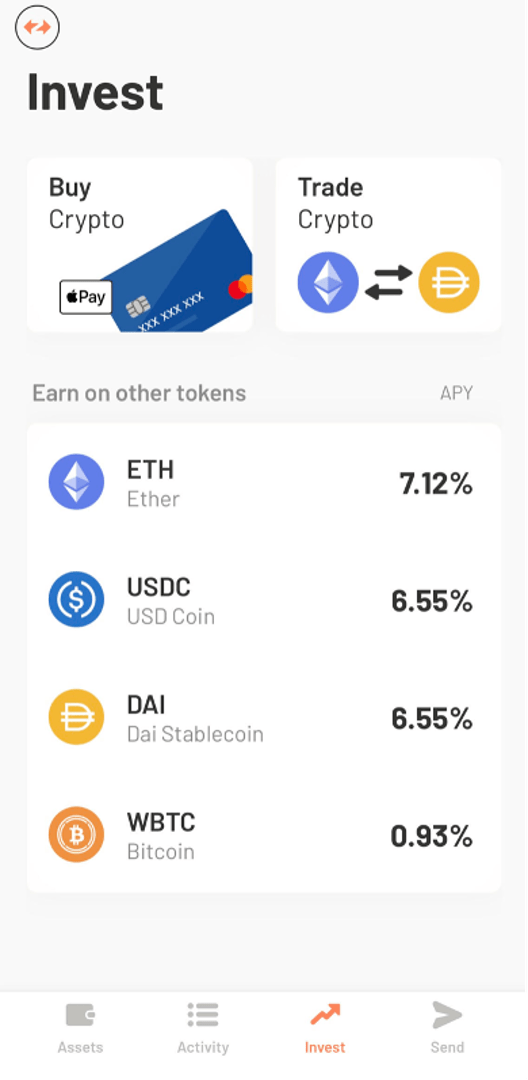
Select ‘USDC’ followed by ‘Lend’. Note that the APY or Annual Percentage Yield rate, represents the rate of return and is subject to fluctuation.
Next, enter the amount of USDC you want to lend. Click ‘review’ followed by ‘invest now’ to complete the transaction.
After you deposit at Aave, you’ll receive Aave interest-bearing tokens, or aTokens. These tokens are pegged to the deposited asset in a 1:1 ratio and will accrue interest in your Argent wallet.
Yearn.Finance – available for USDC, DAI, ETH and wBTC
Yearn.Finance is a protocol that automates the process of yield farming (putting crypto assets to work in various liquidity pools, lending platforms, and other DeFi protocols to generate returns).Argent enables users to interact with one of the most popular features on Yearn.Finance: Yearn Vaults.
Yearn Vaults are presented as a savings account for your crypto. When a user deposits assets to a vault, their funds are routed through various DeFi protocols and lending platforms in order to generate the best possible returns with the least amount of risk.
Each vault will have a different APY, which, again, is subject to fluctuation.
Example: DAI
Select the ‘Invest’ tab.
Select ‘DAI’ followed by ‘Yield Optimised’.

Next, enter the amount of DAI you want to deposit.
Click ‘review’ followed by ‘invest now’ to complete the transaction.
After you deposit, you will be provided with a yVault token (yvDAI in the case of depositing DAI) which represents your share of the vault.
Gro – available for USDC and DAI
Gro is a DeFi protocol that enables users to earn yields on stablecoin deposits.Similar to Yearn.Finance, Gro will put users’ crypto assets to work by routing them through various DeFi protocols to generate returns.
The two main products that Gro provides are ‘Vault’ and ‘PWRD savings’.
The Gro Vault offers higher potential returns on stablecoin deposits but at greater levels of risk. PWRD Savings generates a lower yield than the Vault but offers greater deposit protection.
Example: USDC
Select the ‘Invest’ tab.
Select ‘USDC’ followed by ‘Leveraged Yield’.
Choose whether you want to deposit at Vault or PWRD.
Enter the amount of USDC you want to stake.
Click 'review’ followed by ‘invest now’ to complete the transaction.
Lido Finance – available for ETH
Lido Finance is a popular liquid staking protocol. In simple terms, liquid staking involves holding funds in a crypto wallet to support a blockchain network’s security. In return, stakers earn rewards.In the case of Lido, stakers receive stETH tokens, which represent their share in the staking pool.
The rate of return for staking ETH will fluctuate depending on the total amount of ETH staked across the network (i.e., the more ETH that is staked, the lower the APY).
Example: ETH
Select the ‘Invest’ tab.
Select ‘ETH’ followed by ‘Staking’.

Next, enter the amount of ETH you want to stake. Click ‘review’ followed by ‘invest now’ to complete the transaction.
Your stETH token balance will be updated daily. It’s possible to trade stETH on decentralised exchanges, including via Paraswap on Argent.
Comment and share if you found this tutorial useful! Also, check out our tutorials on how to use MetaMask and Phantom.
Disclaimer: THIS IS NOT FINANCIAL OR INVESTMENT ADVICE. Only you are responsible for any capital-related decisions you make and only you are accountable for the results.
FAQs
Here are some FAQs related to Argent Wallet.1. How does an Argent Wallet work?
This wallet allows users to store, manage, and trade assets securely using Layer 2 solutions like StarkNet and zkSync, with features such as gas-free transactions and integrated DeFi services. It enhances security with smart contract-based wallets, enabling recovery without private keys.2. Is it possible to link the mobile Argent Wallet to the Chrome extension?
Currently, Argent Wallet does not offer a Chrome extension or direct linking between its mobile app and a browser extension. Argent is primarily designed as a mobile wallet, focusing on secure and easy access via mobile devices, including integrations with Layer 2 networks like StarkNet.3. Is an Argent Wallet safe?
Yes, Argent Wallet is considered safe due to its use of smart contract technology, which allows features like multi-signature security, daily transfer limits, and recovery options without private keys. It also supports Layer 2 solutions, reducing the risks associated with Ethereum's high fees and network congestion.4. What is the difference between Argent Wallet and Argent X Wallet?
Argent Wallet is a mobile wallet that focuses on ease of use, security, and integration with DeFi services on Layer 2 networks like StarkNet. Argent X, on the other hand, is a browser extension wallet specifically designed for interacting with the StarkNet Layer 2 network, providing a more developer-focused interface for managing assets and interacting with dApps.Continue reading by joining Cryptonary Pro
$1,548 $1,197/year
Get everything you need to actively manage your portfolio and stay ahead. Ideal for investors seeking regular guidance and access to tools that help make informed decisions.
For your security, all orders are processed on a secured server.
As a Cryptonary Pro subscriber, you also get:
3X Value Guarantee - If cumulative documented upside does not reach 300% during your 12-month membership, you can request a full refund. Terms
24/7 access to experts with 50+ years’ experience
All of our top token picks for 2025
On hand technical analysis on any token of your choice
Weekly livestreams & ask us anything with the team
Daily insights on Macro, Mechanics, and On-chain
Curated list of top upcoming airdrops (free money)
3X Value Guarantee
If cumulative documented upside does not reach 300% during your 12-month membership, you can request a full refund.
Our track record speaks for itself
With over 2.4M tokens and widespread misinformation in crypto, we cut through the noise and consistently find winning assets.
Our track record speaks for itself
With over 2.4M tokens and widespread misinformation in crypto, we cut
through the noise and consistently find winning assets.


Frequently Asked Questions
Can I trust Cryptonary's calls?
Yes. We've consistently identified winners across multiple cycles. Bitcoin under $1,000, Ethereum under $70, Solana under $10, WIF from $0.003 to $5, PopCat from $0.004 to $2, SPX blasting past $1.70, and our latest pick has already 200X'd since June 2025. Everything is timestamped and public record.
Do I need to be an experienced trader or investor to benefit?
No. When we founded Cryptonary in 2017 the market was new to everyone. We intentionally created content that was easy to understand and actionable. That foundational principle is the crux of Cryptonary. Taking complex ideas and opportunities and presenting them in a way a 10 year old could understand.
What makes Cryptonary different from free crypto content on YouTube or Twitter?
Signal vs noise. We filter out 99.9% of garbage projects, provide data backed analysis, and have a proven track record of finding winners. Not to mention since Cryptonary's inception in 2017 we have never taken investment, sponsorship or partnership. Compare this to pretty much everyone else, no track record, and a long list of partnerships that cloud judgements.
Why is there no trial or refund policy?
We share highly sensitive, time-critical research. Once it's out, it can't be "returned." That's why membership is annual only. Crypto success takes time and commitment. If someone is not willing to invest 12 months into their future, there is no place for them at Cryptonary.
Do I get direct access to the Cryptonary team?
Yes. You will have 24/7 to the team that bought you BTC at $1,000, ETH at $70, and SOL at $10. Through our community chats, live Q&As, and member only channels, you can ask questions and interact directly with the team. Our team has over 50 years of combined experience which you can tap into every single day.
How often is content updated?
Daily. We provide real-time updates, weekly reports, emergency alerts, and live Q&As when the markets move fast. In crypto, the market moves fast, in Cryptonary, we move faster.
How does the 3X Value Guarantee work?
We stand behind the value of our research. If the documented upside from our published research during your 12-month membership does not exceed three times (3X) the annual subscription cost, you can request a full refund. Historical context: In every completed market cycle since 2017, cumulative documented upside has exceeded 10X this threshold.
TermsRecommended from Cryptonary