Save 23% ($351) & Get a Free 1-1 Call with our Team ⏰ : 0d 2h 59m 43s
Tutorial: How to Use Binance (Visual Guide for Beginners)
Binance Exchange is one of the leading cryptocurrency exchanges that supports over 500 different cryptocurrencies. In this guide, we will walk through how to use Binance and explore the basic features that will be useful to those who are just starting out.

Overview: How to use Binance
If you are new to the crypto space, the host of different features that Binance offers may come across as overwhelming. This tutorial will go through the most basic features of Binance Exchange that will be useful to those who are just starting out.Note that there are multiple different ways you can go about buying, selling, and swapping crypto on Binance. This tutorial will go through the simplest method of each.
Tutorial
Setting up your account
You can create an account with Binance by heading to Binance.com or downloading the mobile or desktop app. This section will explain how to use Binance for the initial setup. We’re going to use the website for this tutorial.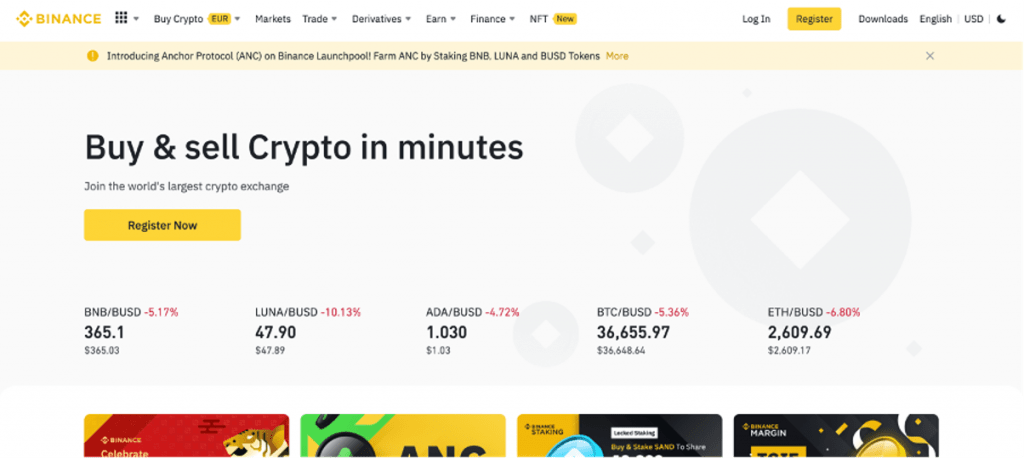
On the website’s homepage, click ‘register now’.
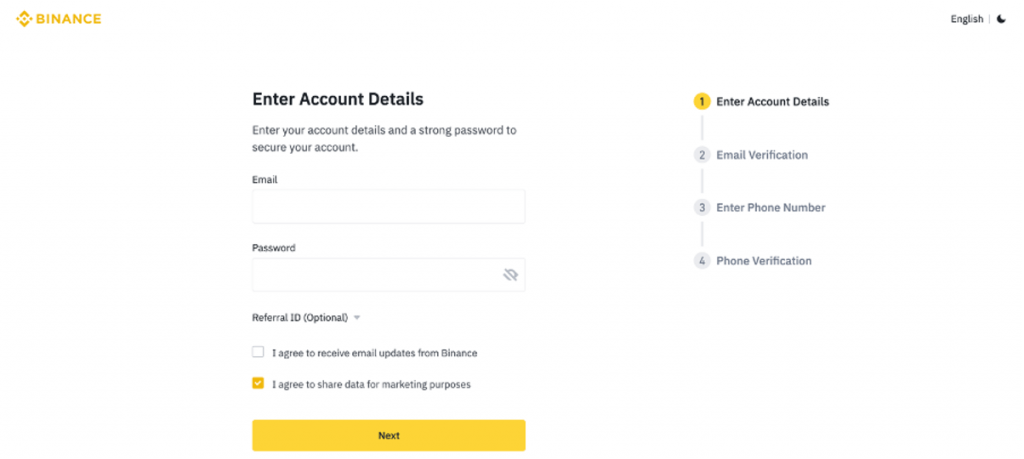
Once you enter an email and password for your account, you will be prompted to enter a verification code sent to your email address. If this email doesn’t appear in your main inbox, make sure to check your spam/junk mail.
Following this, you will also be prompted to enter and verify your phone number. This process is pretty straightforward.
Once this is done, you will have registered your account.
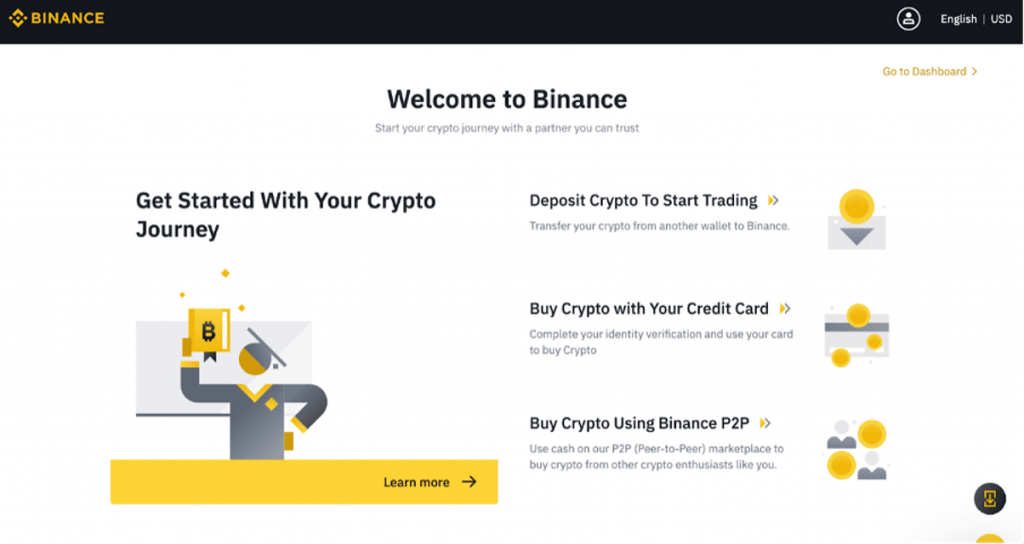
Once you’re logged in, follow the steps to set up two-factor authentication (2FA). This is important for how to use Binance securely. To do this, click ‘go to dashboard’ and select the security tab.

When you click ‘Binance/ Google Authenticator’, you will be presented with a QR code. You will then need to download the Google Authenticator app on your phone and use it to scan this QR code to complete the 2FA set-up.
Now, each time you log into your Binance account, you will be asked to enter a six-digit verification code. Simply open the Google Authenticator app, and the app will generate the new, randomised code for you to enter.
Before you start trading, you will also have to verify your identity. This section covers how to use Binance for identity verification to ensure your account is secure. To do this, click on your profile icon in the top-right corner of the screen and click ‘identification’ in the drop-down menu that appears.
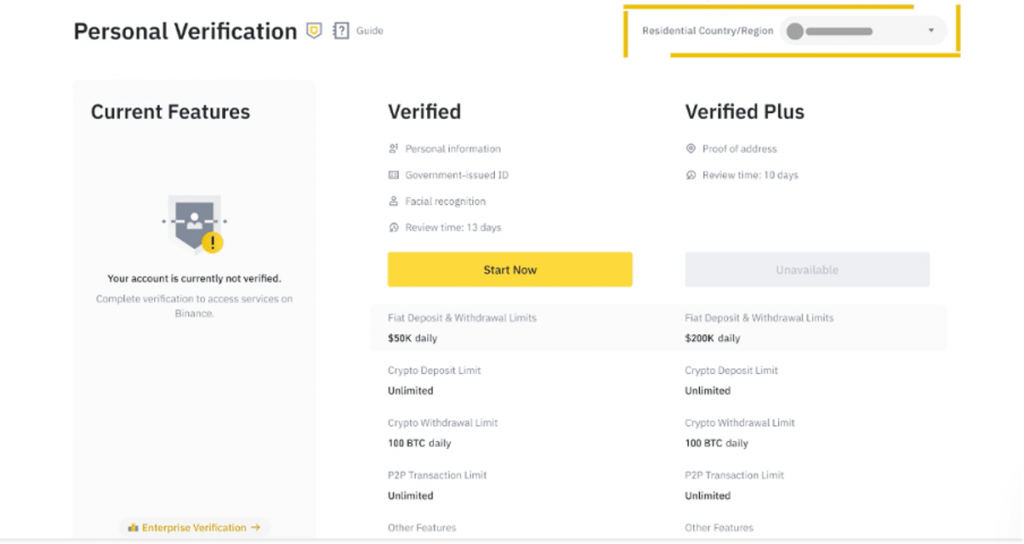
When you click ‘start now’, you will be prompted to enter your personal information and upload supporting documentation (e.g. passport, driver’s licence). You will also have to complete facial recognition. You will be notified once Binance has verified your details and documentation.
Each time you trade crypto on Binance, you will be charged a trading fee. Binance offers a 25% discount on this fee if you pay using BNB coin (the platform’s native currency).
If you want to avail of this discount, click your profile icon and click ‘dashboard’. On this page, scroll down to the ‘spot trading fee’ section.
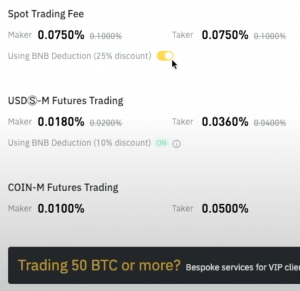
All you have to do is click on the toggle switch beside ‘using BNB deduction’. It’s up to you whether you want to use BNB to pay the fees, and you will obviously have to fund your account with some BNB to use this discount.
Depositing Fiat
To deposit some fiat (e.g., dollar, euro) into your Binance account, click on ‘buy crypto’ followed by ‘card deposit’. This section demonstrates how to use Binance to deposit fiat into your account.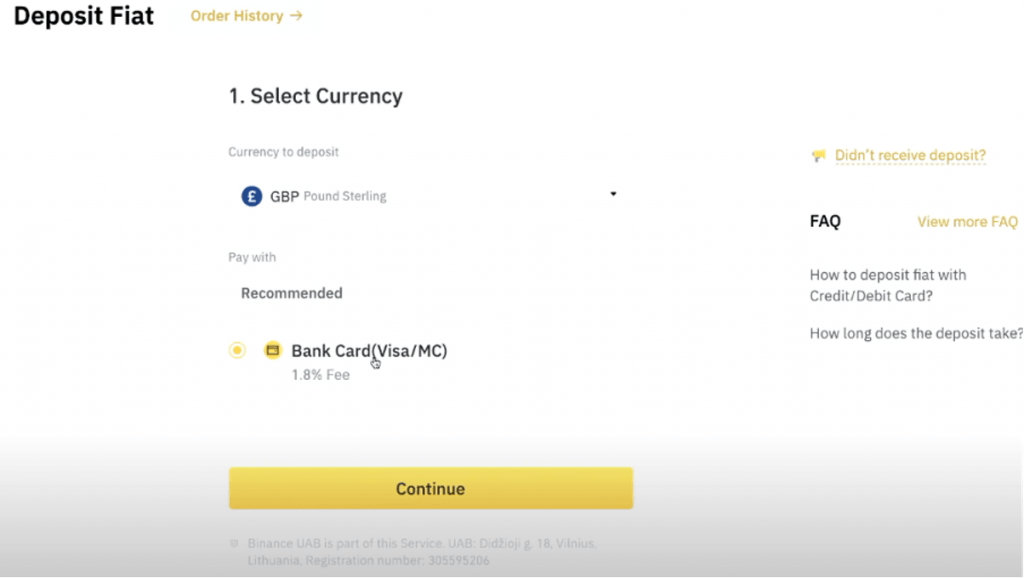
The options you’ll have to deposit will depend on the fiat you’ve chosen. As shown in the image above, if you are depositing GBP, the only option is to deposit via a bank card, which comes with a 1.8% fee.
Once you have selected your fiat and payment method, click ‘continue’, and you’ll be prompted to verify the transaction via your bank’s OTP transaction page.
To view your account’s fiat (and crypto) balances, click ‘wallet’ at the top of your screen, followed by ‘fiat and spot’.
Buying Crypto
There are two very simple ways to buy crypto on Binance: via debit/credit card and via cash balance.Via Debit/Credit Card
Click ‘buy crypto’ at the top of your screen. In the drop-down menu that appears, select the ‘credit/debit card’ option.

On the following screen, select the fiat currency you want to use and the type of cryptocurrency you want to buy.
Once you enter the amount of fiat you want to spend, the corresponding amount of your chosen crypto that you can expect to receive will be displayed. Click ‘continue’.

Next, click ‘add new card’ and enter your card details. You’ll also be required to enter your billing address. Note that these details must match the details used to create your Binance account. When you click ‘add card’ followed by ‘continue’, you’ll be prompted to verify the transaction.
Once again, to view your account’s fiat (and crypto) balances, click ‘wallet’ at the top of your screen, followed by ‘fiat and spot’.
Via Cash Balance
Provided you have already deposited some fiat into your Binance account, you can go ahead and click ‘buy crypto’ followed by ‘cash balance.’
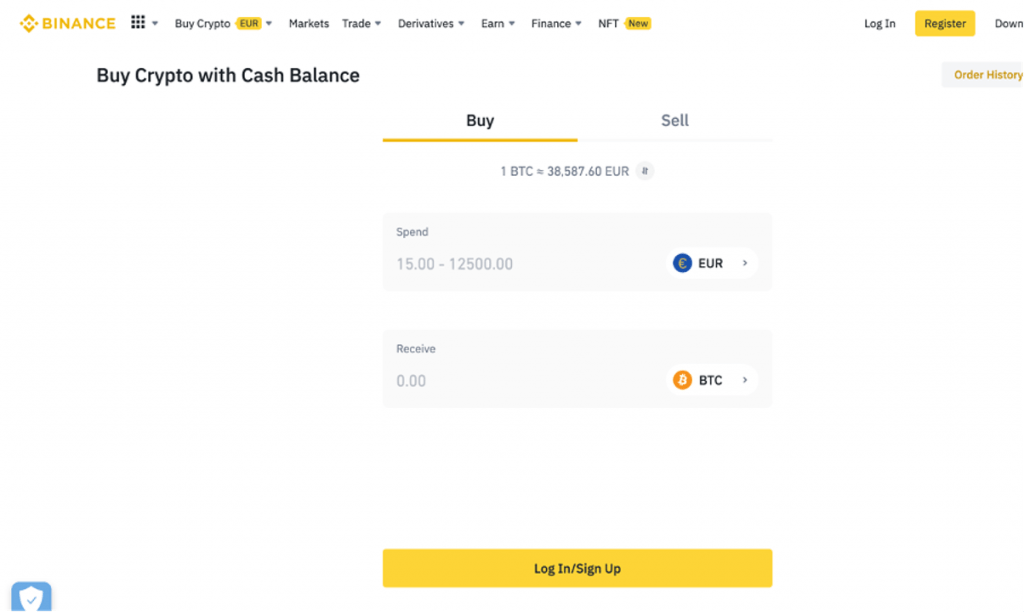
Simply select the fiat currency you want to use and the type of cryptocurrency you want to buy. Once you enter the amount of fiat you want to spend, the corresponding amount of your chosen crypto that you can expect to receive will be displayed.
Click ‘continue’ to finalise the transaction.
Depositing Crypto
If you already hold some crypto in another wallet, you can deposit it into your Binance Wallet.To do this, you’ll need to retrieve your account’s address for the cryptocurrency you’re looking to send.Start by clicking on ‘wallet’ at the top right of your screen. In the drop-down menu, click ‘overview’, and on the following page, click ‘deposit’.
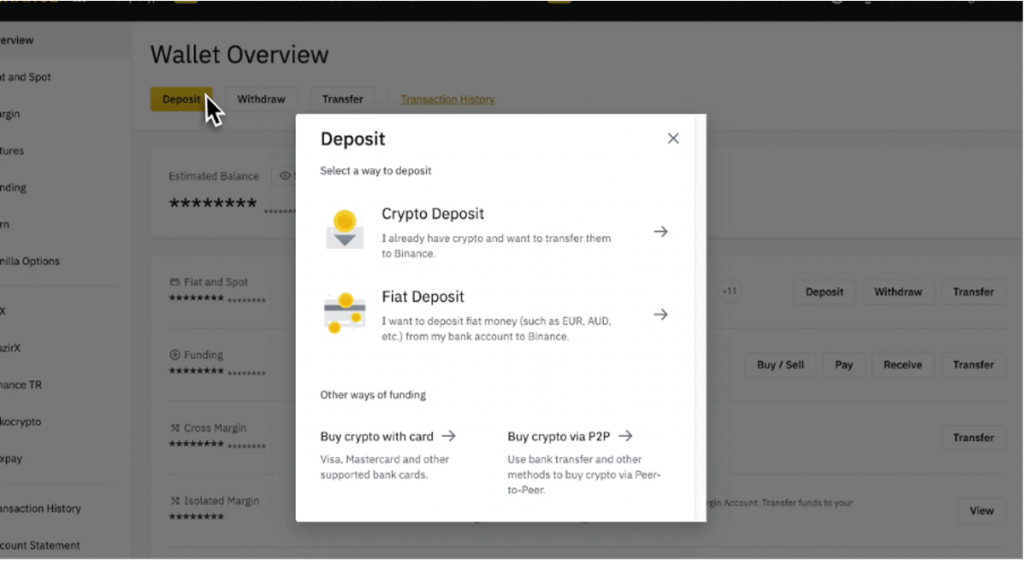
In the pop-up screen that appears, select ‘crypto deposit’. On the next page, you’ll have to select the type of crypto you intend to deposit as well as the network.
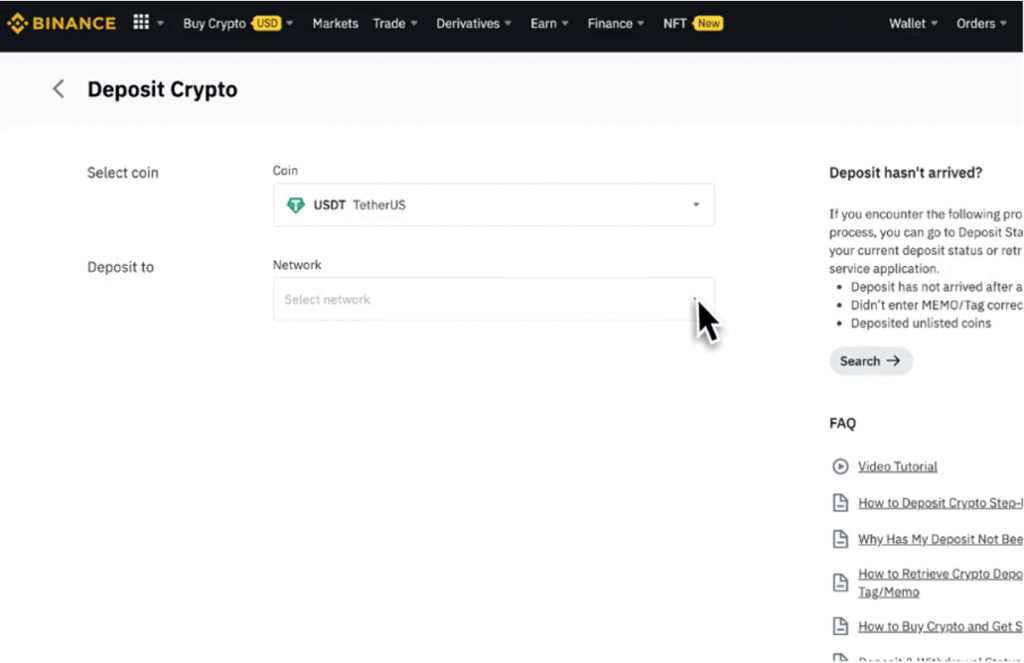
It is important that you select the network that is compatible with the platform you are sending the crypto from. If you choose the incorrect one, you risk losing your crypto.
Once you have done this, you will be presented with your deposit address, which you can copy and paste into the recipient address section of the platform you are sending from.
Converting Crypto
To swap or ‘convert’ one cryptocurrency for another, click on ‘trade’ followed by ‘convert’.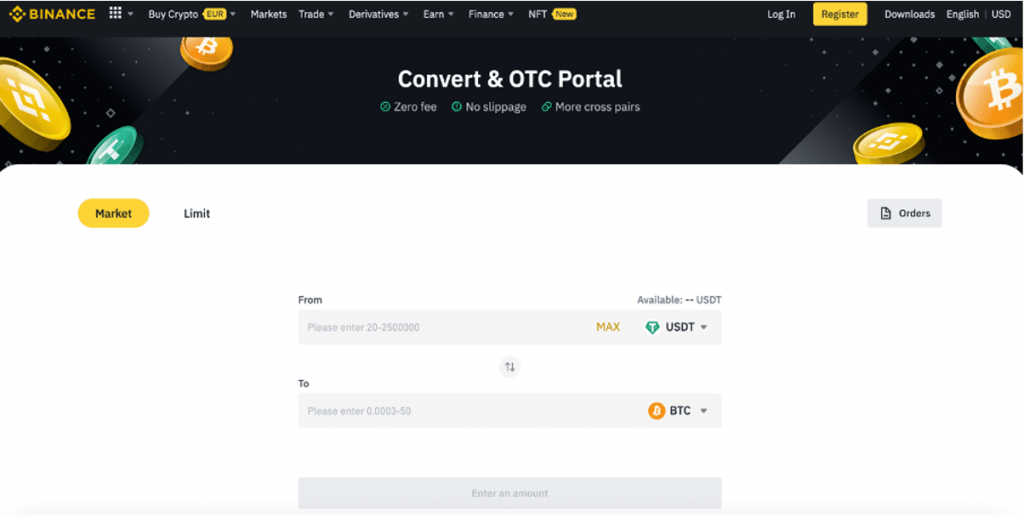
On this page, there is a ‘market’ and ‘limit’ tab. In the market tab, you can only choose the amount of crypto you want to swap, whereas the limit tab enables you to choose the price of the swap (i.e. you can specify the price you want the crypto to be at in order for your swap to be processed).
Market Tab
In the Market Tab, simply select the currency you want to convert from and the currency you want to receive in return. Enter in the amount of crypto you want to convert. If you want to convert all of your available balance, click ‘max’.
Next, click ‘preview conversion’. You will then see the price quote for the transaction you’re considering.

You have 5 seconds to approve the quote displayed to you. If the 5 seconds expire, click ‘refresh’ to get a new rate.
Simply click ‘convert’ to process the transaction.
Limit Tab
Again, you’ll first need to select the type of crypto you want to swap and the crypto you want to swap it into.
You can specify the amount of your chosen currency you want to convert or the amount of the specific crypto you want to receive in return.
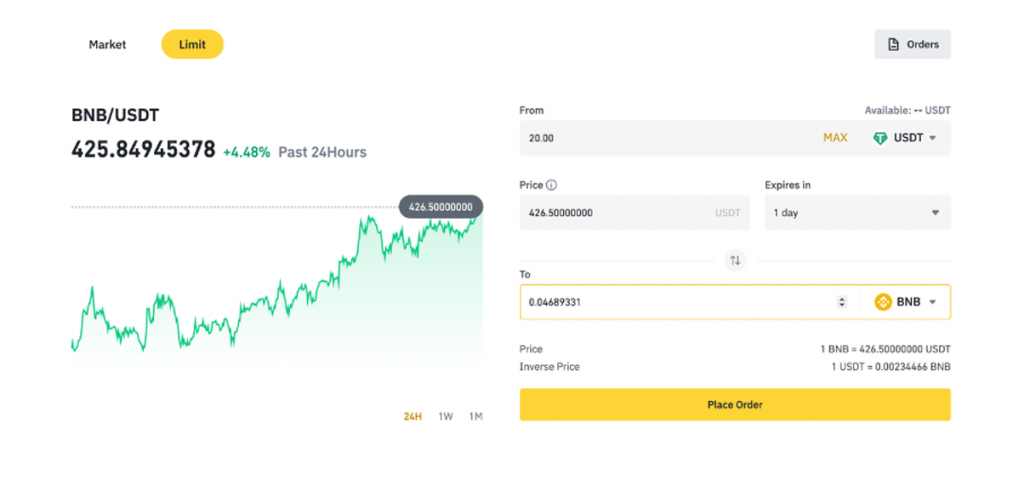
The graph on the left of your screen displays the market price of the trading pair across the last 24hrs, last week or last month. So taking the above example, it cost 425.84945378 to buy 1 BNB at that current moment in time.
The ‘price’ section is where you can specify the price you want to trade at. Again using the example above, I would be selling 20 USDT for 0.04 BNB when 1 BNB = 426.50 USDT. You can also specify a time period for when the transaction will expire if the trading price is not met.
Once you click ‘place order’, your transaction will be submitted.
Selling Crypto for Fiat
You can sell your crypto for fiat by clicking on ‘buy crypto’ followed by the ‘cash balance’ or ‘credit/debit card’ option.Regardless of which option you choose, you will need to select the type of and amount of crypto you want to sell as well as the type of fiat you want to receive.
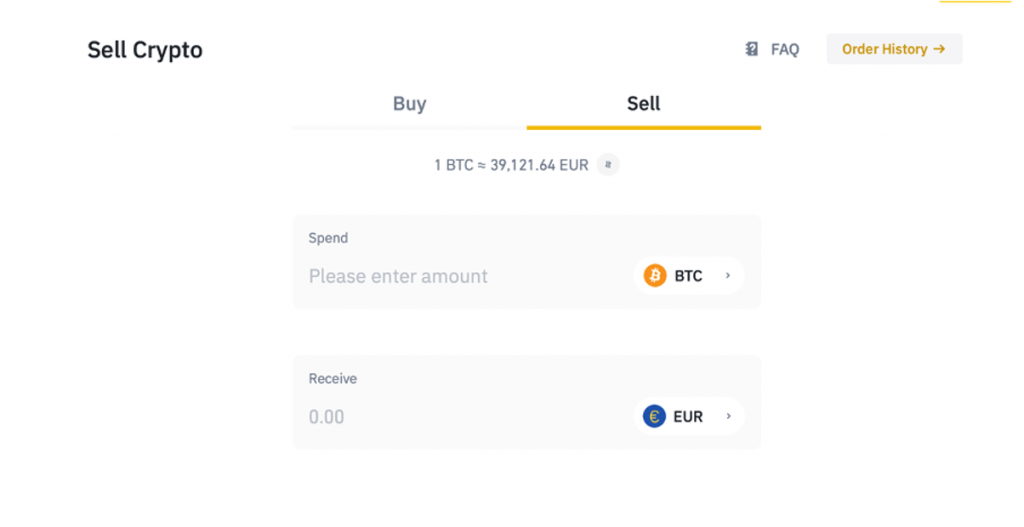
Click ‘next’ to proceed. On the following page, you will be presented with a preview of the transaction. You will also be required to enter your card details if you choose to sell your crypto via the credit/debit card option.
Once you click ‘sell’, you will be prompted to confirm the transaction and to complete a security verification.
Following this, the transaction will be processed. If you chose to the sell via the cash balance option, your fiat currency should shortly appear in your Binance account.
Withdrawing Fiat
Start by clicking on ‘wallet’ at the top of your screen, followed by ‘fiat and spot’.
Click ‘withdraw’ beside the fiat currency you want to withdraw.

Next, you will need to choose a method of withdrawal (e.g. via Bank Card or other payment systems such as Adv Cash). The options you’ll have will depend on your region and the type of fiat currency.
Simply enter the amount you want to withdraw and provide the necessary beneficiary information (e.g. card details). Note that Binance only accepts withdrawals to accounts that are in your name.
Once you complete a security verification and confirm the withdrawal, the transaction will be processed.
Withdrawing Crypto
To withdraw Crypto, you will also need to navigate to the ‘fiat and spot’ section of your wallet.
Click ‘withdraw’ beside the cryptocurrency you want to withdraw.
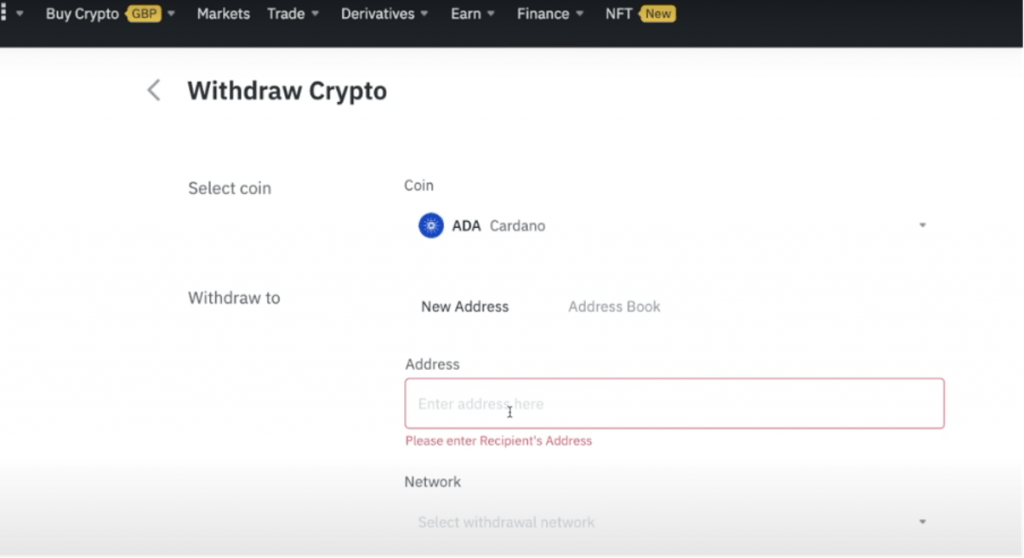
On the following screen, you will need to enter the address of the wallet/account that you are sending the crypto to. You will also need to choose the appropriate network.
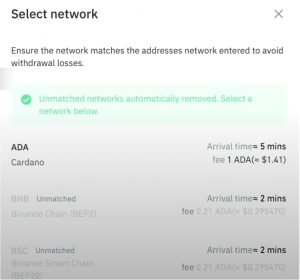
Binance will automatically remove the option to choose any unsuitable networks.
Once you click ‘withdraw’, you will be prompted to complete a security verification. After this, click ‘submit’ to process the transaction.
Comment and share if you found this tutorial useful! Also, keep an eye out for our Binance Advanced and Binance Earn tutorials that will be coming out shortly. For now, read our Coinbase or MetaMask tutorials.
Disclaimer: THIS IS NOT FINANCIAL OR INVESTMENT ADVICE. Only you are responsible for any capital-related decisions you make, and only you are accountable for the results.
FAQs
Here are some FAQs for how to use Binance.1. How do I know in what to invest?
Consider your financial goals, risk tolerance, and time horizon. Research different investment options and consult with a financial advisor for personalised advice.2. How can I change my Binance account from business to personal?
You cannot directly change your account type. Instead, disable your current account and create a new personal account.3. When you buy crypto through Binance, do you keep it in Binance or keep it in the cold wallet?
You can keep crypto on Binance or transfer it to a cold wallet. For enhanced security, it's recommended to move large amounts to a cold wallet.4. Is Binance good for beginners?
Yes, Binance is suitable for beginners. It offers a user-friendly interface and educational resources.5. How much money do you need to start a Binance account?
There is no minimum amount required to start a Binance account. You can begin with any amount you're comfortable investing.6. Is Binance account free?
Yes, creating a Binance account is free. However, there are fees associated with trading and some transactions.7. What is memo in Binance?
A memo is an identifier code required in addition to an address when sending certain cryptocurrencies on Binance.8. Where to find memo in Binance?
You can find the memo on the deposit page for cryptocurrencies that require it, both on the Binance website and mobile app.Continue reading by joining Cryptonary Pro
$1,548 $1,197/year
Get everything you need to actively manage your portfolio and stay ahead. Ideal for investors seeking regular guidance and access to tools that help make informed decisions.
For your security, all orders are processed on a secured server.
As a Cryptonary Pro subscriber, you also get:
3X Value Guarantee - If cumulative documented upside does not reach 300% during your 12-month membership, you can request a full refund. Terms
24/7 access to experts with 50+ years’ experience
All of our top token picks for 2025
On hand technical analysis on any token of your choice
Weekly livestreams & ask us anything with the team
Daily insights on Macro, Mechanics, and On-chain
Curated list of top upcoming airdrops (free money)
3X Value Guarantee
If cumulative documented upside does not reach 300% during your 12-month membership, you can request a full refund.
Our track record speaks for itself
With over 2.4M tokens and widespread misinformation in crypto, we cut through the noise and consistently find winning assets.
Our track record speaks for itself
With over 2.4M tokens and widespread misinformation in crypto, we cut
through the noise and consistently find winning assets.


Frequently Asked Questions
Can I trust Cryptonary's calls?
Yes. We've consistently identified winners across multiple cycles. Bitcoin under $1,000, Ethereum under $70, Solana under $10, WIF from $0.003 to $5, PopCat from $0.004 to $2, SPX blasting past $1.70, and our latest pick has already 200X'd since June 2025. Everything is timestamped and public record.
Do I need to be an experienced trader or investor to benefit?
No. When we founded Cryptonary in 2017 the market was new to everyone. We intentionally created content that was easy to understand and actionable. That foundational principle is the crux of Cryptonary. Taking complex ideas and opportunities and presenting them in a way a 10 year old could understand.
What makes Cryptonary different from free crypto content on YouTube or Twitter?
Signal vs noise. We filter out 99.9% of garbage projects, provide data backed analysis, and have a proven track record of finding winners. Not to mention since Cryptonary's inception in 2017 we have never taken investment, sponsorship or partnership. Compare this to pretty much everyone else, no track record, and a long list of partnerships that cloud judgements.
Why is there no trial or refund policy?
We share highly sensitive, time-critical research. Once it's out, it can't be "returned." That's why membership is annual only. Crypto success takes time and commitment. If someone is not willing to invest 12 months into their future, there is no place for them at Cryptonary.
Do I get direct access to the Cryptonary team?
Yes. You will have 24/7 to the team that bought you BTC at $1,000, ETH at $70, and SOL at $10. Through our community chats, live Q&As, and member only channels, you can ask questions and interact directly with the team. Our team has over 50 years of combined experience which you can tap into every single day.
How often is content updated?
Daily. We provide real-time updates, weekly reports, emergency alerts, and live Q&As when the markets move fast. In crypto, the market moves fast, in Cryptonary, we move faster.
How does the 3X Value Guarantee work?
We stand behind the value of our research. If the documented upside from our published research during your 12-month membership does not exceed three times (3X) the annual subscription cost, you can request a full refund. Historical context: In every completed market cycle since 2017, cumulative documented upside has exceeded 10X this threshold.
TermsRecommended from Cryptonary