Tutorial: Serum and Raydium
As more dApps continue to deploy on Solana, a top 10 blockchain by market cap, it continues to grow as a legitimate competitor to Ethereum in the DeFi space. Solana’s speedy transactions and low fees have lent themselves well to DeFi protocols, two of which will be the focus of this tutorial: Serum and Raydium.
Before we dive into the particulars of using both Serum and Raydium, let’s briefly cover what they are and what services they provide.
Quick Step-by-Step Flow Chart
For those looking for a quick overview, here’s a step-by-step flow chart that outlines the entire process at a glance. Refer to this chart if you want a visual guide to follow alongside the detailed steps below.

Click Here for the Full High-Resolution Flow Chart
Disclaimer: This guide is provided for informational purposes only and does not constitute financial advice. Cryptonary shall not be held liable for any losses or damages incurred as a result of using the methods outlined in this guide.
What is Serum?
Serum is a decentralised exchange (DEX) protocol that aims to provide DeFi users with fast transaction speeds and low fees by using an on-chain order book that sets it apart from other DEXs. It is built on Solana and its native utility token, Serum (SRM), can be used for discounts on transaction fees.What is Raydium?
Raydium is an automated market maker (AAM) tool, meaning that it automatically helps the process that is required to provide liquidity for trading pairs. Liquidity simply means how easy it is to buy and sell an asset. High liquidity means it’s easy to trade a certain pair of cryptocurrencies, while low liquidity means it’s difficult. An AMM, as the underlying protocol that powers a decentralised exchange (DEX), attracts liquidity providers by rewarding them with transaction fees and tokens.According to its documentation, Raydium uses Serum’s central order book to provide quick trades, shared liquidity, and new ways of earning yield on its users’ assets. Particularly important for traders is the shared liquidity aspect of Raydium, as it can access the liquidity and order flow of the entire Serum ecosystem of DEXs and swaps.
Tutorial
Getting Started with Serum and Raydium
For this tutorial, we’ll be using the Phantom wallet browser extension to interact with Serum and Raydium. To start, go to Serum’s homepage and click the large ‘Trade on Serum’ button.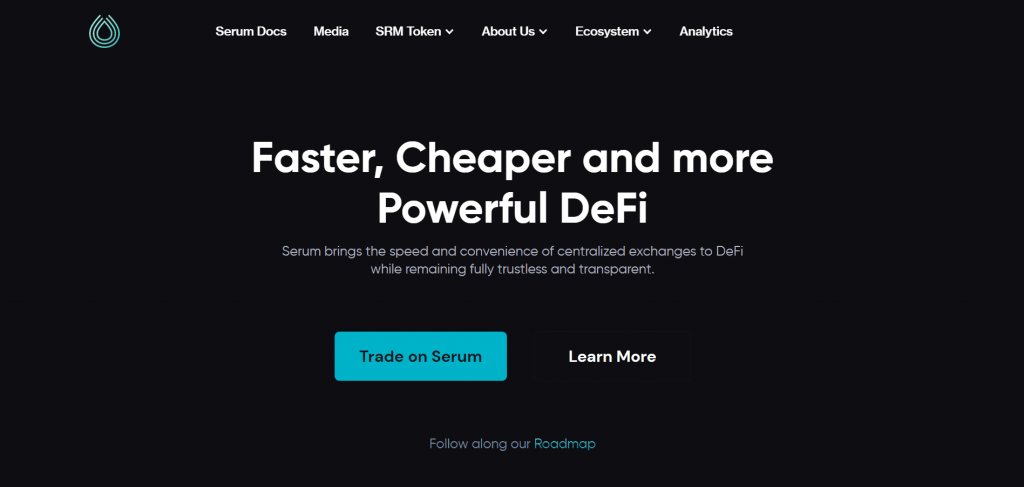
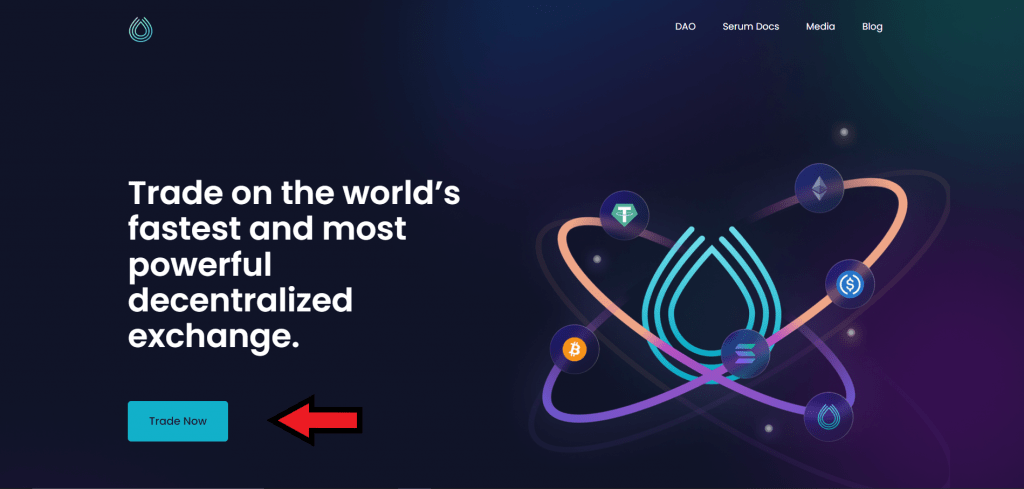
After doing that, the Serum Portal will open, where we can click on the ‘Trade Now’ button to view a list of all of the projects that utilize Serum. From there, click on the ‘DEX’ tab, hover over Raydium, and click ‘Trade’ to be taken to the Raydium trading page.
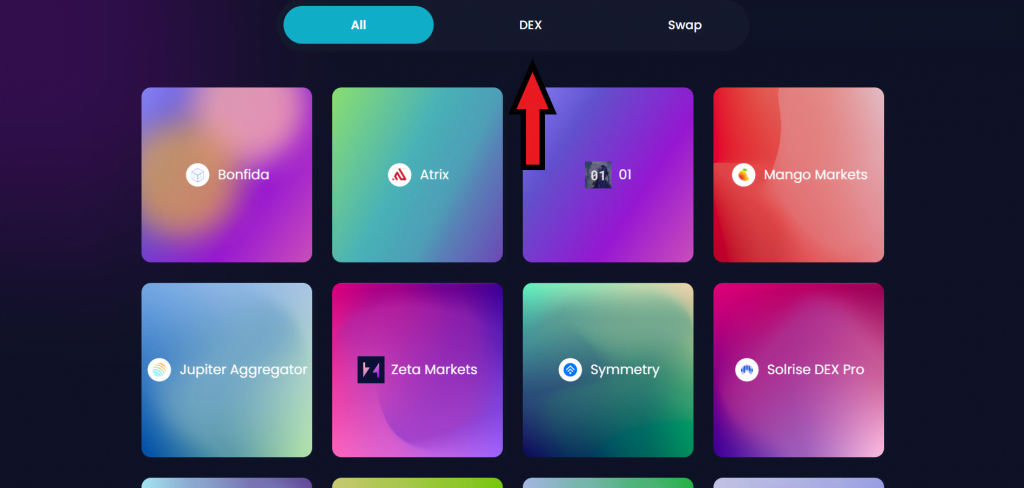
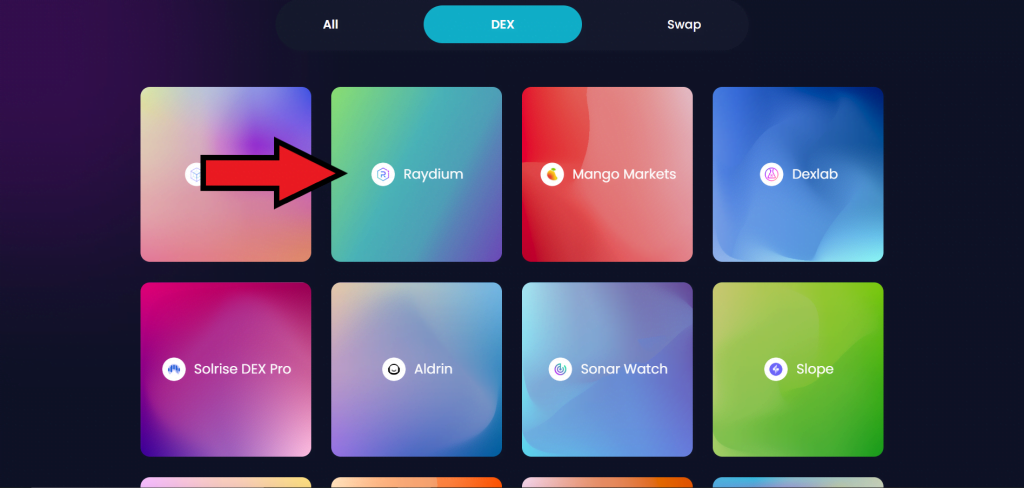
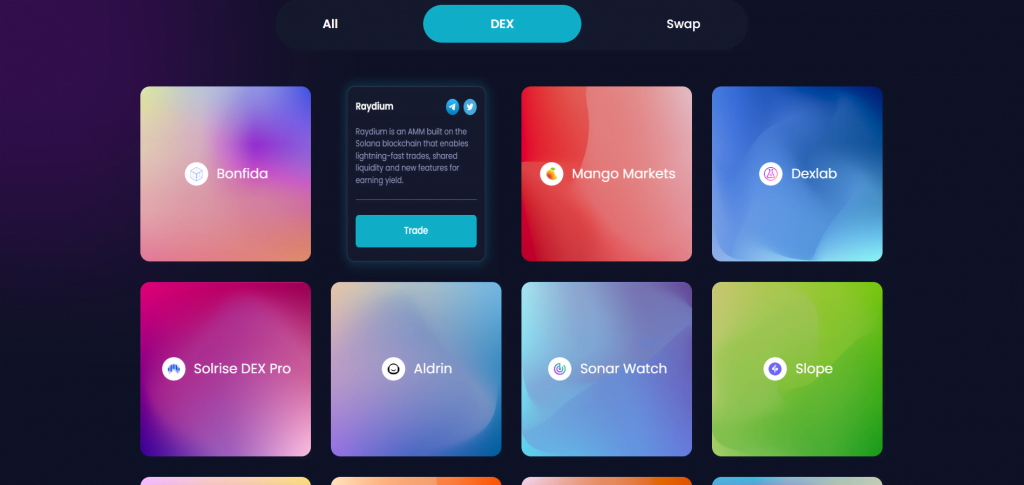
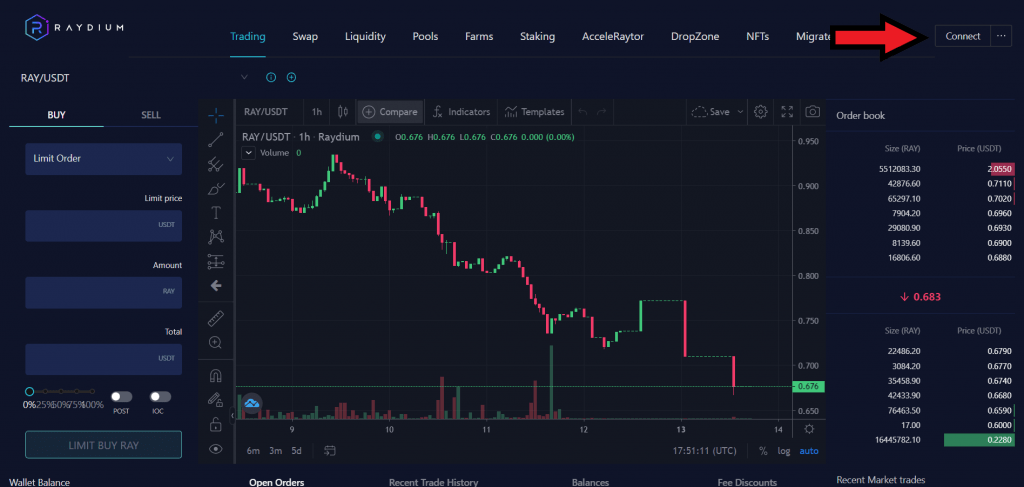
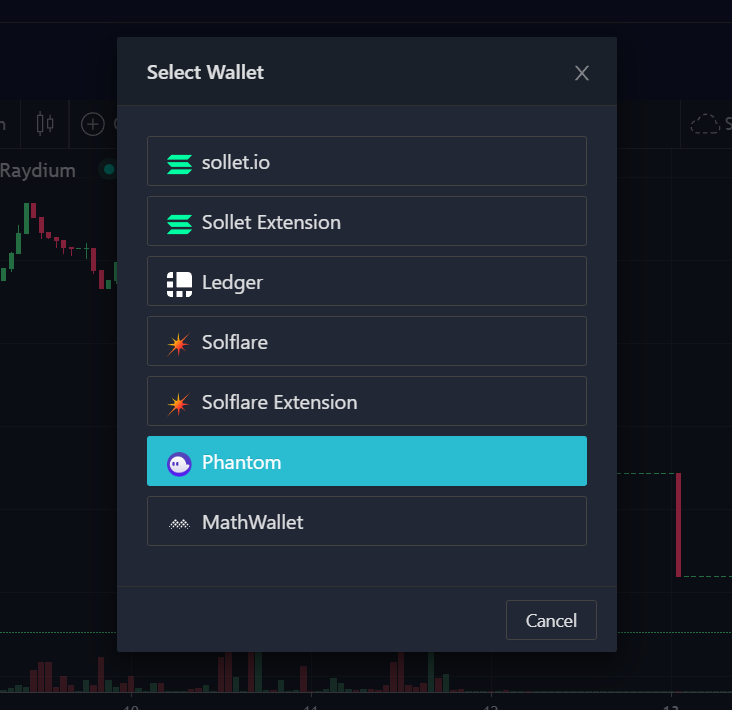
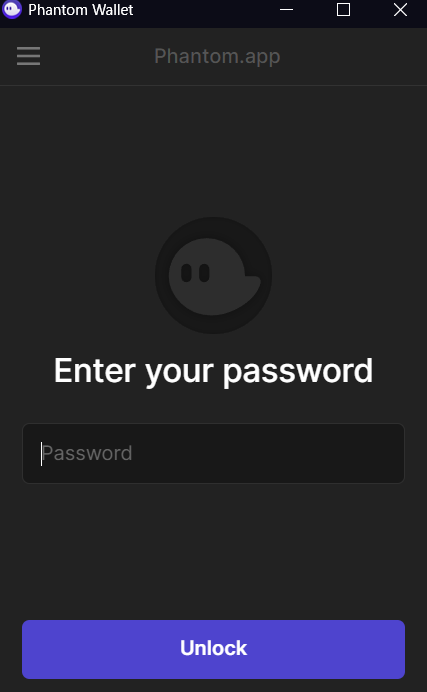
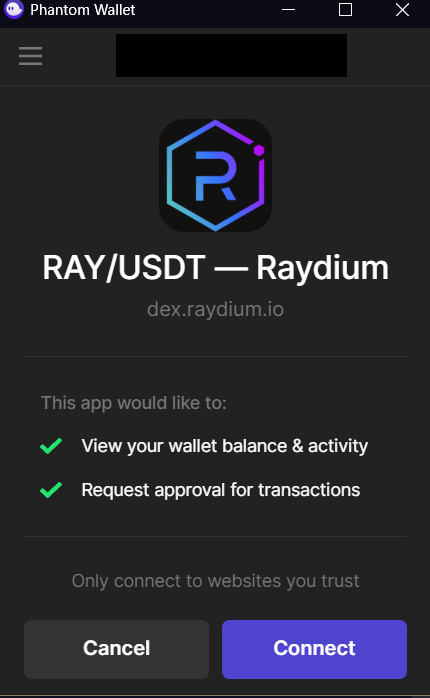
To get started with trading on Raydium, first, connect a wallet to the dApp. Do this by clicking ‘Connect’ in the upper right corner, selecting Phantom (or a different preferred wallet), entering the password for your wallet, and clicking ‘Connect’ in your wallet. If successful, you’ll receive a confirmation in the lower right corner, and the ‘Connect’ button will change to ‘Disconnect.’
Trading
Raydium’s trading page has several options for adjusting the chart for advanced traders, but for this tutorial, the focus is just on trading. Trading options can be found on the left side of the trading page. For a simpler ‘swap’ experience, jump to the ‘Swap’ section of this tutorial.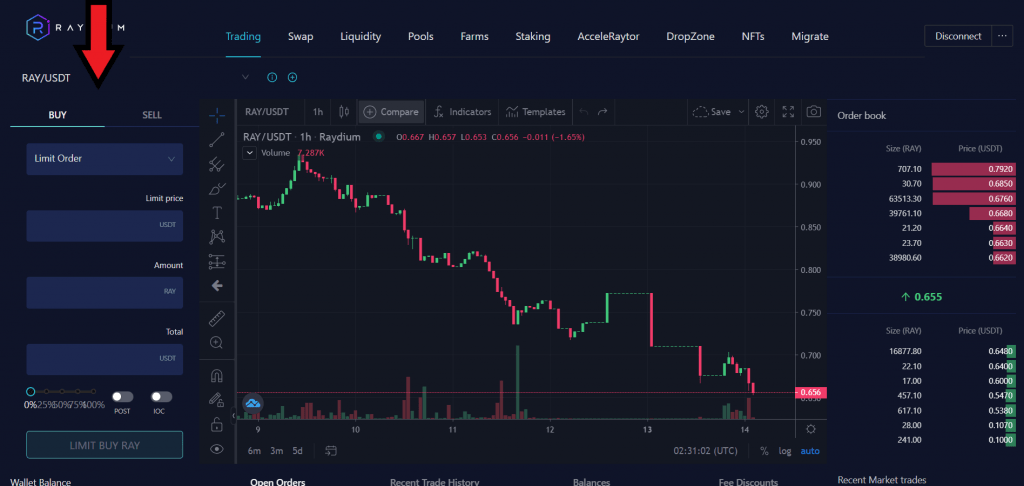
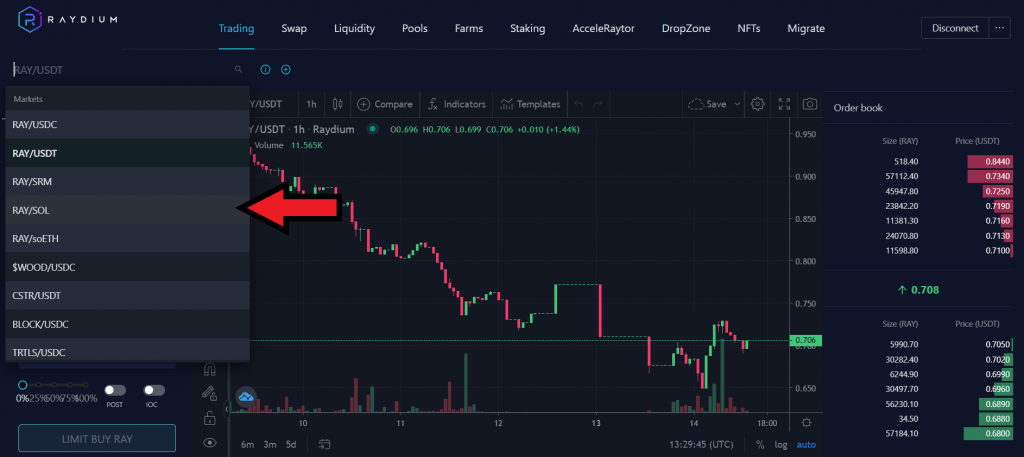
A user wants to trade some SOL for RAY, Raydium’s native utility token. First, select the RAY/SOL trading pair from the dropdown menu.
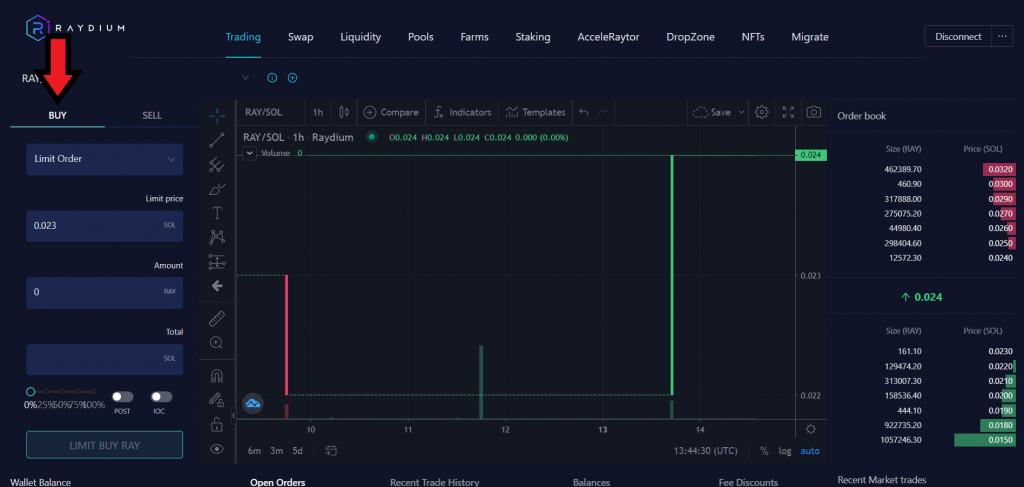
Next, make sure that the buy tab is selected.
Next, select the type of order. As of the writing of this tutorial, only limit orders are available. Because of this, we must decide on a price at which we want the trade to execute. The RAY/SOL pair is currently trading at 0.024, so set the limit price at 0.023. After that, enter the amount of RAY that needs to be purchased. This can be done manually, or by using the slider at the bottom to select a percentage of the SOL in the connected wallet. Certain percentages can be selected by clicking on them.
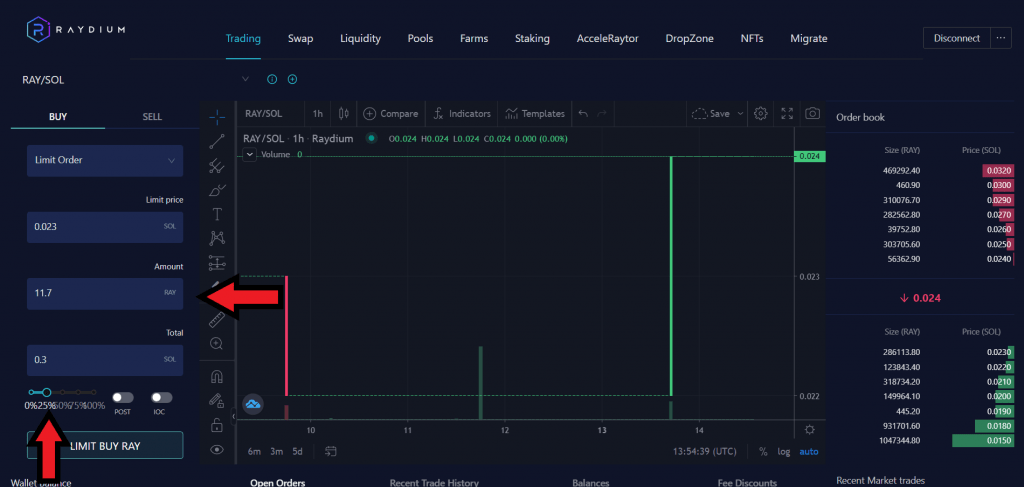
Next, there are options available for post orders (POST) and immediate or cancel orders (IOC) located next to the percentage slider. These are slightly more advanced than a simple limit order, so for this tutorial, we’ll leave them off.
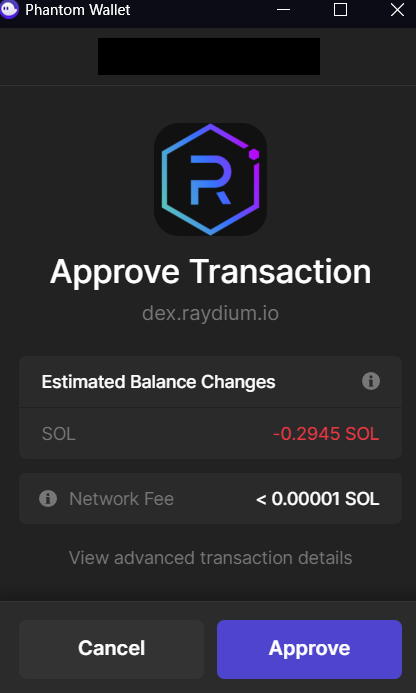
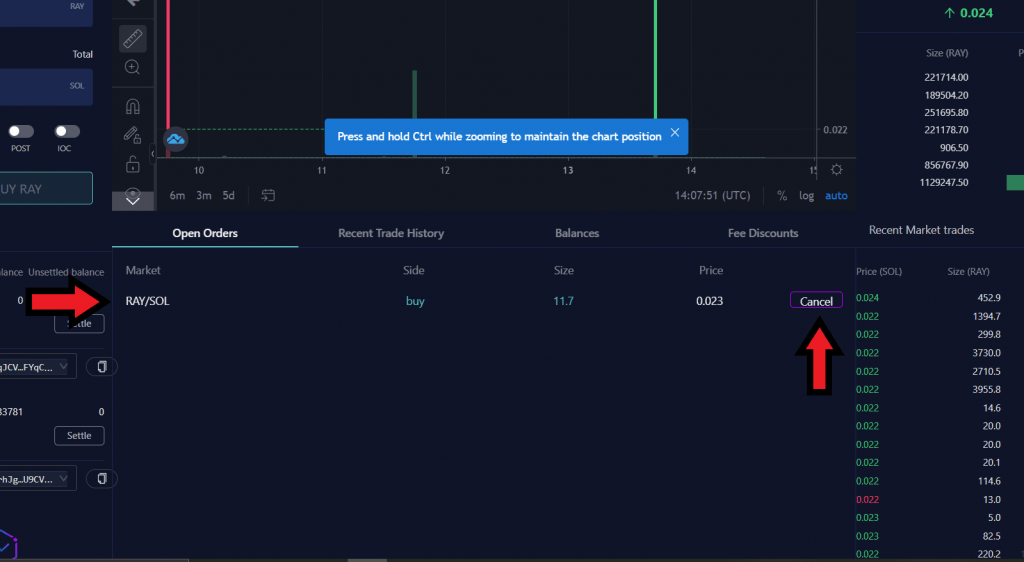
When the trade is ready to be executed, click ‘LIMIT BUY RAY’ to execute the trade. Enter Phantom’s password and approve the transaction. A notification will appear that the transaction has been sent and another will appear when the transaction is successful. A successful order will also appear in the ‘Open Orders’ tab under the trading pair chart. If there’s an issue with the order, it can be cancelled by clicking ‘Cancel’ by the order in Open Orders. Funds can then be retrieved by going to the ‘Balances’ tab, clicking ‘Settle,’ and approving the transaction.
Swap
Next, let’s move on to the simpler ‘Swap’ feature of Raydium. Click on ‘Swap’ in the navigation bar located at the top of the screen. This will open a new page.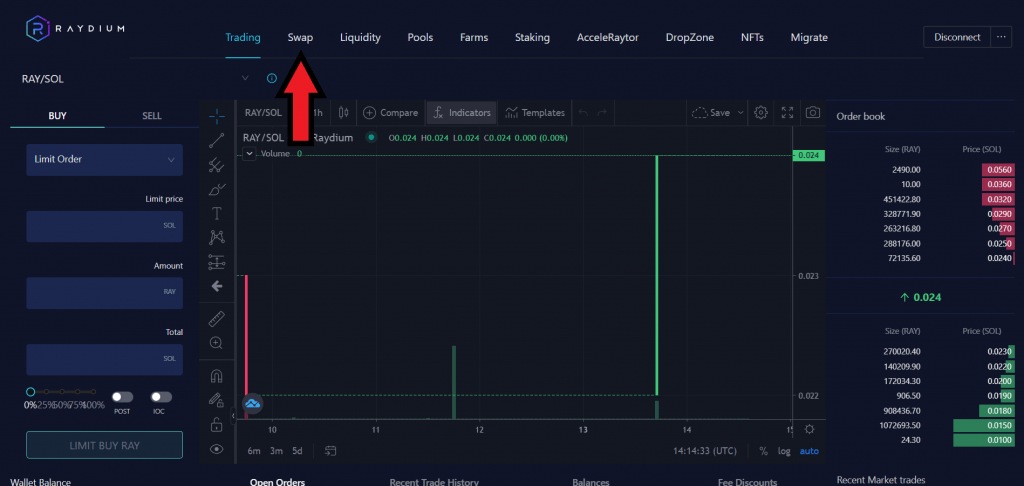
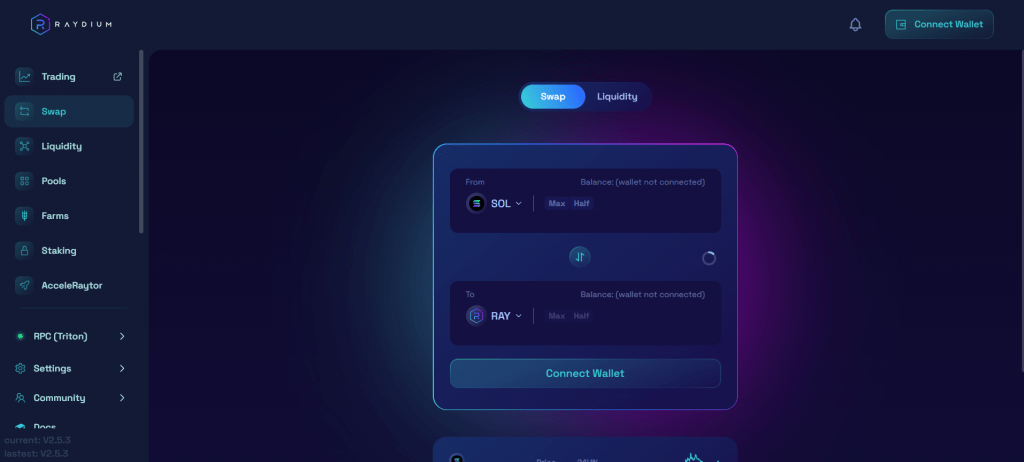
Since this is a different site from the trading portion of Raydium, your wallet of choice will again have to be connected by clicking ‘Connect Wallet’ in the top right corner of the screen and then ‘Connect’ when the Phantom popup appears.
Again, a user wants to swap SOL for RAY. This is the default option, so enter how much SOL we to trade. This can be done manually or by clicking ‘Max’ or ‘Half.’
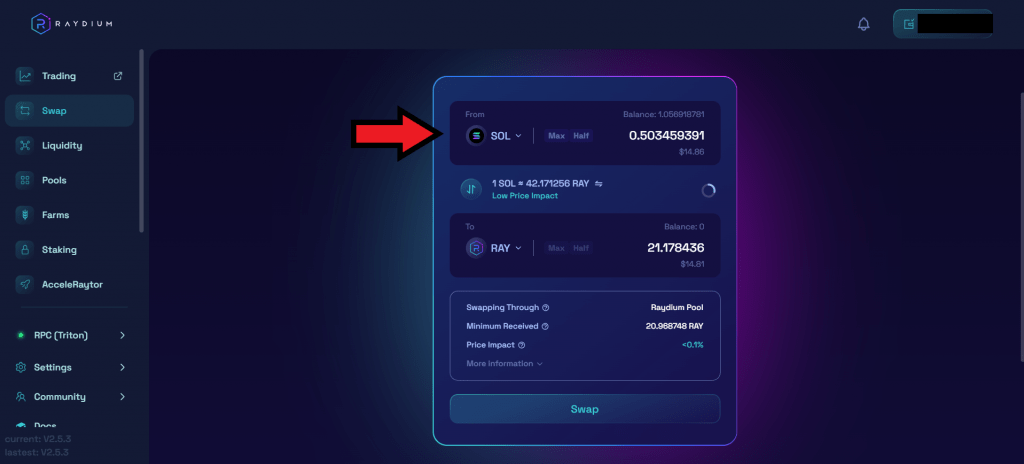
Once satisfied with the swap, click ‘Swap’ to execute it and then approve the transaction in Phantom. A notification will appear in the bottom right corner for a successfully sent transaction, and another will appear once the transaction is successful.
Liquidity
Before providing liquidity on Raydium, it’s essential to understand the risks associated, mainly impermanent loss. Impermanent loss is where a liquidity provider (LP) ends up with less value for some assets as opposed to simply holding the assets, like in a crypto wallet. It’s highly recommended to learn more about impermanent loss by reading our detailed pro guide.To provide liquidity through Raydium, first select the ‘Liquidity’ tab on either the left sidebar or from the ‘Swap/Liquidity’ options near the top of the page.
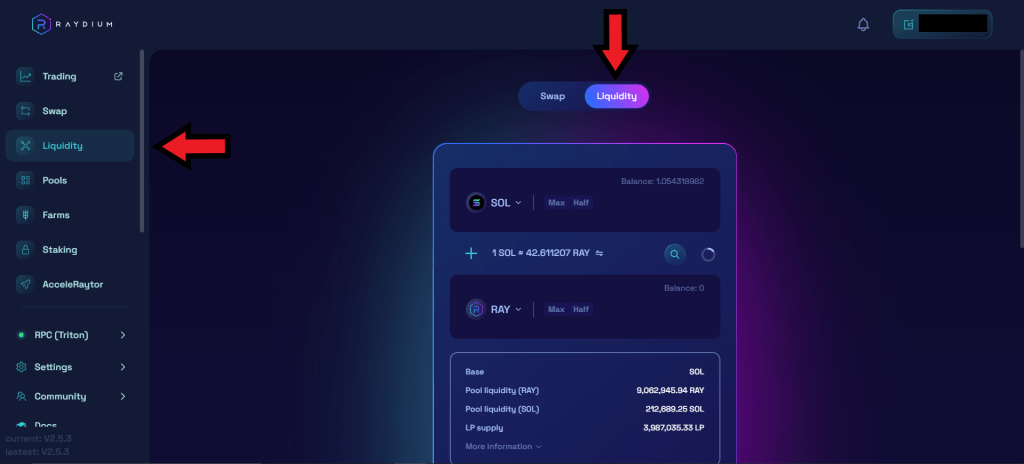
Next, enter the amount of SOL and RAY you’d like to provide. The total value of the SOL provided and the total value of the RAY provided need to be roughly the same, as shown here.

When the transaction is ready, check the box confirming an understanding of the risks involved with providing liquidity, like impermanent loss, then click ‘Add Liquidity.’

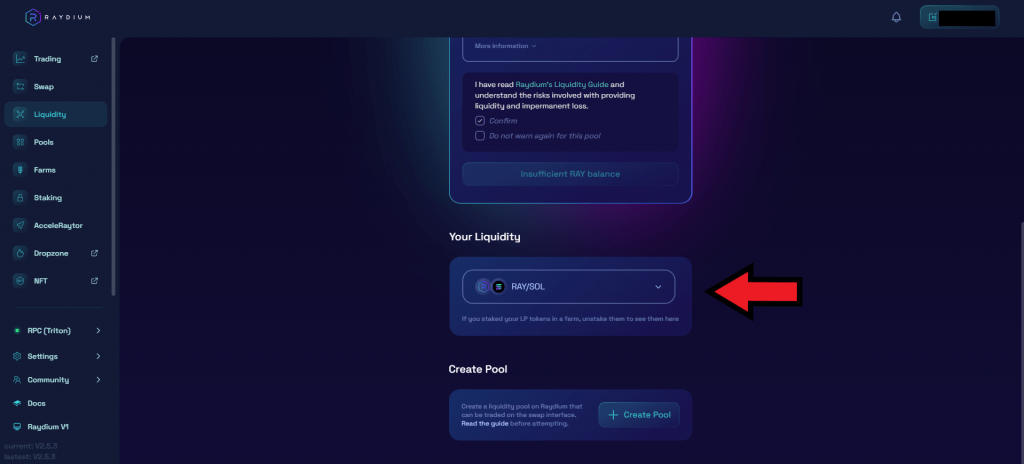
After approving the transaction in Phantom, there will be two confirmation messages that appear at the bottom right of the screen: one confirms that the transaction has been sent, while the second confirms that the transaction was successful. The added liquidity will also appear in the ‘Your Liquidity’ section of the page. Double-check Phantom to ensure that the liquidity provider tokens (LP tokens) have been deposited into the wallet.

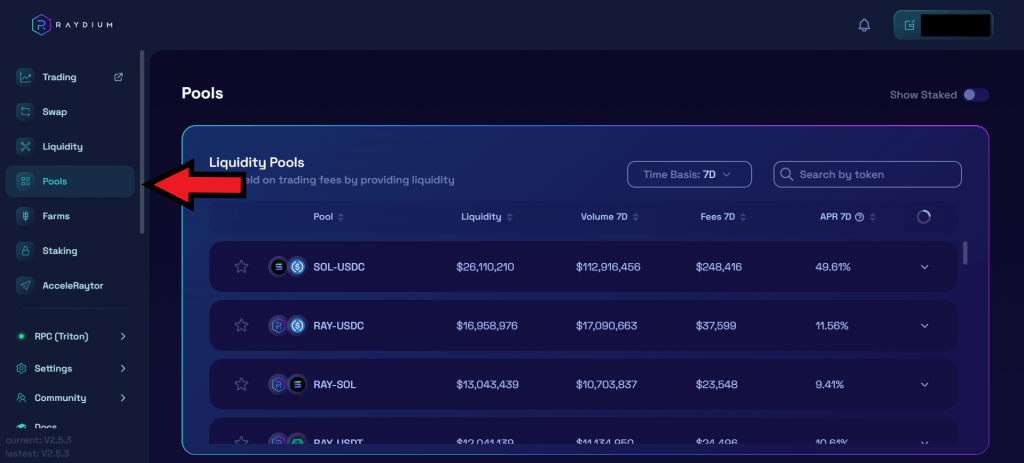
All available liquidity pools can be viewed by clicking the ‘Pools’ option in the left sidebar.
Farms
Raydium also allows users to farm yield through LP tokens. To access the various yield farms, click on ‘Farm’ in the left sidebar. Alternatively, farms can be accessed from the ‘Your Liquidity’ section on the main liquidity page.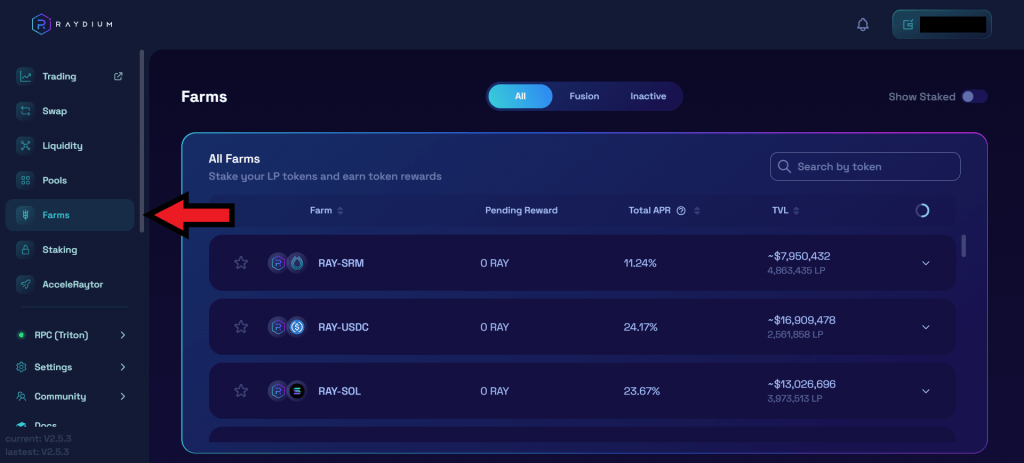
After providing liquidity to the RAY/SOL trading pair in the previous section, staking the newly acquired LP tokens is an option. First, click on the RAY/SOL trading pair to open up the dropdown menu.
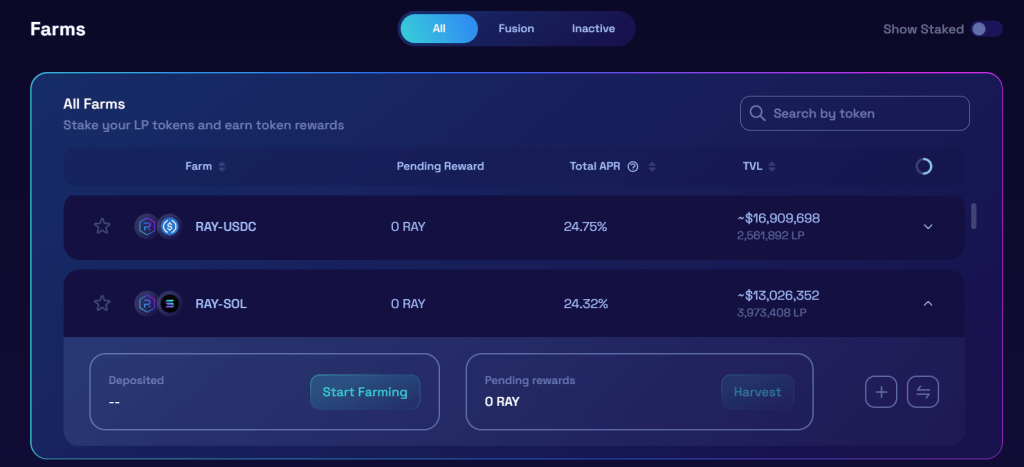
Next, click the ‘Start Farming’ button. This will open a popup menu to deposit LP tokens. The amount to be staked can be entered manually or all LP tokens can be staked by clicking ‘Max.’
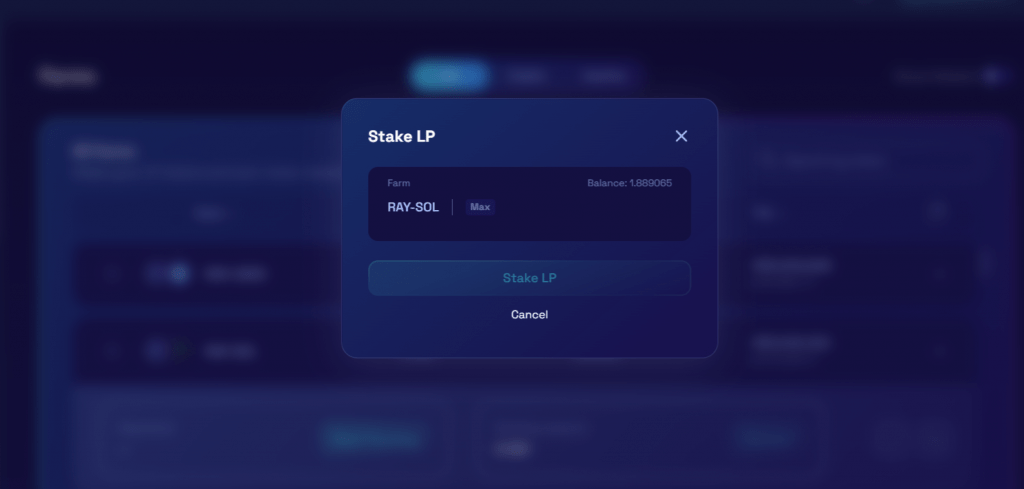
Once the amount is entered, click ‘Stake LP’ and confirm the transaction in Phantom. Again, two confirmation messages will appear in the bottom right corner of the page. Once successful, deposited LP tokens can be seen in the ‘Deposited’ section of the RAY/SOL pair. Rewards can be collected by clicking the ‘Harvest’ button in the area beside ‘Deposited.’

Staking
Raydium allows users to stake their RAY tokens and earn rewards. This can be done from the Staking page, which is accessed by clicking ‘Staking’ in the left sidebar.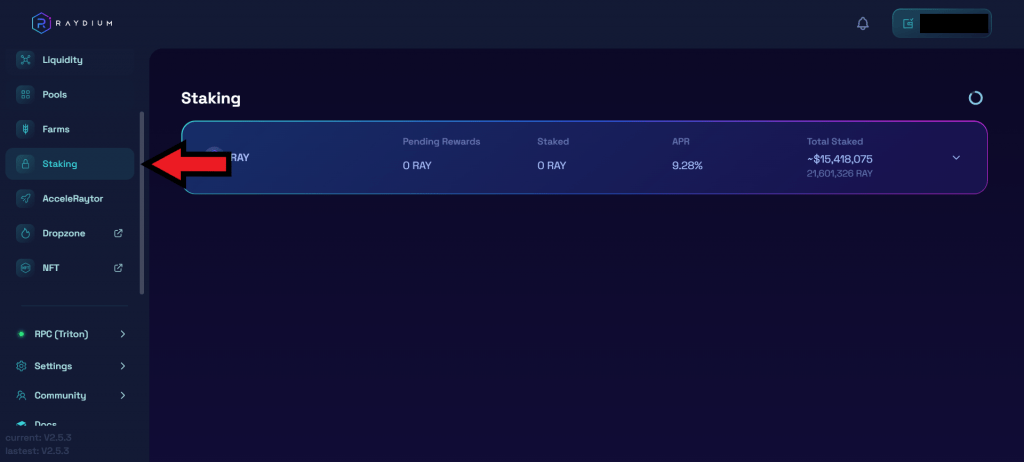
Open the staking menu by clicking on the ‘RAY’ box.

Click ‘Start Staking’ to open a popup menu where the amount to be staked can be manually entered, or all can be staked by clicking ‘Max,’ similarly to the sections above.
Once the transaction is ready, click ‘Stake RAY’ and confirm the transaction in Phantom. Provided the transaction is successful, the amount deposited with appear in the ‘Deposited’ section of the ‘Staking’ page, just like in the liquidity example above. Staking rewards can be collected by clicking ‘Harvest’ in the section next to ‘Deposited.’
AcceleRaytor, Dropzone, and NFT
There are a few other features that Raydium provides to its users: AcceleRaytor, Dropzone, and an NFT marketplace.AcceleRaytor bills itself as a ‘launchpad for new Solana project.’ Through it, Raydium users can stake RAY for the chance to win special lottery tickets. To have the tickets counted in the lottery, a certain amount of USDC must also be deposited into the project’s pool. Lastly, owners of winning tickets can claim their share of the project’s tokens. As always, it’s vital to do adequate research before making any decisions.
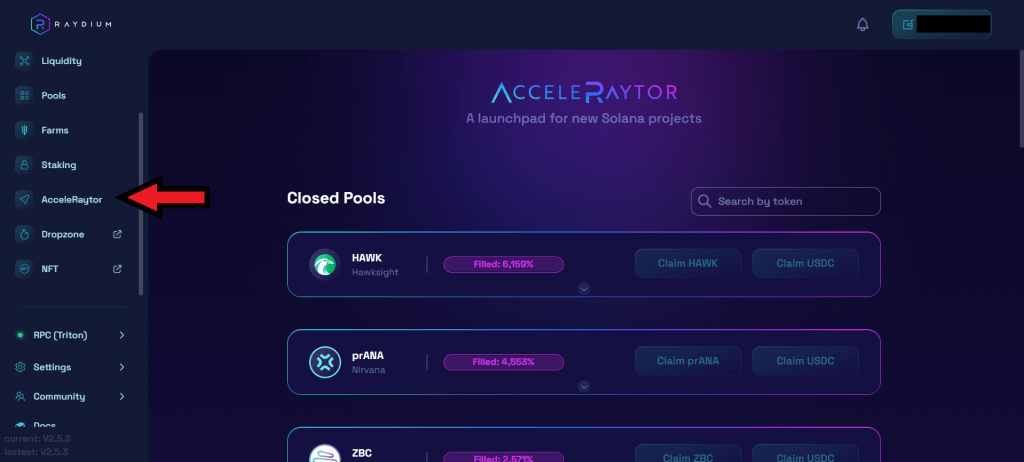
Currently, there are no open pools in the AcceleRaytor. More details on past projects and how the lottery system works can be found on Raydium’s Medium site.
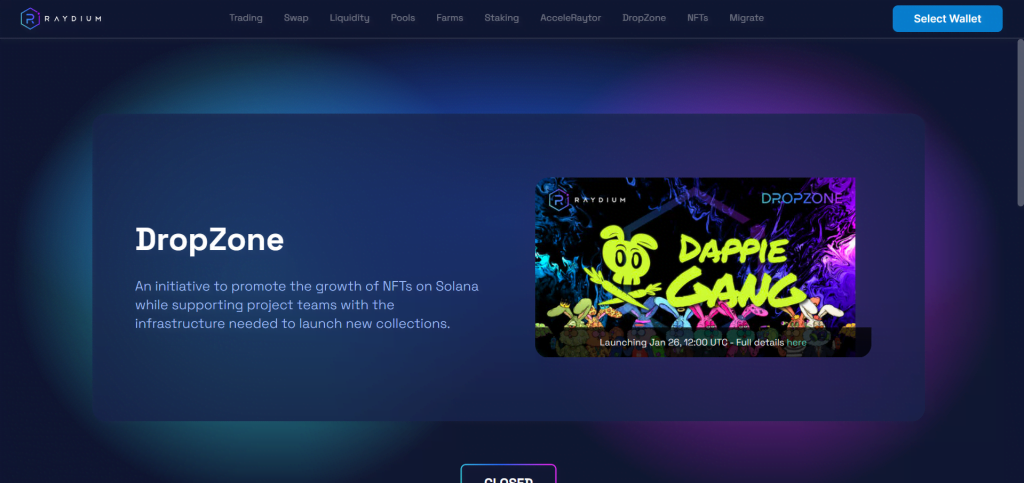
Next up is the Dropzone feature. Dropzone allows users to deposit SOL for tickets to be entered in a lottery to win a ‘Drop Box’ token. These Drop Boxes represent an NFT for the project in which the SOL was deposited. Drop Box tokens are redeemed at the project’s website to mint an NFT.
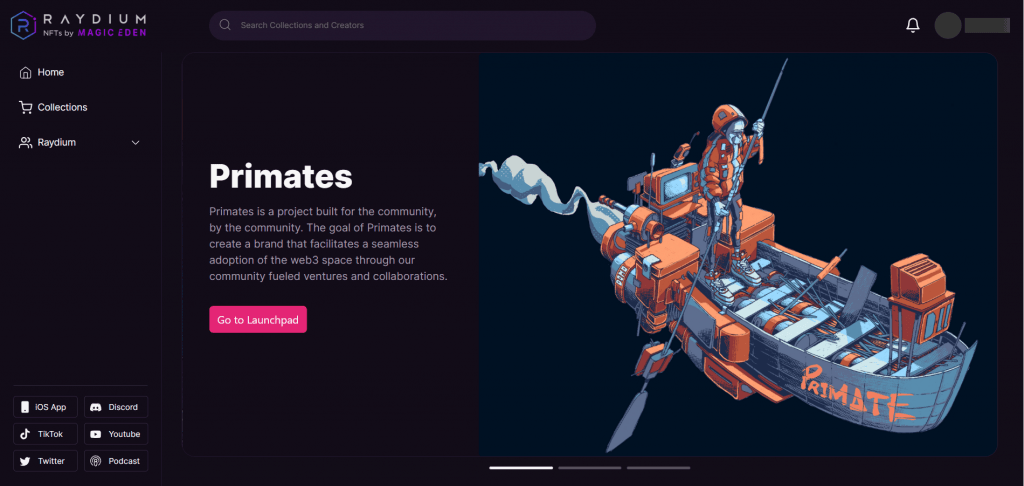
Lastly, we have Raydium’s NFT marketplace. Raydium’s NFT marketplace is powered by Magic Eden, the leading NFT marketplace on Solana. From here you can purchase some of the most popular Solana NFTs, including DeGods and Okay Bears.
Settings
Raydium’s settings can be changed by clicking on the ‘Settings’ button located on the bottom half of the left sidebar.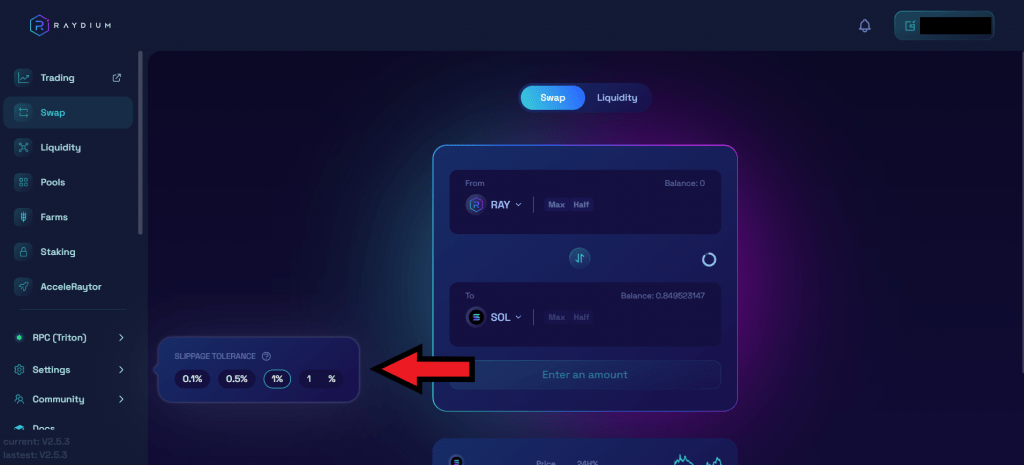
As of the writing of this tutorial, the only setting that can be changed is slippage tolerance.
Disclaimer: THIS IS NOT FINANCIAL OR INVESTMENT ADVICE. Only you are responsible for any capital-related decisions you make, and only you are accountable for the results.
That wraps up this tutorial for Serum and Raydium! If you found this tutorial useful, make sure to comment and share. Also, let us know what tutorials you’d like to see next!
Continue reading by joining Cryptonary Pro
$1,548 $1,197/year
Get everything you need to actively manage your portfolio and stay ahead. Ideal for investors seeking regular guidance and access to tools that help make informed decisions.
For your security, all orders are processed on a secured server.
As a Cryptonary Pro subscriber, you also get:
3X Value Guarantee - If cumulative documented upside does not reach 300% during your 12-month membership, you can request a full refund. Terms
24/7 access to experts with 50+ years’ experience
All of our top token picks for 2025
On hand technical analysis on any token of your choice
Weekly livestreams & ask us anything with the team
Daily insights on Macro, Mechanics, and On-chain
Curated list of top upcoming airdrops (free money)
3X Value Guarantee
If cumulative documented upside does not reach 300% during your 12-month membership, you can request a full refund.
Our track record speaks for itself
With over 2.4M tokens and widespread misinformation in crypto, we cut through the noise and consistently find winning assets.
Our track record speaks for itself
With over 2.4M tokens and widespread misinformation in crypto, we cut
through the noise and consistently find winning assets.
Frequently Asked Questions
Can I trust Cryptonary's calls?
Yes. We've consistently identified winners across multiple cycles. Bitcoin under $1,000, Ethereum under $70, Solana under $10, WIF from $0.003 to $5, PopCat from $0.004 to $2, SPX blasting past $1.70, and our latest pick has already 200X'd since June 2025. Everything is timestamped and public record.
Do I need to be an experienced trader or investor to benefit?
No. When we founded Cryptonary in 2017 the market was new to everyone. We intentionally created content that was easy to understand and actionable. That foundational principle is the crux of Cryptonary. Taking complex ideas and opportunities and presenting them in a way a 10 year old could understand.
What makes Cryptonary different from free crypto content on YouTube or Twitter?
Signal vs noise. We filter out 99.9% of garbage projects, provide data backed analysis, and have a proven track record of finding winners. Not to mention since Cryptonary's inception in 2017 we have never taken investment, sponsorship or partnership. Compare this to pretty much everyone else, no track record, and a long list of partnerships that cloud judgements.
Why is there no trial or refund policy?
We share highly sensitive, time-critical research. Once it's out, it can't be "returned." That's why membership is annual only. Crypto success takes time and commitment. If someone is not willing to invest 12 months into their future, there is no place for them at Cryptonary.
Do I get direct access to the Cryptonary team?
Yes. You will have 24/7 to the team that bought you BTC at $1,000, ETH at $70, and SOL at $10. Through our community chats, live Q&As, and member only channels, you can ask questions and interact directly with the team. Our team has over 50 years of combined experience which you can tap into every single day.
How often is content updated?
Daily. We provide real-time updates, weekly reports, emergency alerts, and live Q&As when the markets move fast. In crypto, the market moves fast, in Cryptonary, we move faster.
How does the 3X Value Guarantee work?
We stand behind the value of our research. If the documented upside from our published research during your 12-month membership does not exceed three times (3X) the annual subscription cost, you can request a full refund. Historical context: In every completed market cycle since 2017, cumulative documented upside has exceeded 10X this threshold.
Terms


