This week only: 23% Off + a 1-on-1 call with our experts. ⏰ : 1d 23h 59m 43s
Staking
Staking is an important benefit of holding a cryptocurrency, and dependent on the staking options and background tokenomics, staking your tokens whilst holding them can offer significant upside. To not get too technical regarding staking, let us compare staking to something most people are familiar with, a savings account at a bank. Similarly, to a savings accounts which pays you interest for storing your money with the bank and allowing them to use it, staking pays you interest for providing your tokens to help secure the network and validate transactions. For this reason, staking is available for most Proof of Stake based networks such as Solana, Algorand, Cosmos, Ethereum and Tezos amongst others. When following a long term holding strategy with your portfolio investments it is important to maximise their passive growth. We’ve all seen the classic graph about the difference in taking advantage of compounding interest at different ages.As you can see compounding interest is not to be ignored, and the earlier you start the better. However, when staking your crypto, you receive your interest in crypto and not in fiat. As we will be looking at how to stake Solana, let us use an example of 100 SOL. SOL staking offers an interest rate of up to 10% per year currently. In terms of growth rate in crypto tokens, your portfolio follows the usual interest curve. So after one year you will have 110SOL (100SOL + 10 SOL), after two years you will have 121SOL (110SOL + 11SOL), year three you will have 133.1SOL (121SOL + 12.1SOL) and so forth. It allows you to increase your token holdings without having to deploy more capital, to take further advantage of the potential upside of Solana.
Option 1 – Staking with via an exchange
At the moment there are a couple of major exchanges that offer staking services for Solana, with different terms. The terms mentioned here are similar to those banks have with their saving accounts, and require you to wait for a certain period of time before being able to withdraw your savings/staked crypto. For example Binance was offering users who wished to stake SOL with them, lockup periods of 30, 60 and 90 days for an annualised interest rate of around 10%.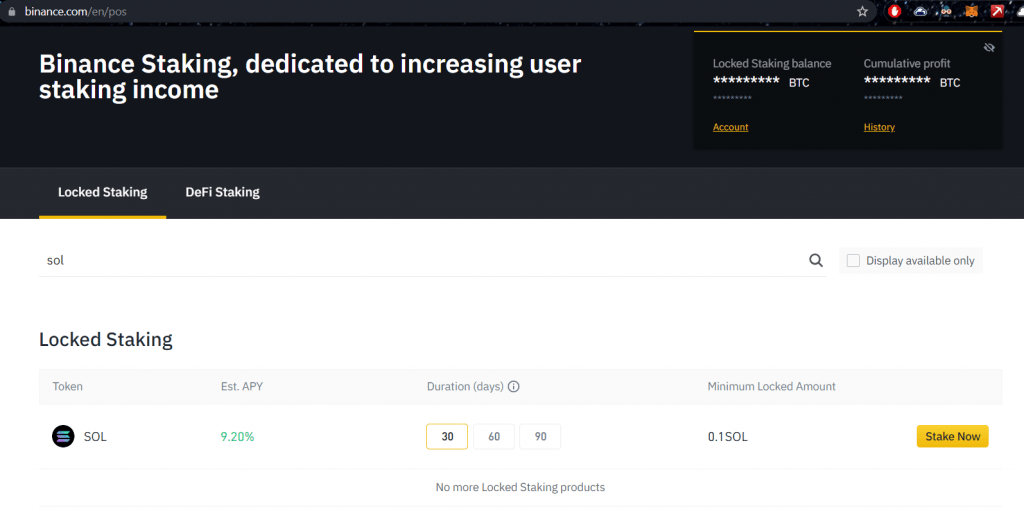
Once someone has staked their SOL and agreed to the lockup period, they cannot access their SOL until the lockup period is over, at which point their staked SOL will be returned to them along with the interest. The lockup periods offered by Binance are not ideal.
Option 2 – Staking with a validator
The only other competitive alternative for SOL staking apart from exchanges is staking directly with a validator. This option offers a slightly lower interest rate between 7-8% dependent on how the validator and network as a whole is performing and the number of transactions being processed, but comes with a lockup period of a Solana epoch (between 2-3 days).This option does help the Solana network as opposed to staking with an exchange. So for a reduction in yearly interest and a little bit more legwork, you have a smaller lockup period whilst also helping the network. Interest accrued is also received every 66 hours.
Staking with a validator involves delegating your tokens to a validator. There are multiple methods to do this and many different validators you can choose. To make life easy for everyone we have conducted a review of validators, and objectively identified the validator with the best credentials.
We determined GenesysGo to be the best option for delegating your stake to, as they have been consistently at the top of the leaderboard in terms of validator performance and have also been vetted by the Solana Foundation. You can view validator performance here.
Disclaimer: Cryptonary receives no benefits or incentives of any kind and there is no conflict of interest present. The communications and collaboration with GensysGo was carried out in the best interests of Cryptonary members and Solana ecosystem participants, to make the staking process with a validator as easy as possible for everyone. Users are urged to do their own research on the validator they choose. As always, NOT FINANCIAL NOR INVESTMENT ADVICE. Only you are responsible for any capital-related decisions you make and only you are accountable for the results.
We reached out and got in touch with them and collaborated on creating a staking guide as delegating to a validator is more complicated than staking via exchange. One of the founders of GenesysGo will also be appearing on our upcoming podcast and has some exciting news to share with everyone on the upcoming podcast! Below, you will find the step by step guide of how to stake your tokens with a validator, using solstake. We have found this to be the most user friendly method possible. Alternative options, such as using a SolFlare or Exodus wallets exist, however solstake is the easiest option and should work with whatever SPL based wallet you are currently using (Phantom, Sollet and Ledger integration).
If you wish to stake with a different validator, you will simply select a different option for Step 6 as shown below:
If you encounter any problems during the staking process or simply wish to speak directly to the people who run the validators, you will find GensysGo Discord here and can always drop them a message on Twitter.
Comparing the two options for Solana staking, staking via exchange is the easier alternative requiring less effort but does not help the Solana network. Staking using a validator requires more effort and has a slightly smaller interest rate with rates of around 7-8%, but helps secure the network whilst having a smaller lockup periods. Both options are the clear cut best in market, and the final decision as to which avenue to use for staking is a question of safety vs convenience.
Recommended from Cryptonary