Save 23% ($351) & Get a Free 1-1 Call with our Team ⏰ : 0d 2h 59m 43s
How to Buy Ethereum (ETH) Visual Guide
Ethereum is one of the leading cryptocurrencies that has gained widespread popularity for its potential in decentralised applications and smart contracts. However, there are some who are new to the crypto market and don’t know how to buy Ethereum.
That’s why we at Cryptonary are here to make sure that you learn the basics of buying Ethereum on a major platform like Binance. Once you get the basics down, then be it Litcoin or Bitcoin, you’ll be able to buy any coin available on that platform. With that said, let’s start by going over the entire procedure.
Here’s what you’re going learn through this guide:
- Buy Ethereum Through Binance
- Buy Ethereum Through Phantom Wallet
- Buy Ethereum Through Trust Wallet
Step-By-Step Guide for Buying Ethereum
The very step in buying any kind of crypto token is knowing which exchange you’re going to use.Step 1: Select an Exchange
The main issue beginners face when buying Ethereum is finding the right exchange. Finding a reliable and trustworthy platform is the key. To buy Ethereum, you must register on a cryptocurrency exchange that supports Ethereum trading. Here are some popular exchanges:- Binance
- Coinbase
- Kraken
- Gemini
- Robinhood
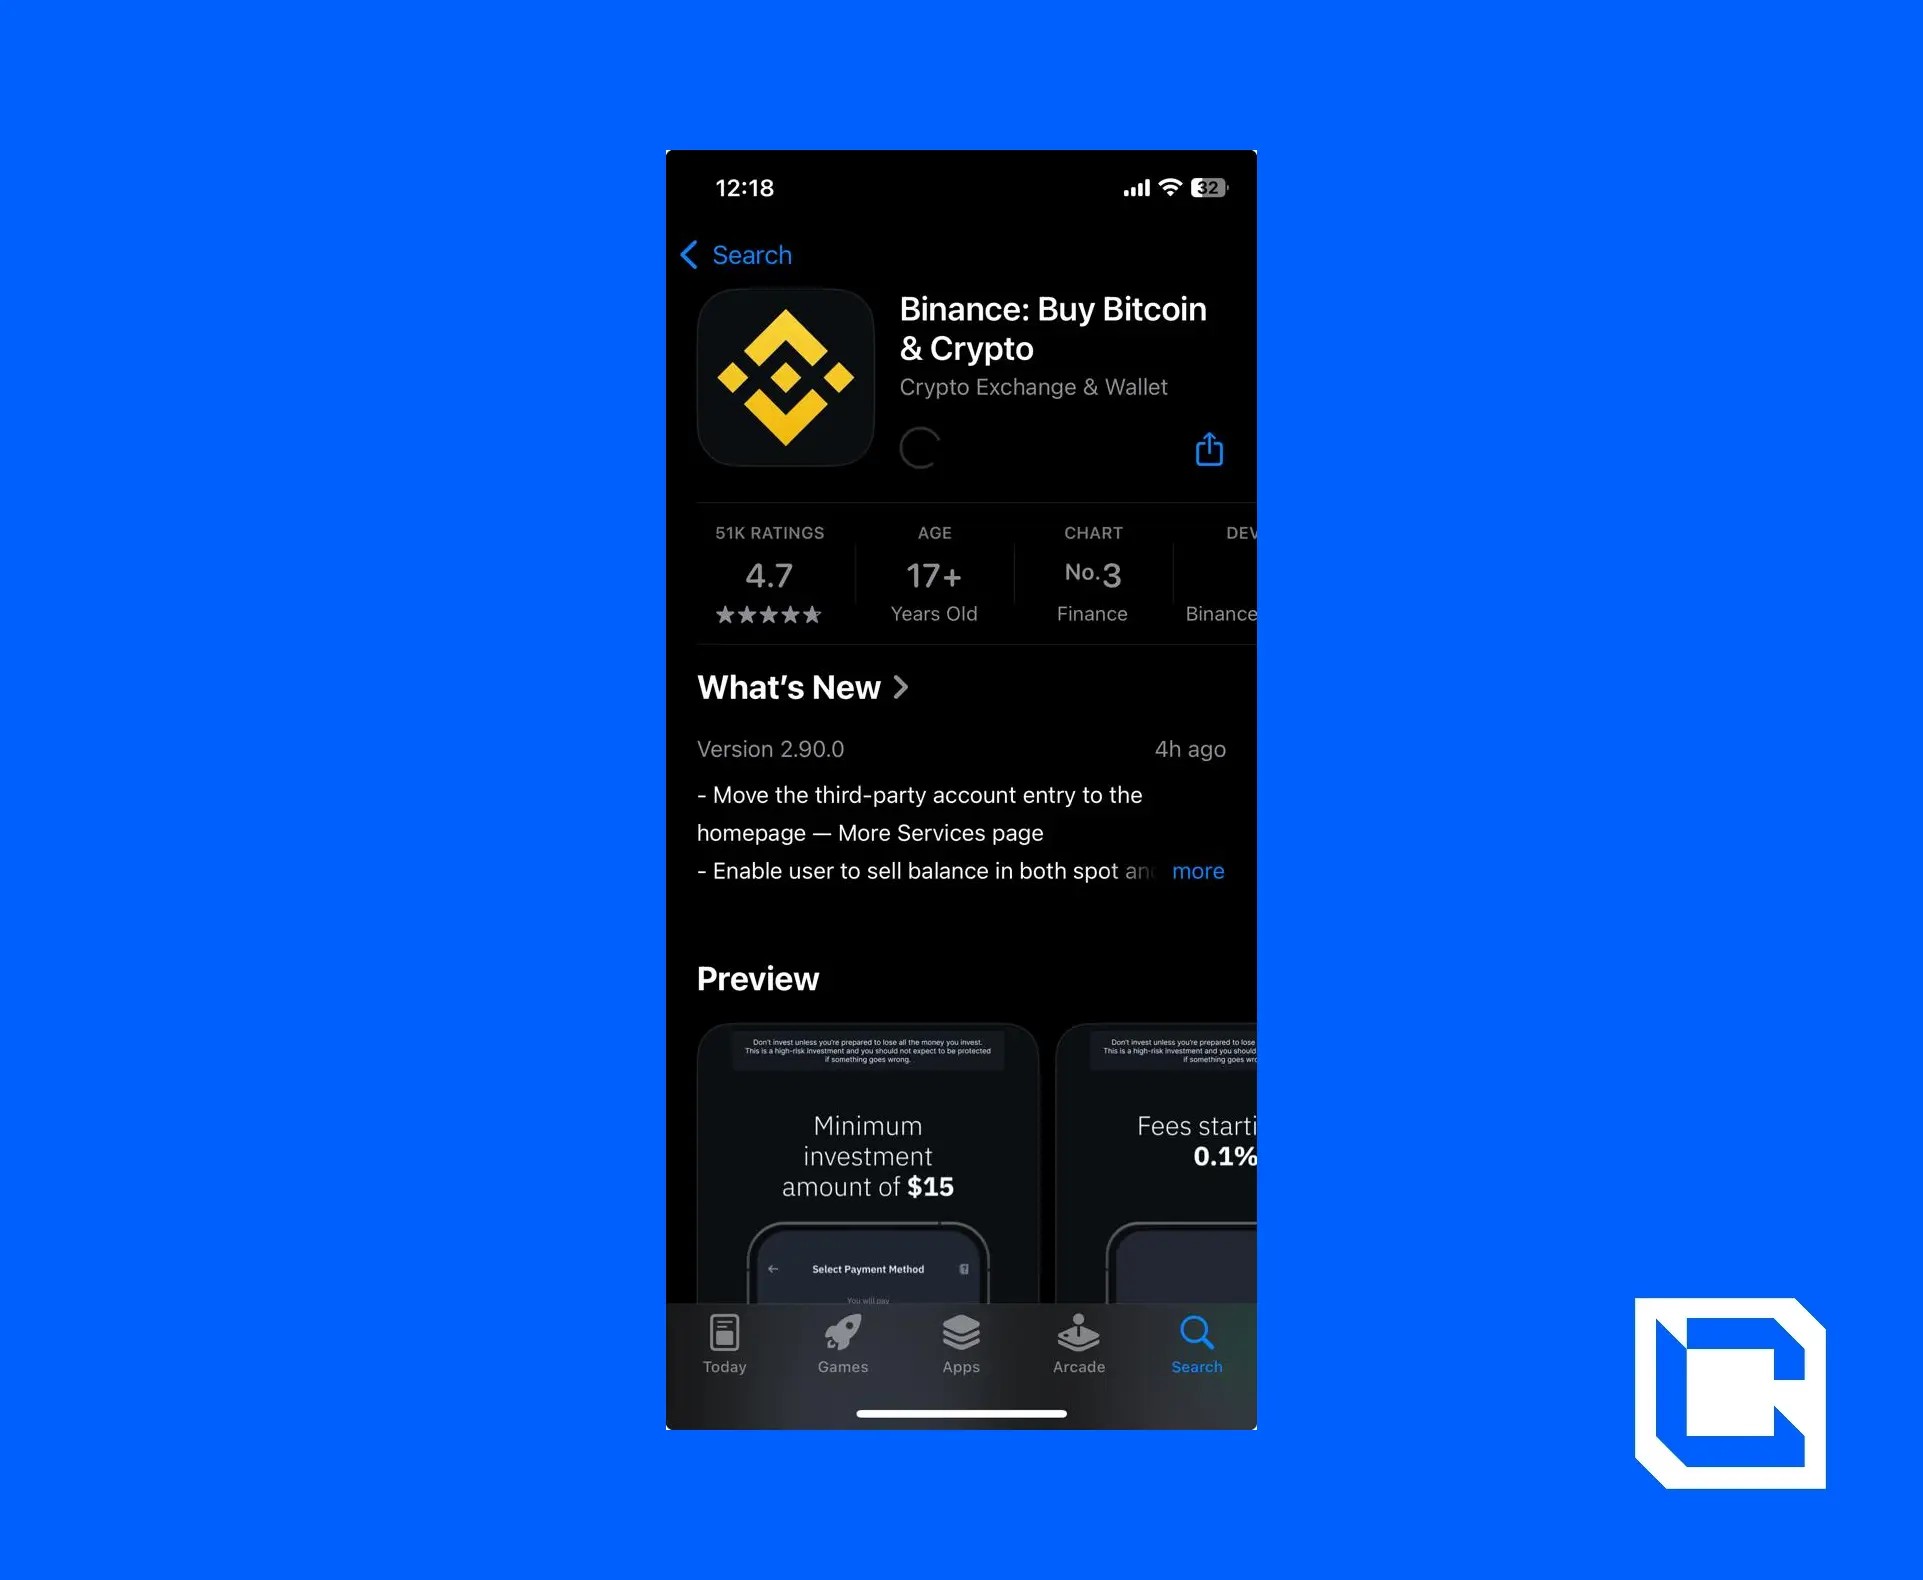
- Go to the app store and download the Binance app on your phone.
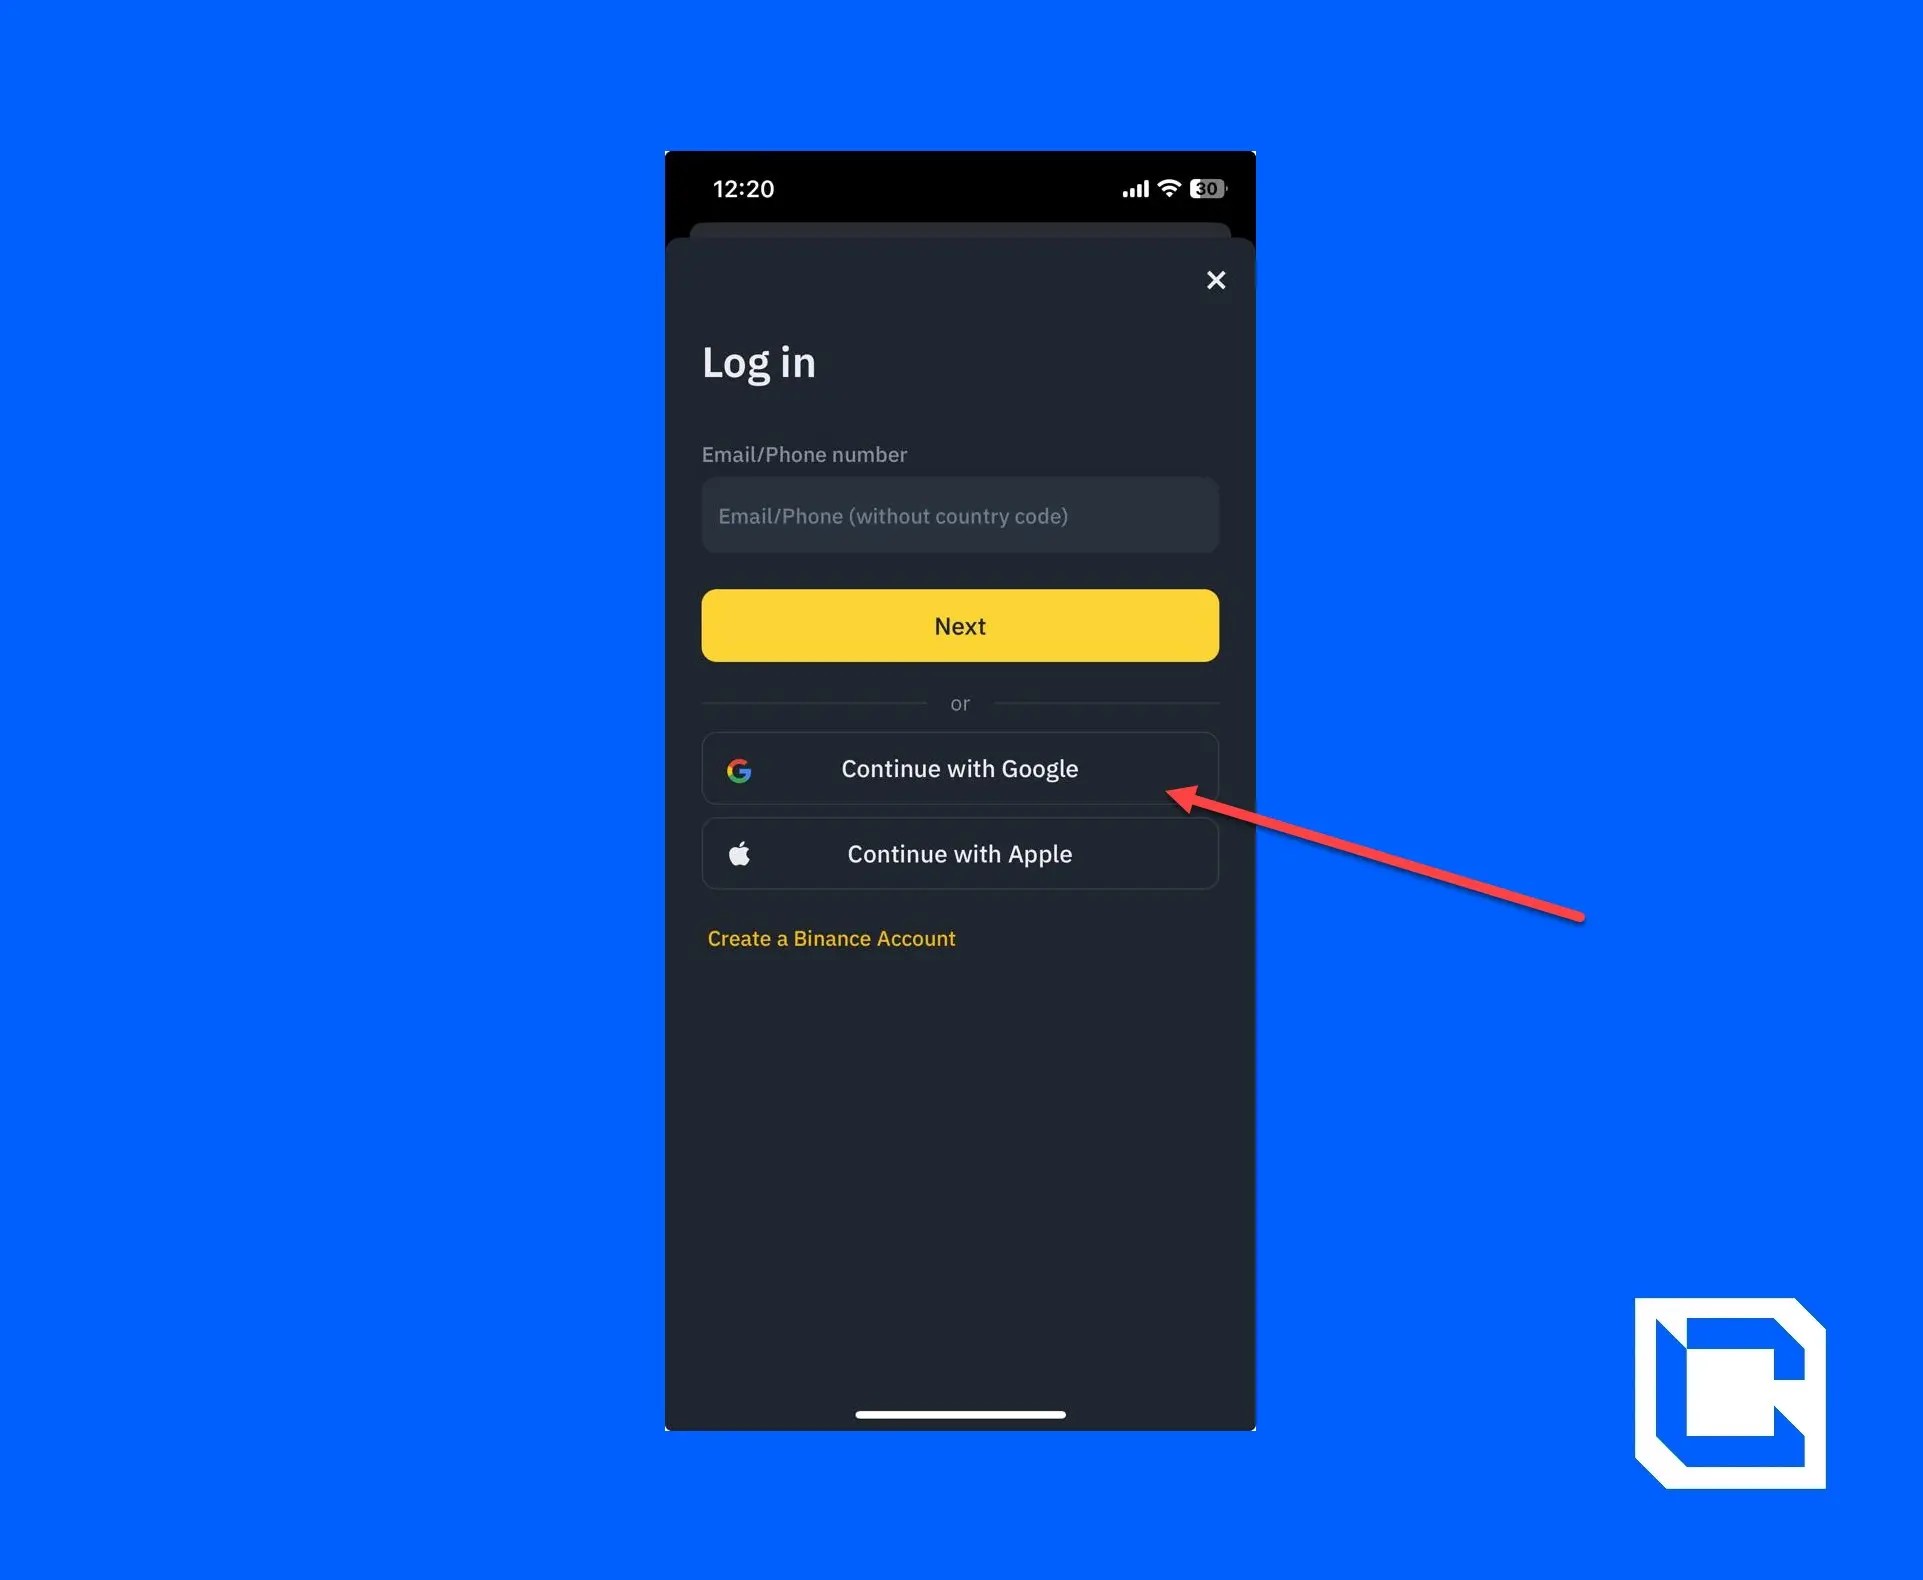
Step 2: Login to Your Account
Once the app is installed, the next step is to log in to your account.- We'll be using our Gmail account to log in quickly.
Note: To do any exchange or trading, you must have a verified account. To learn how to create and verify your Binance account, check out our guide on how to use Binance.
Step 3: Adding Funds to Your Account
Now that your account is ready, you need to have funds to buy Ethereum. There are usually several options to fund your account.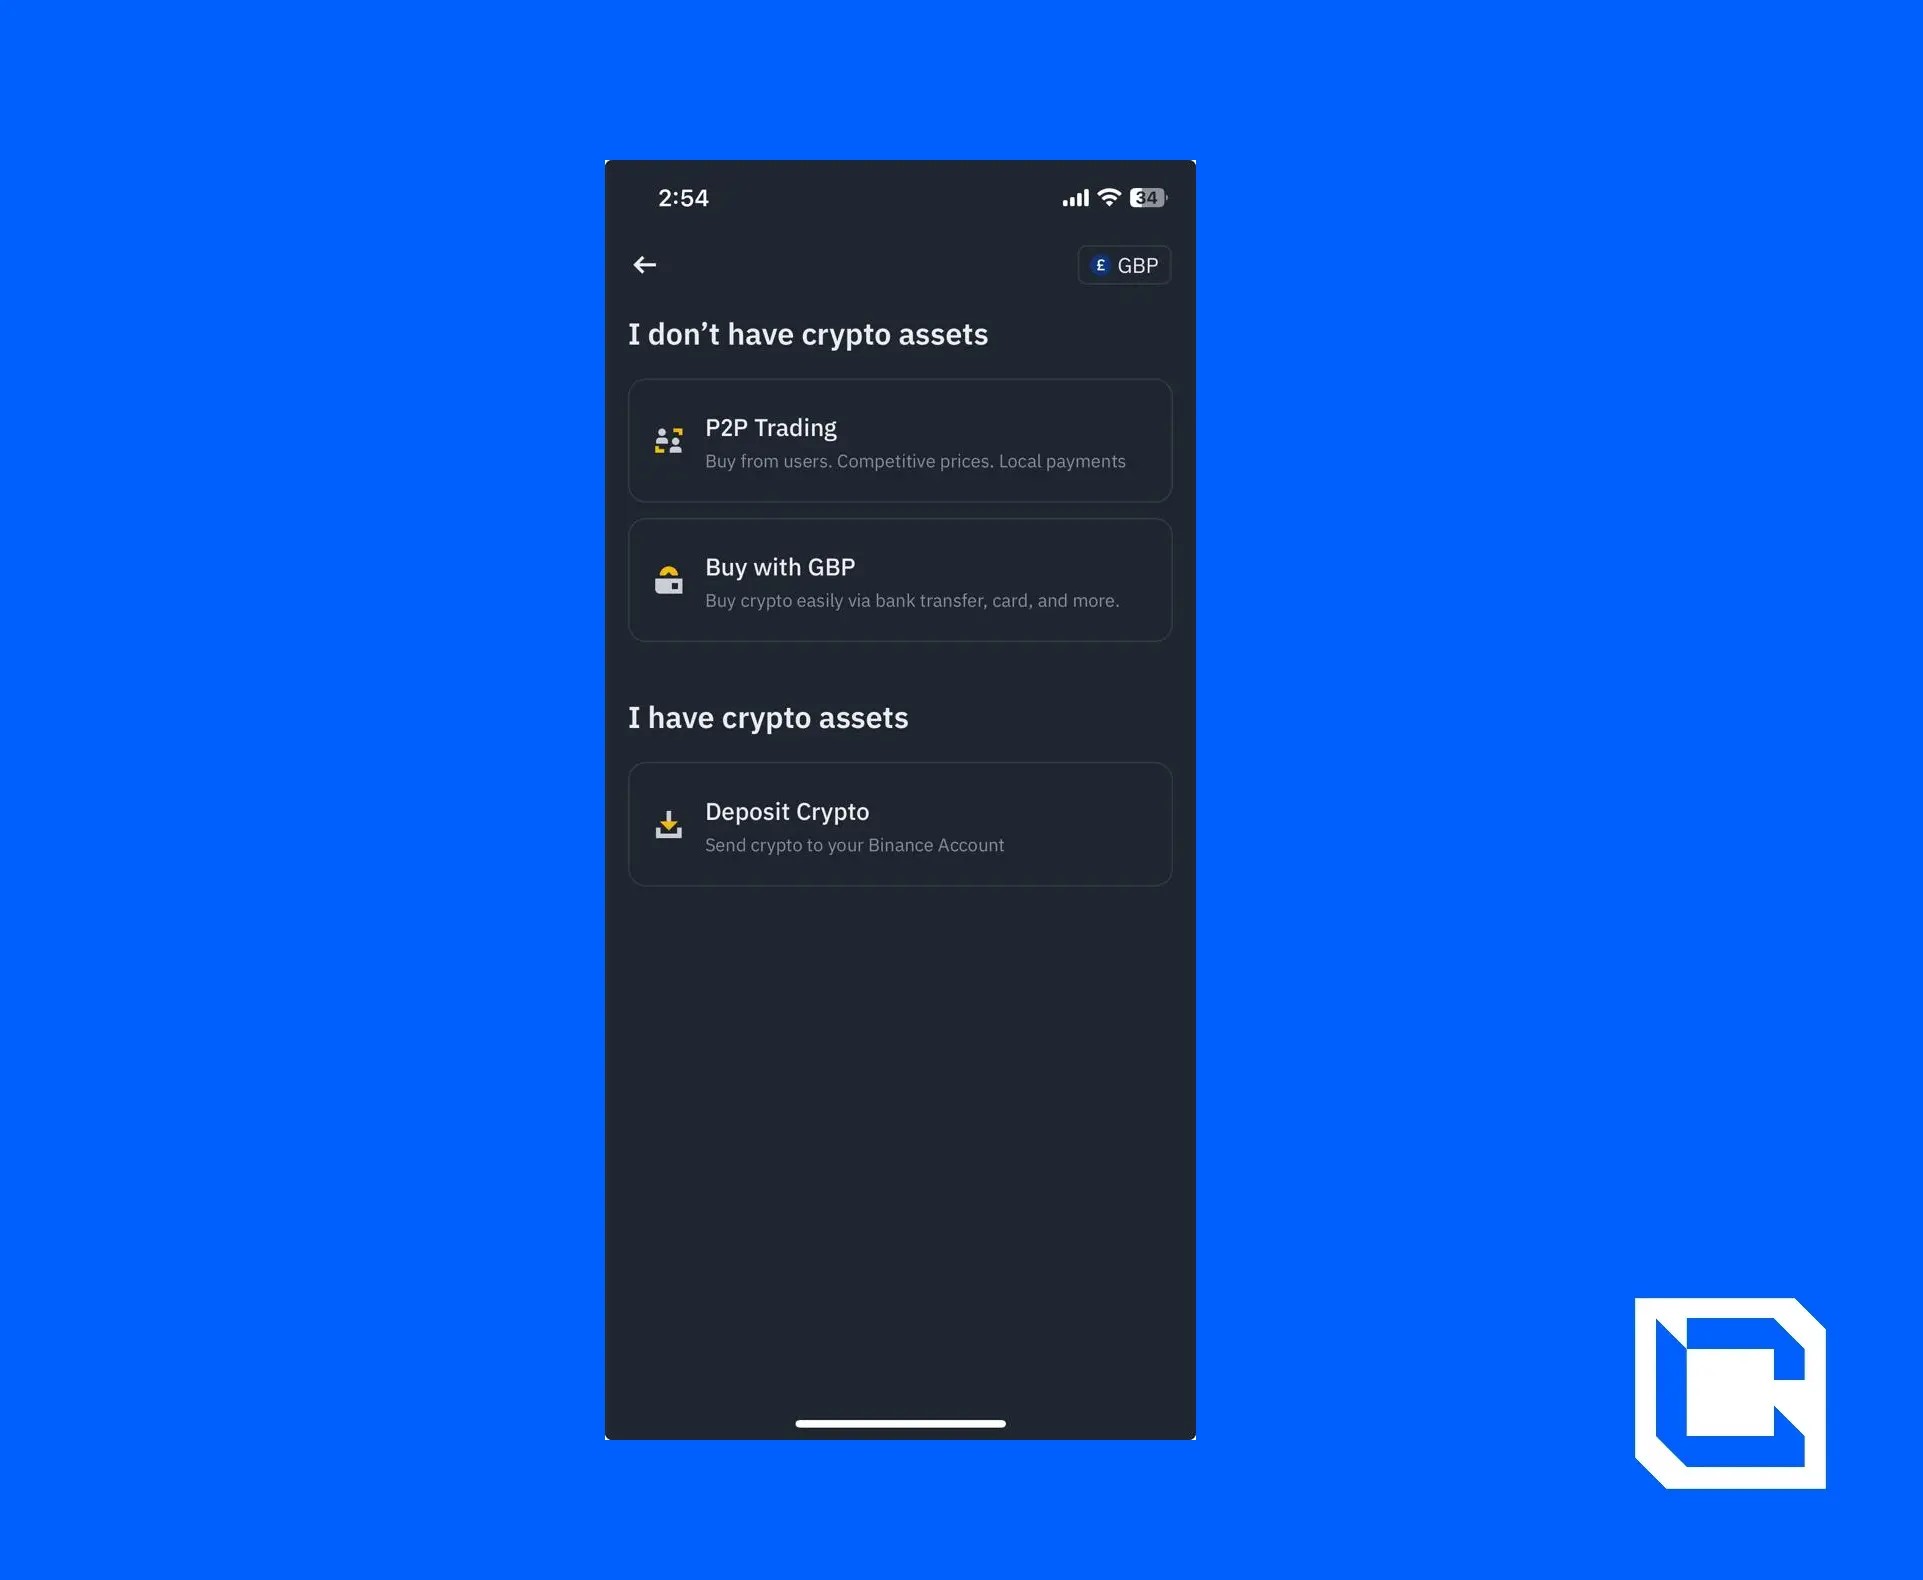
You can choose from the following options if you don't have any crypto assets.
- Buy with GBP: You can add funds using a bank transfer or credit/debit card.
- P2P Trading: You can buy directly from another user on the platform.
- Deposit Crypto: You can exchange other cryptocurrencies for GBP.
Once you've deposited GBP into your account, you'll have to convert it into USDT. It's a fairly simple process.
However, we’ll be adding USDT directly to your wallet using a credit/debit card.
- First, you need to open the Binance app and tap on the search bar.
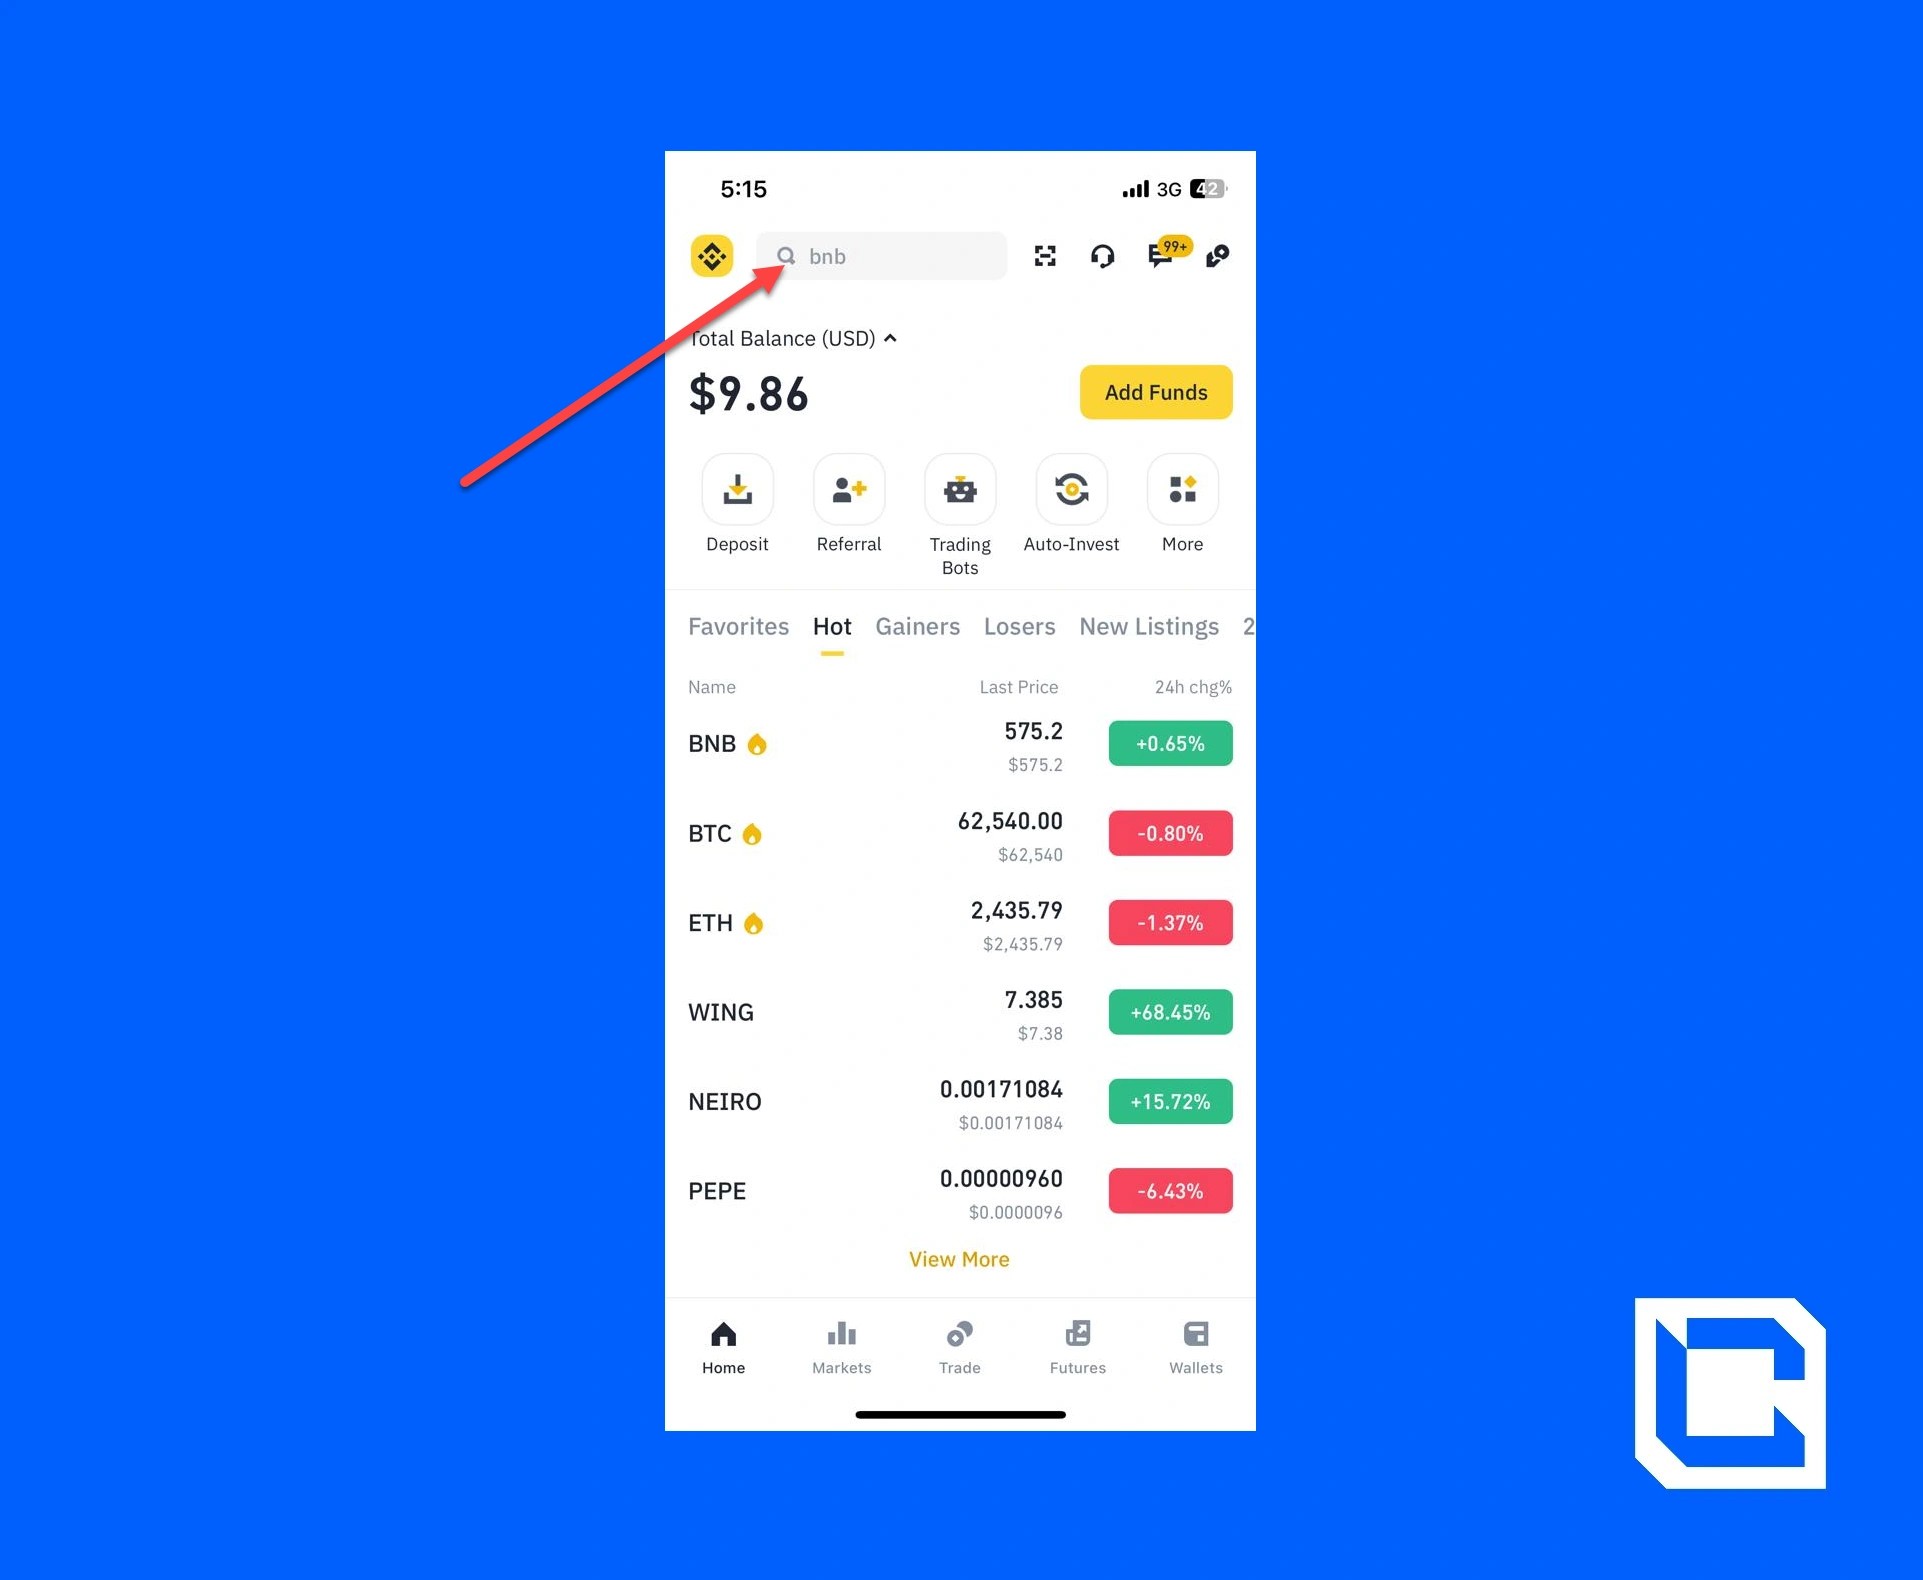
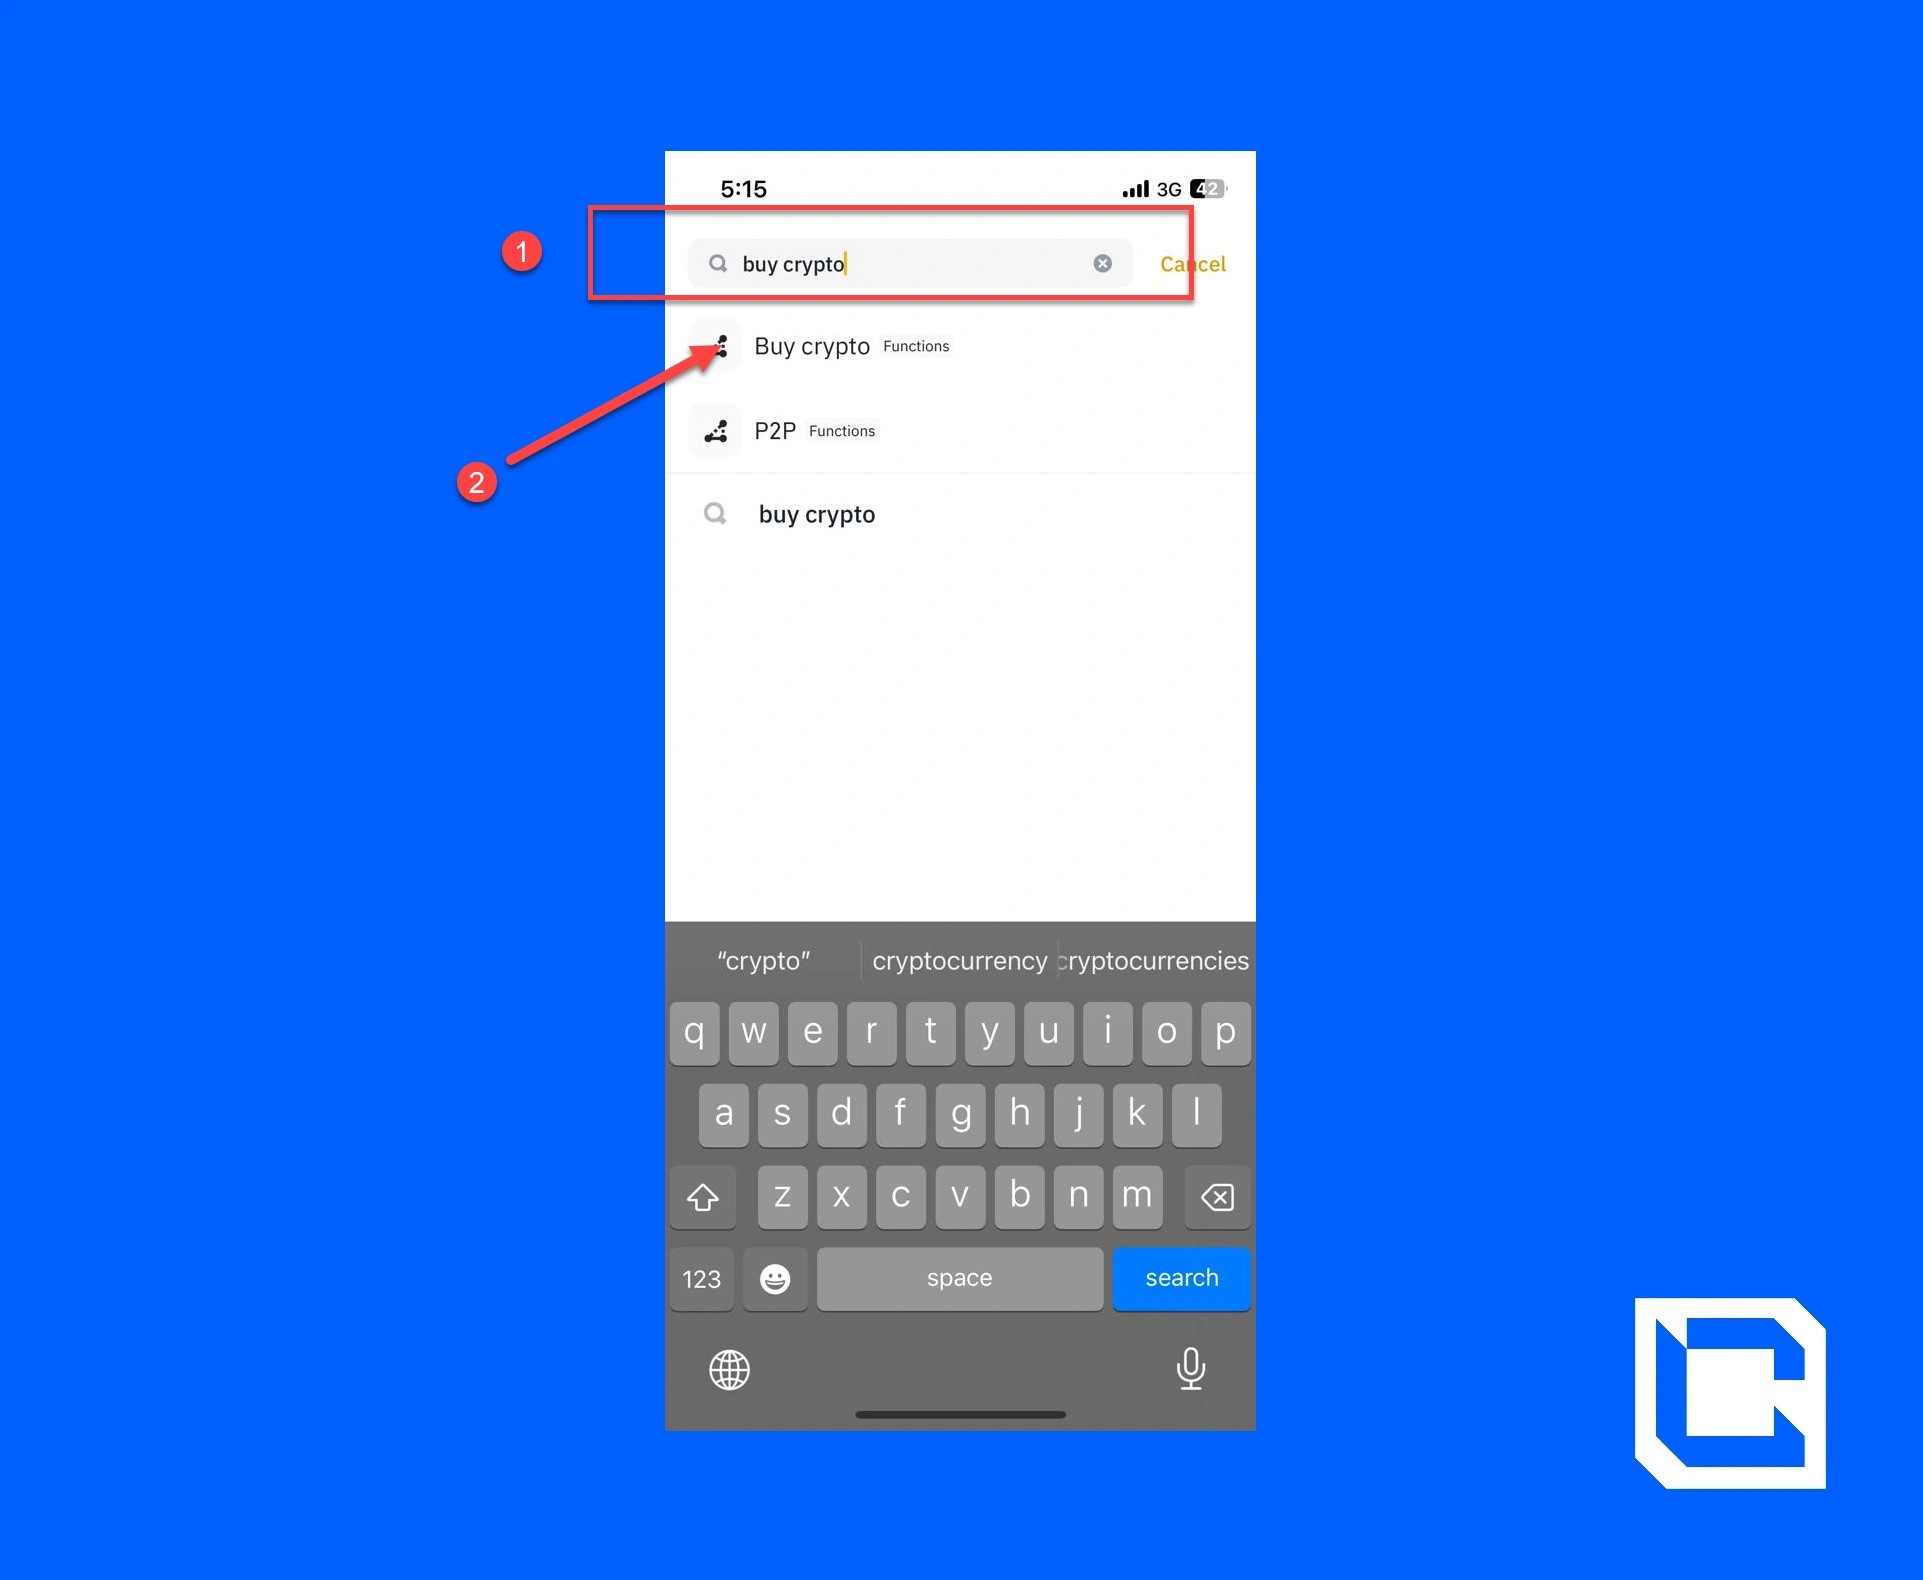
- Search for “Buy Crypto” and tap on it.
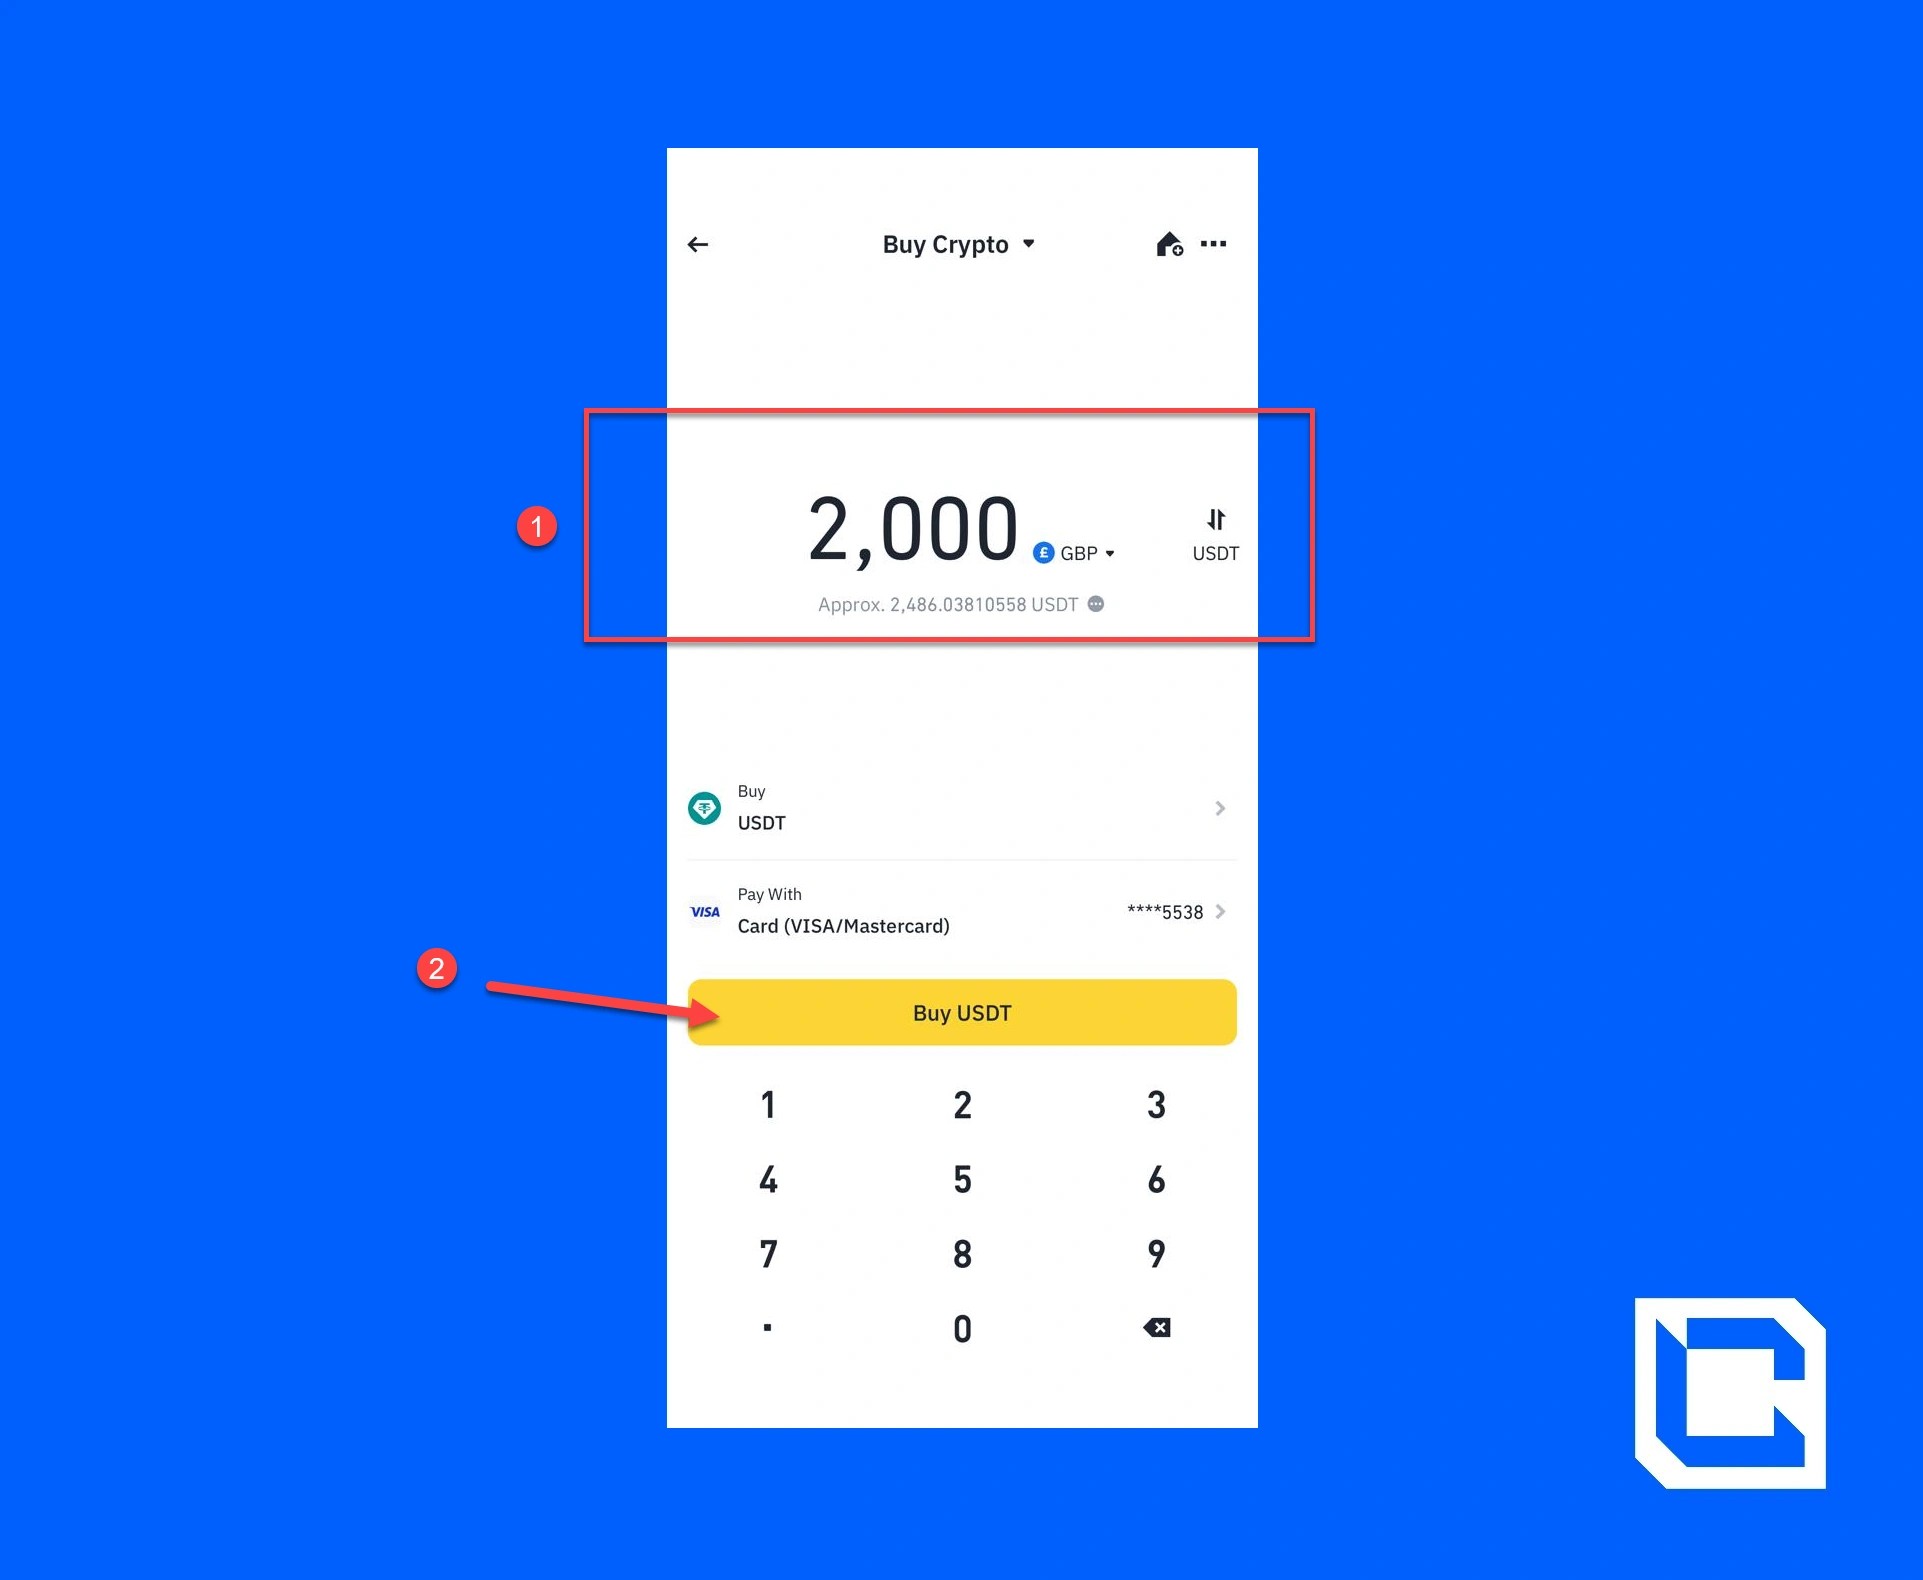
- Make sure that the crypto you want to buy is set to USDT.

- Enter the GBP you want to spend, select the payment method of credit/debit card, and tap on the “Buy USDT” button.
Step 4: Buying Ethereum (ETH)
Now that your Binance account is ready, we can proceed with learning how to buy Ethereum. The first step is to verify you have USDT in your wallet.- Go to the “Wallet” section on the bottom corner of your phone.
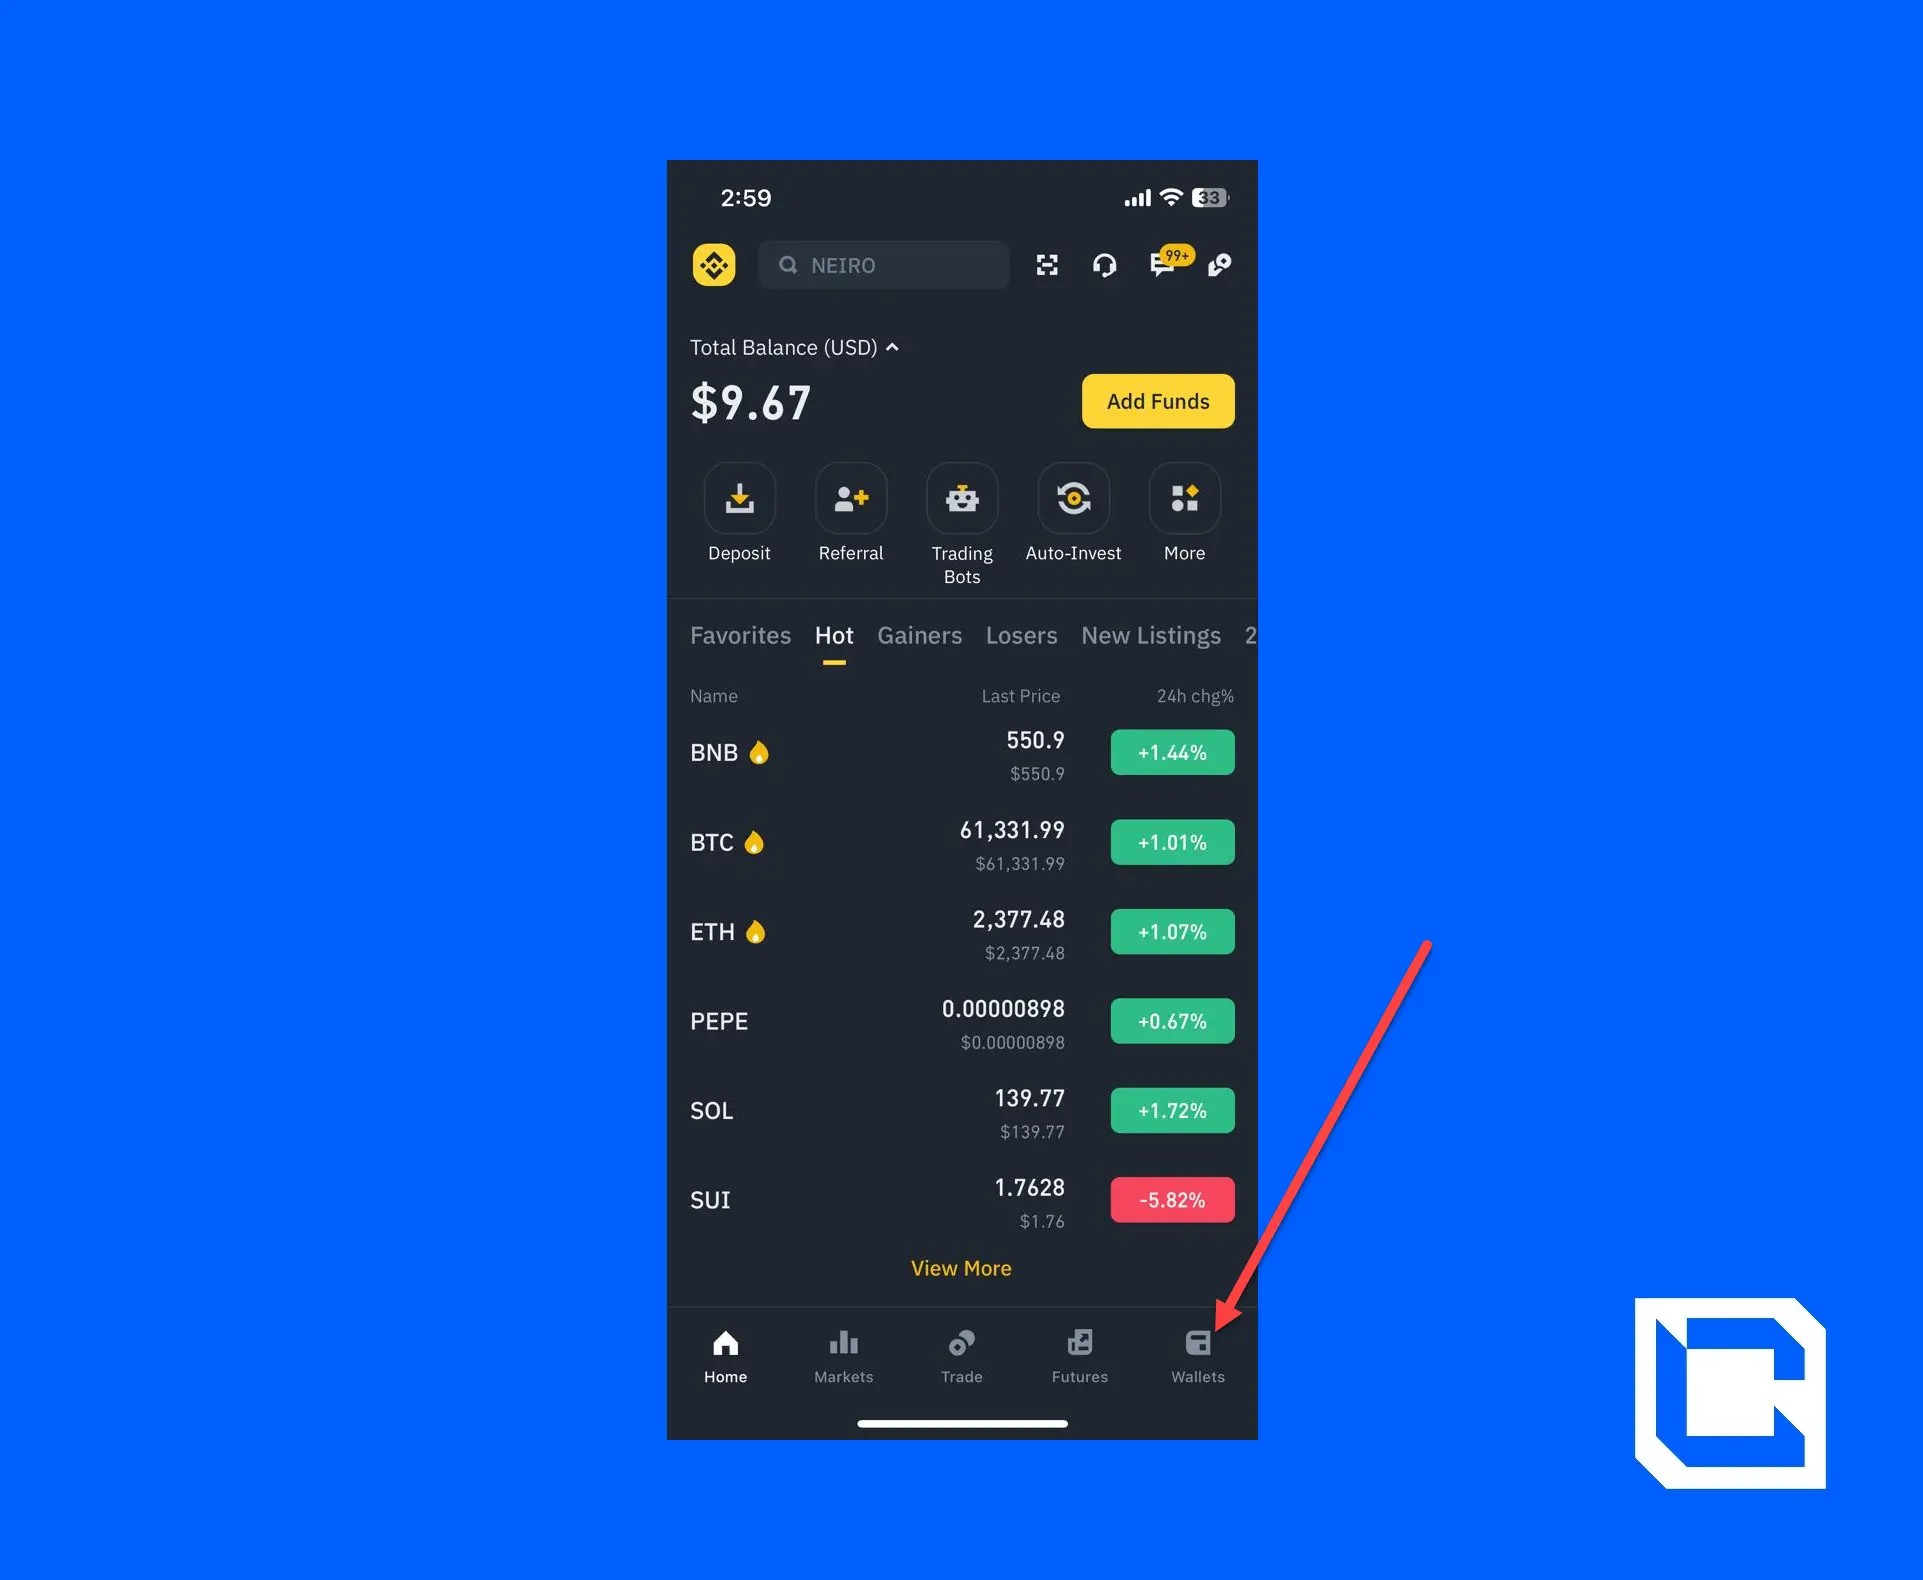
- Check whether or not you have enough USDT.
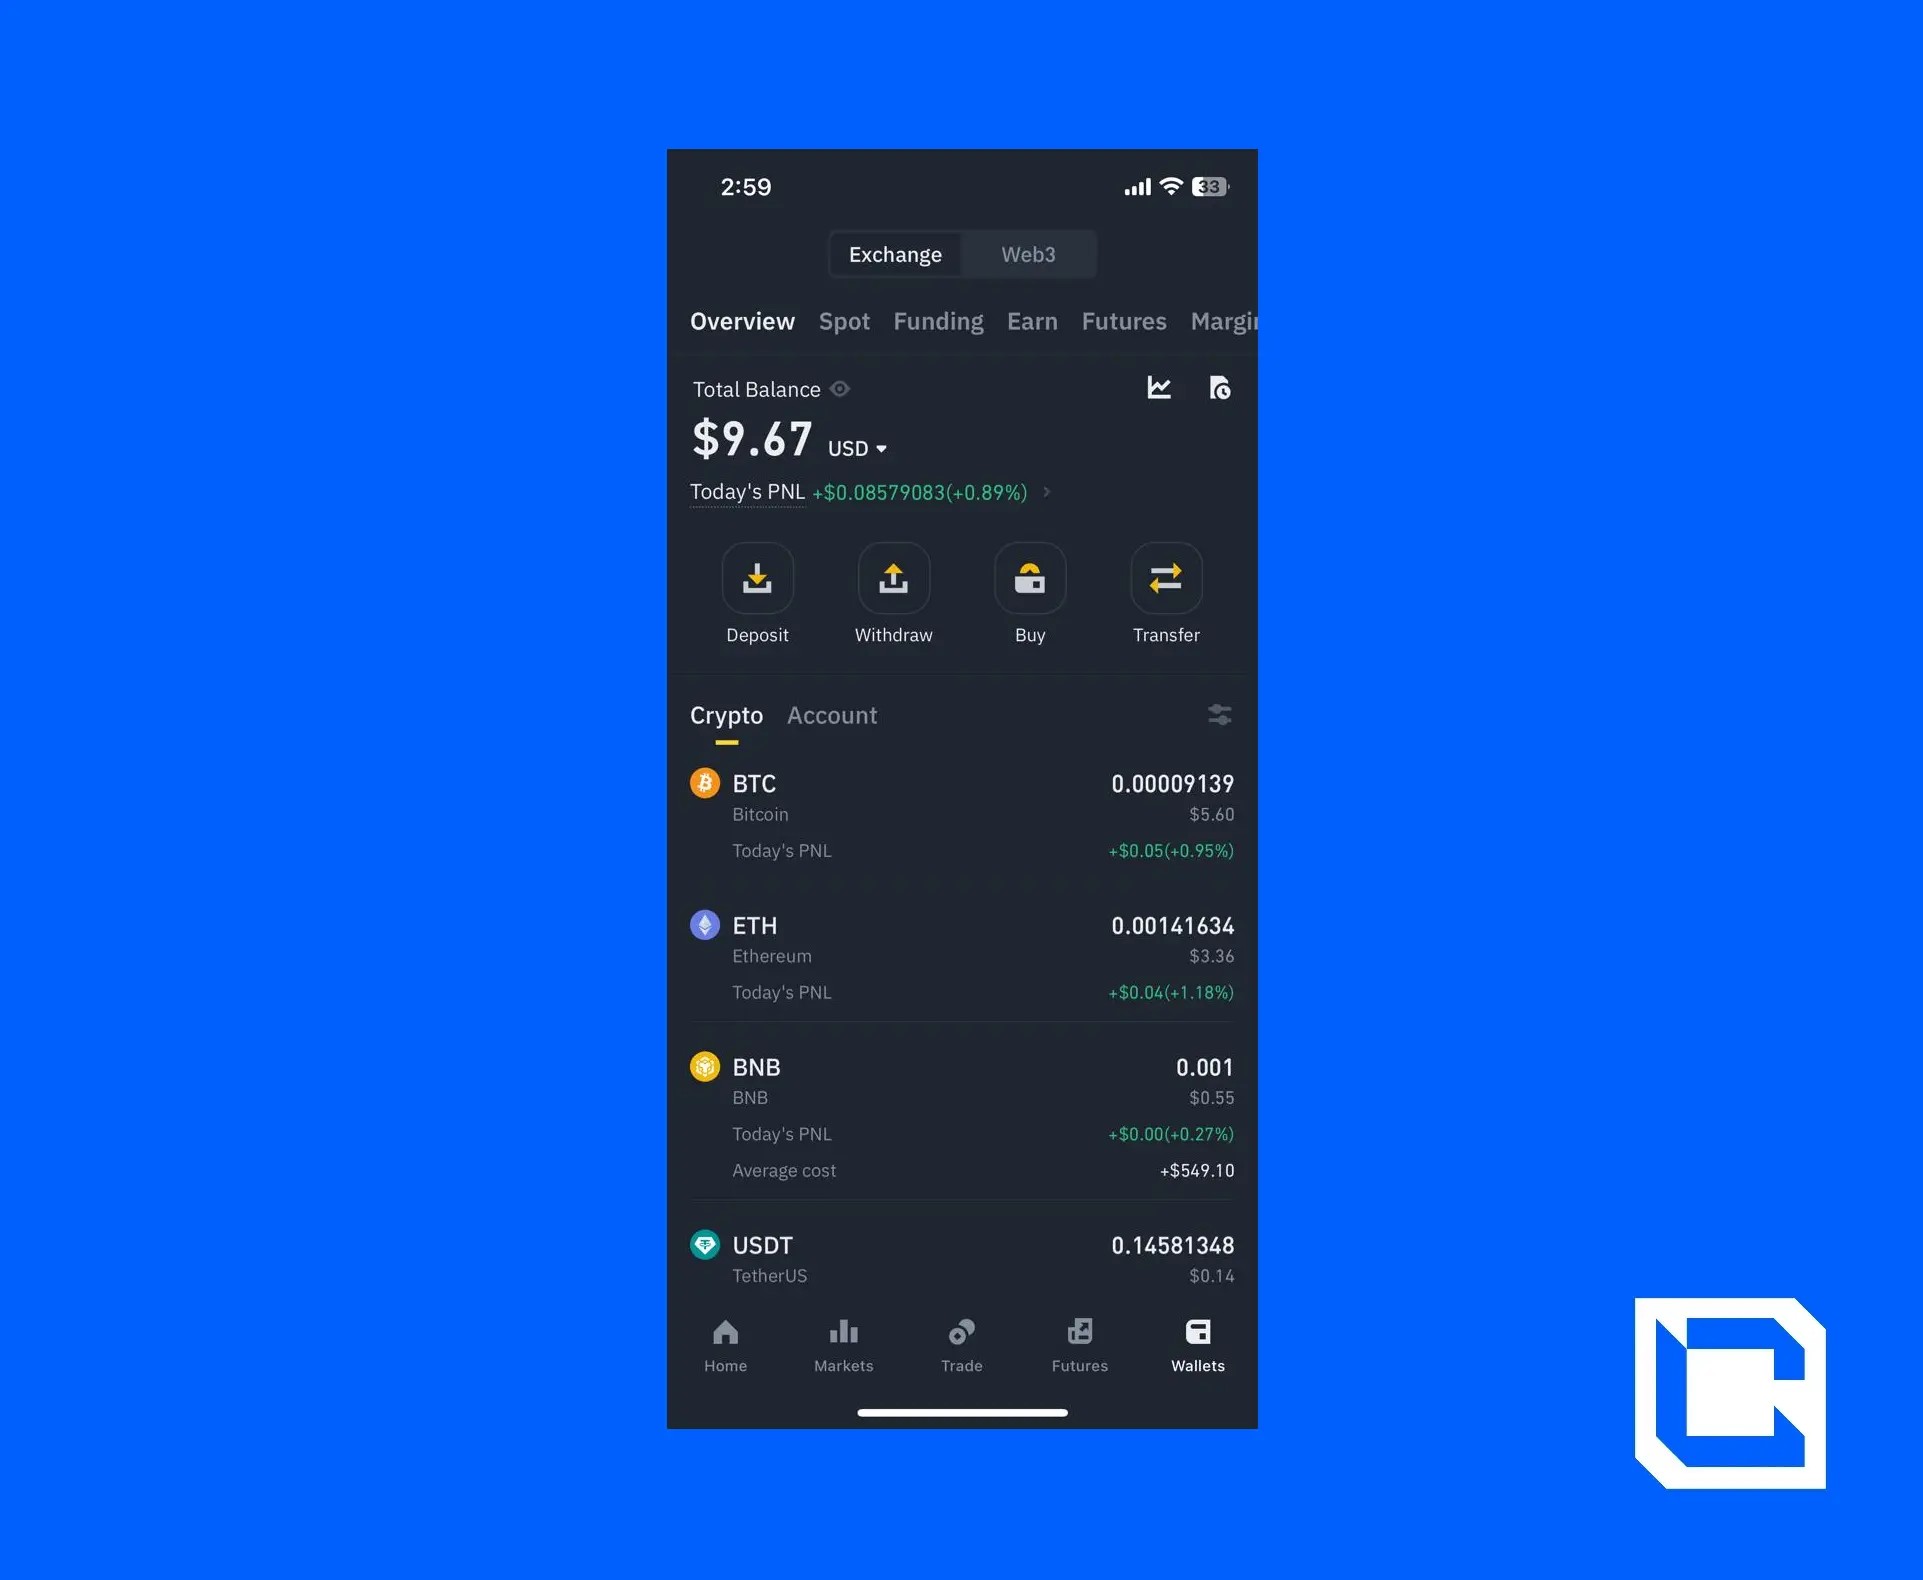
Note: If you don’t have enough USDT, then you’ll need to use your funds to buy some.
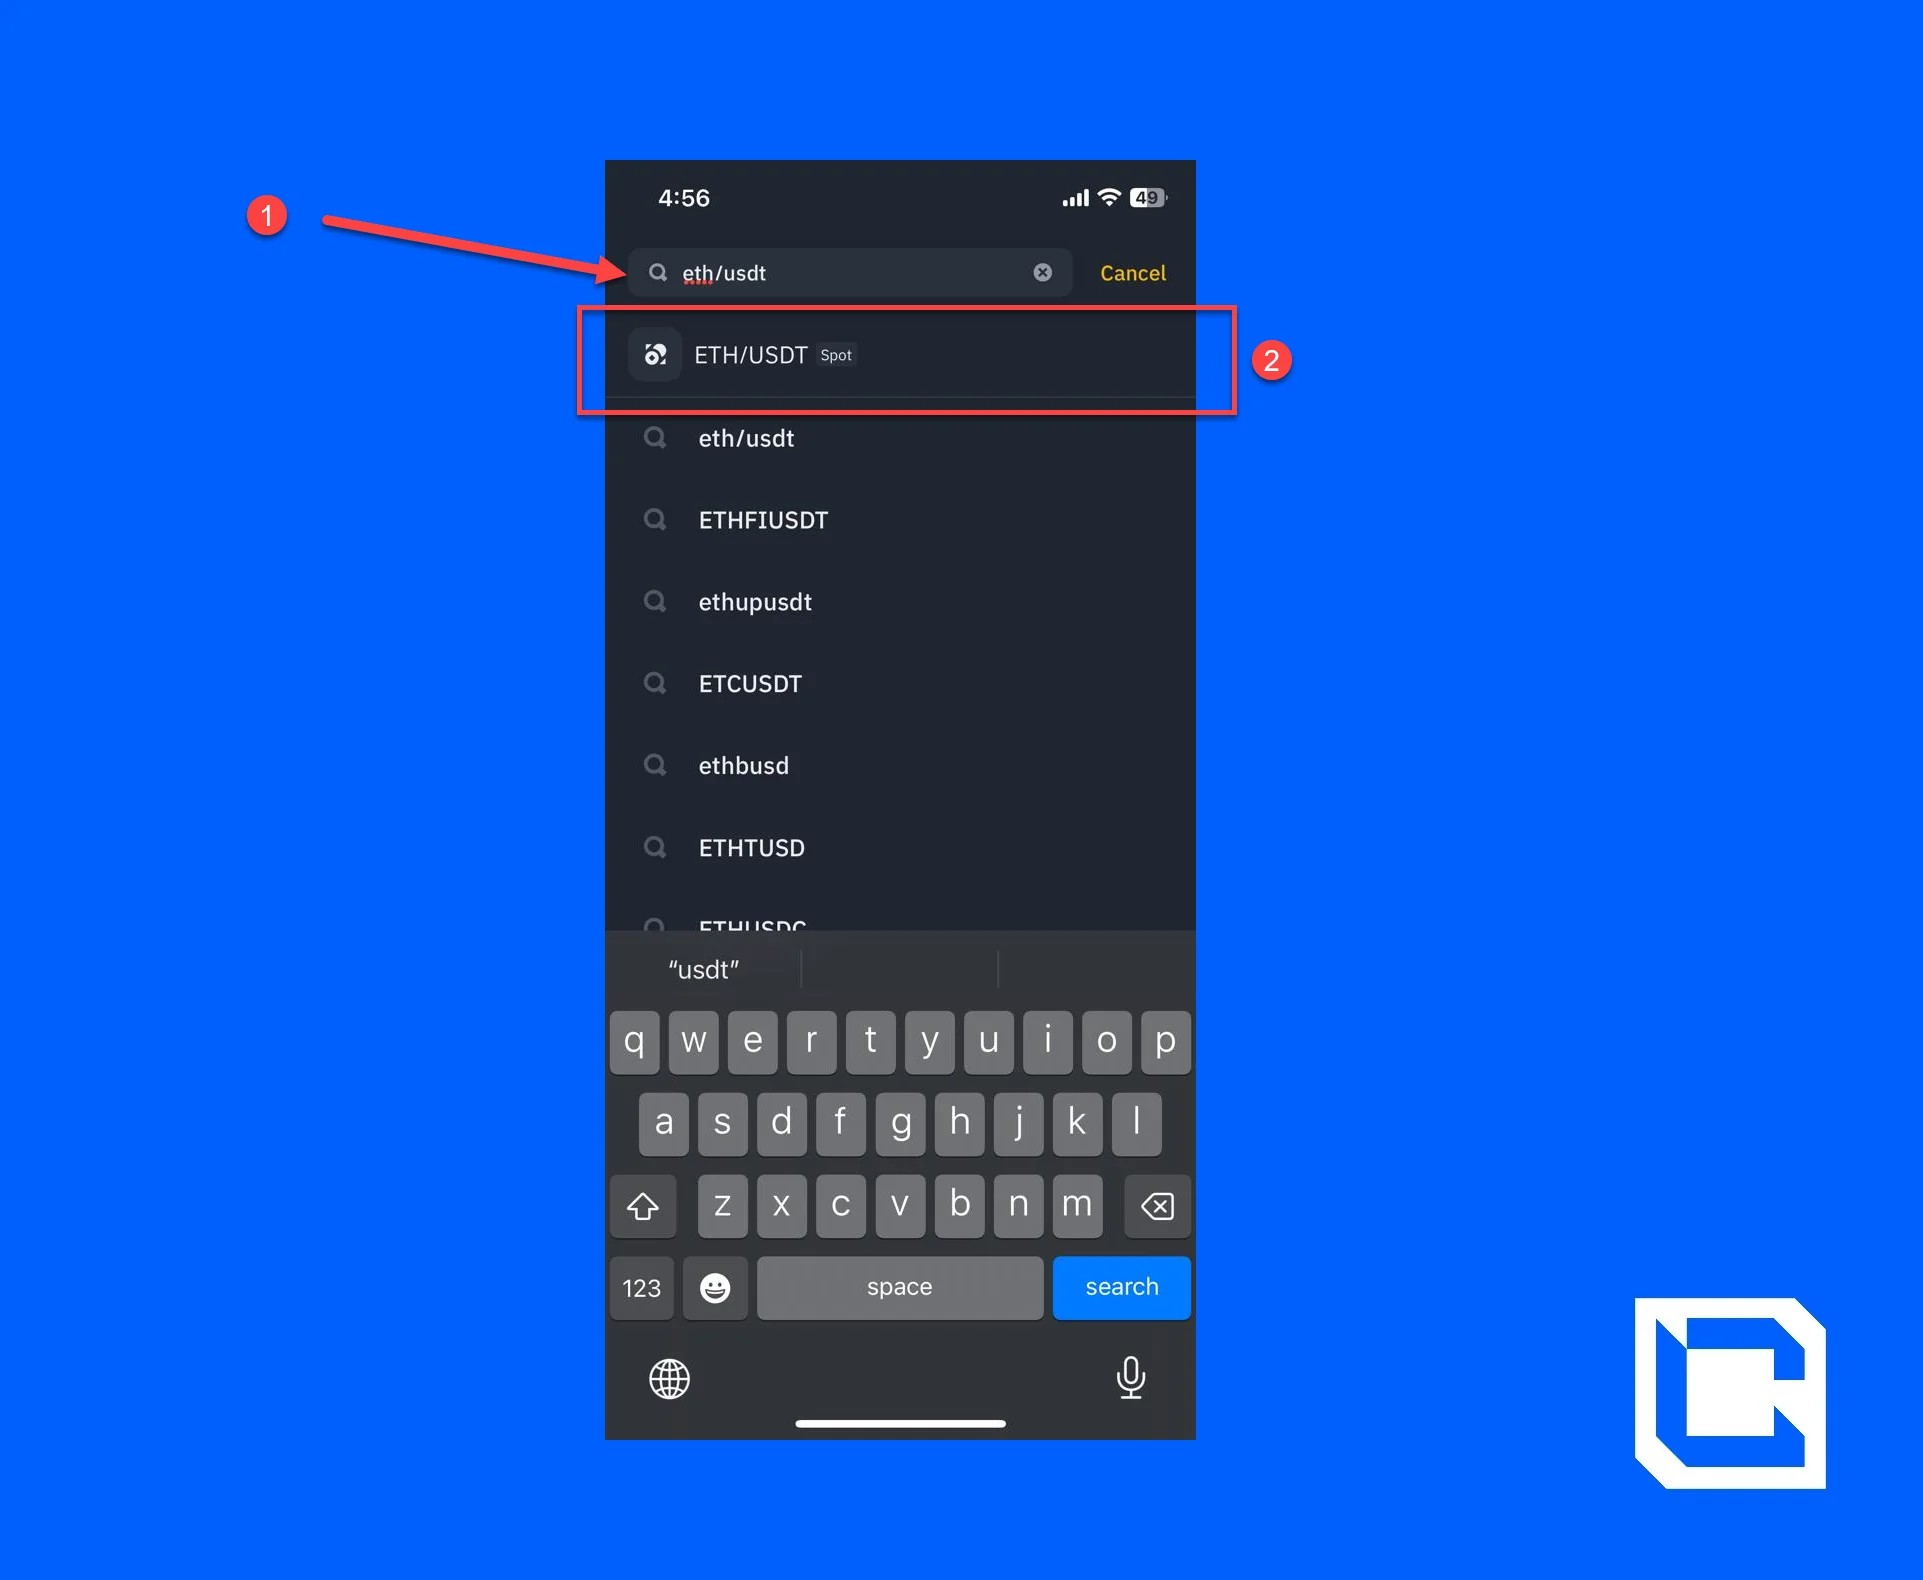
- Now, go to the home page and search for “ETH/USDT” in the search bar.
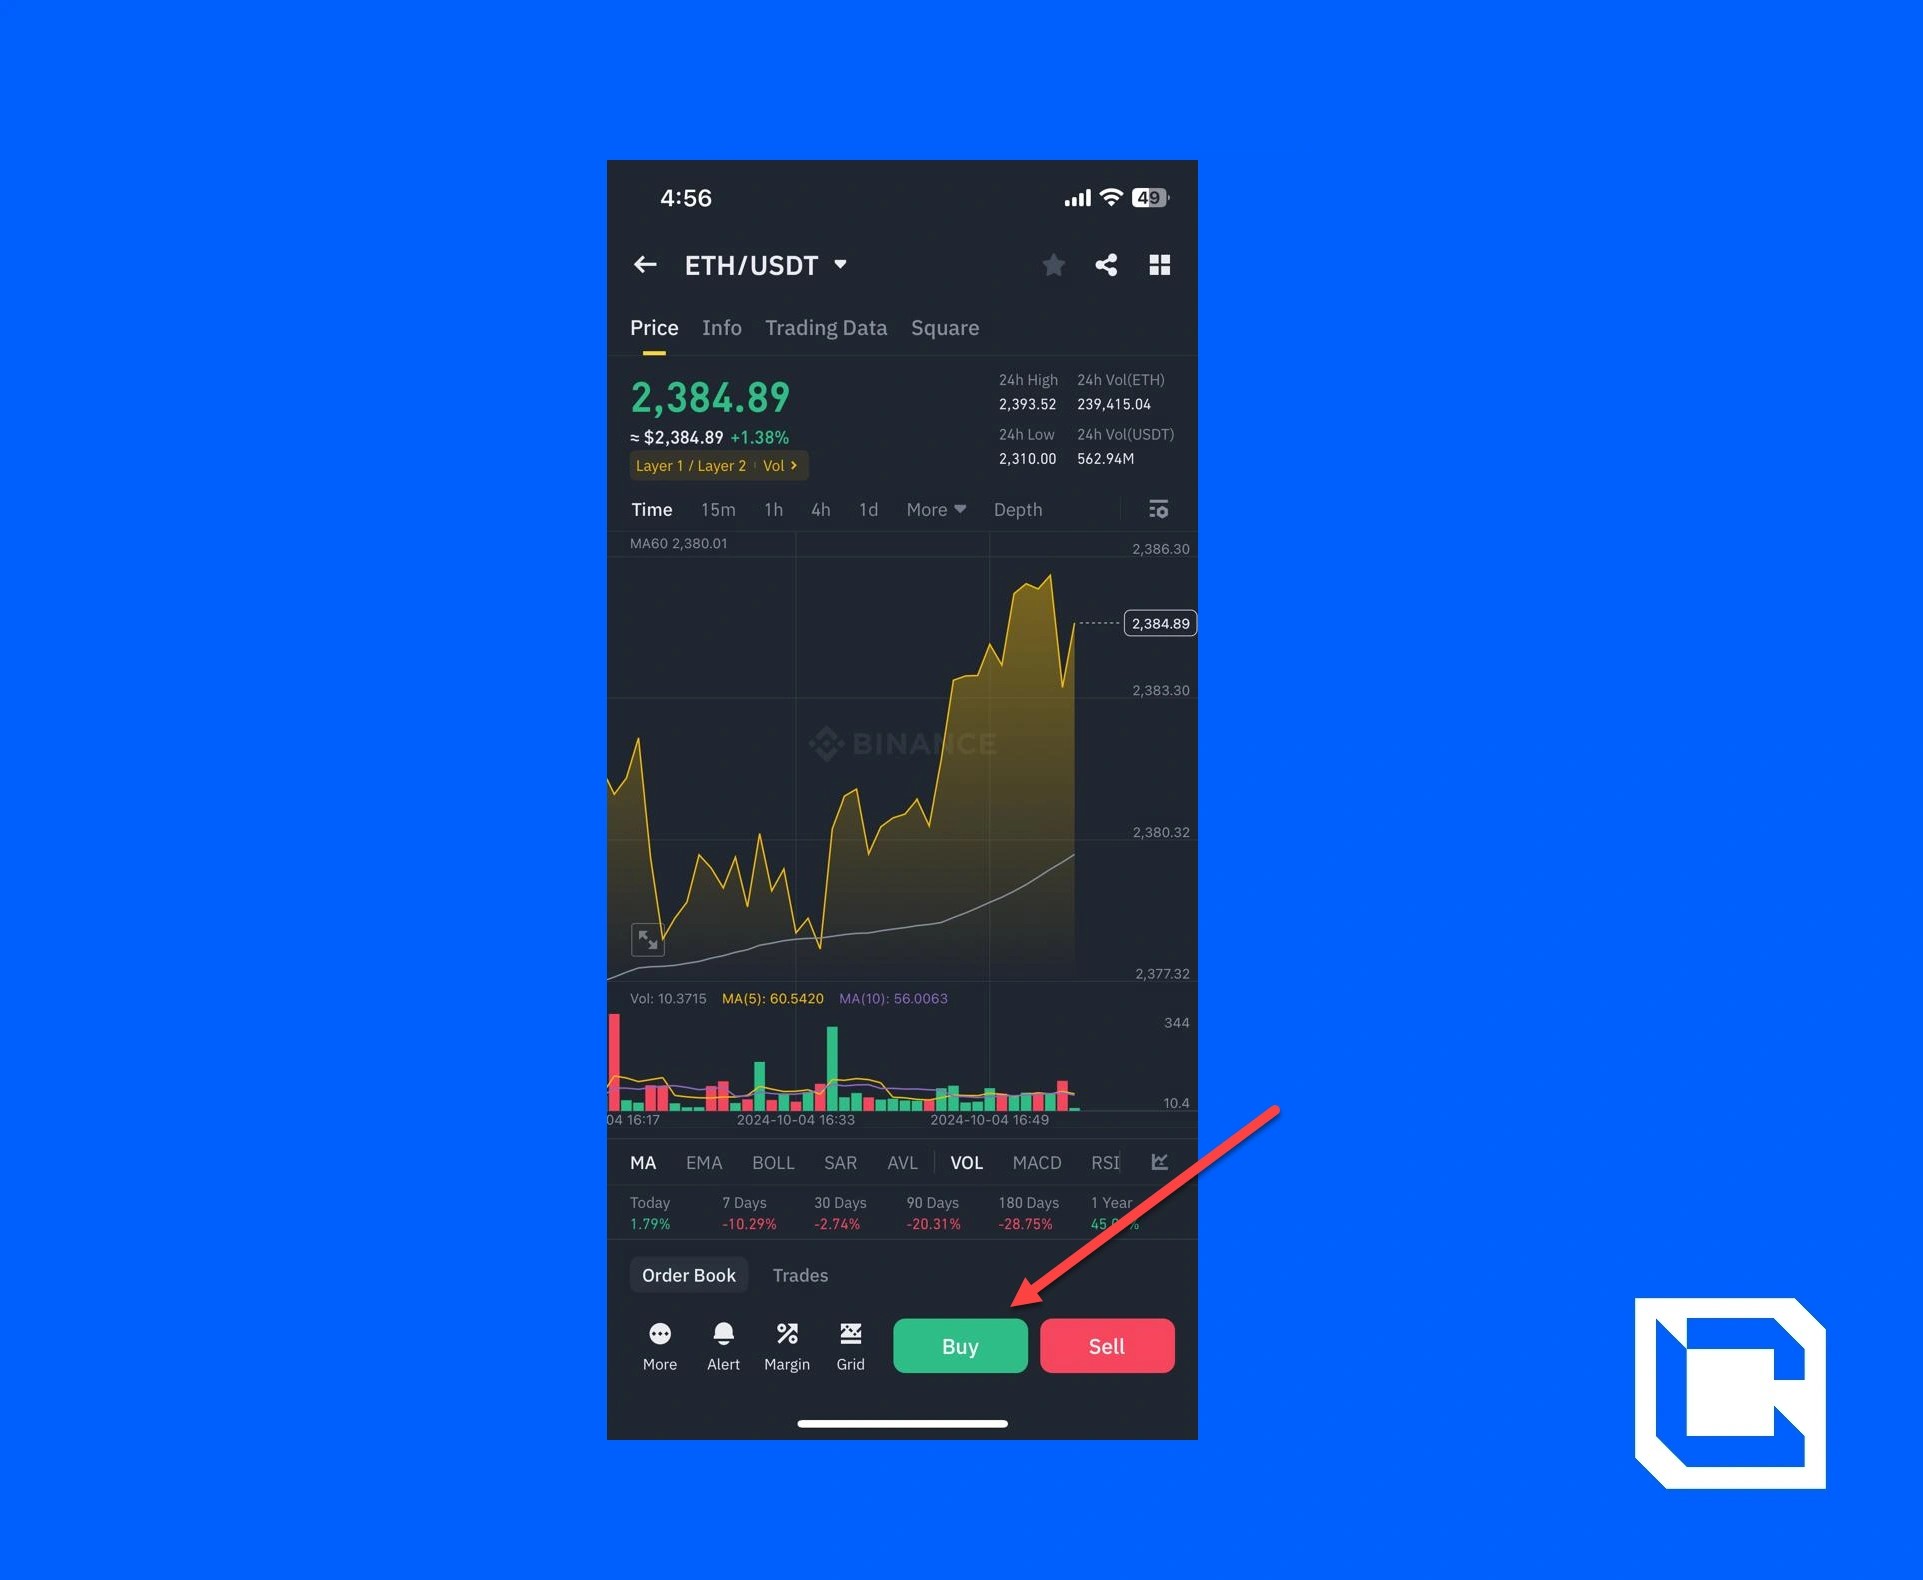
- Tap on the “Buy” button for ETH.
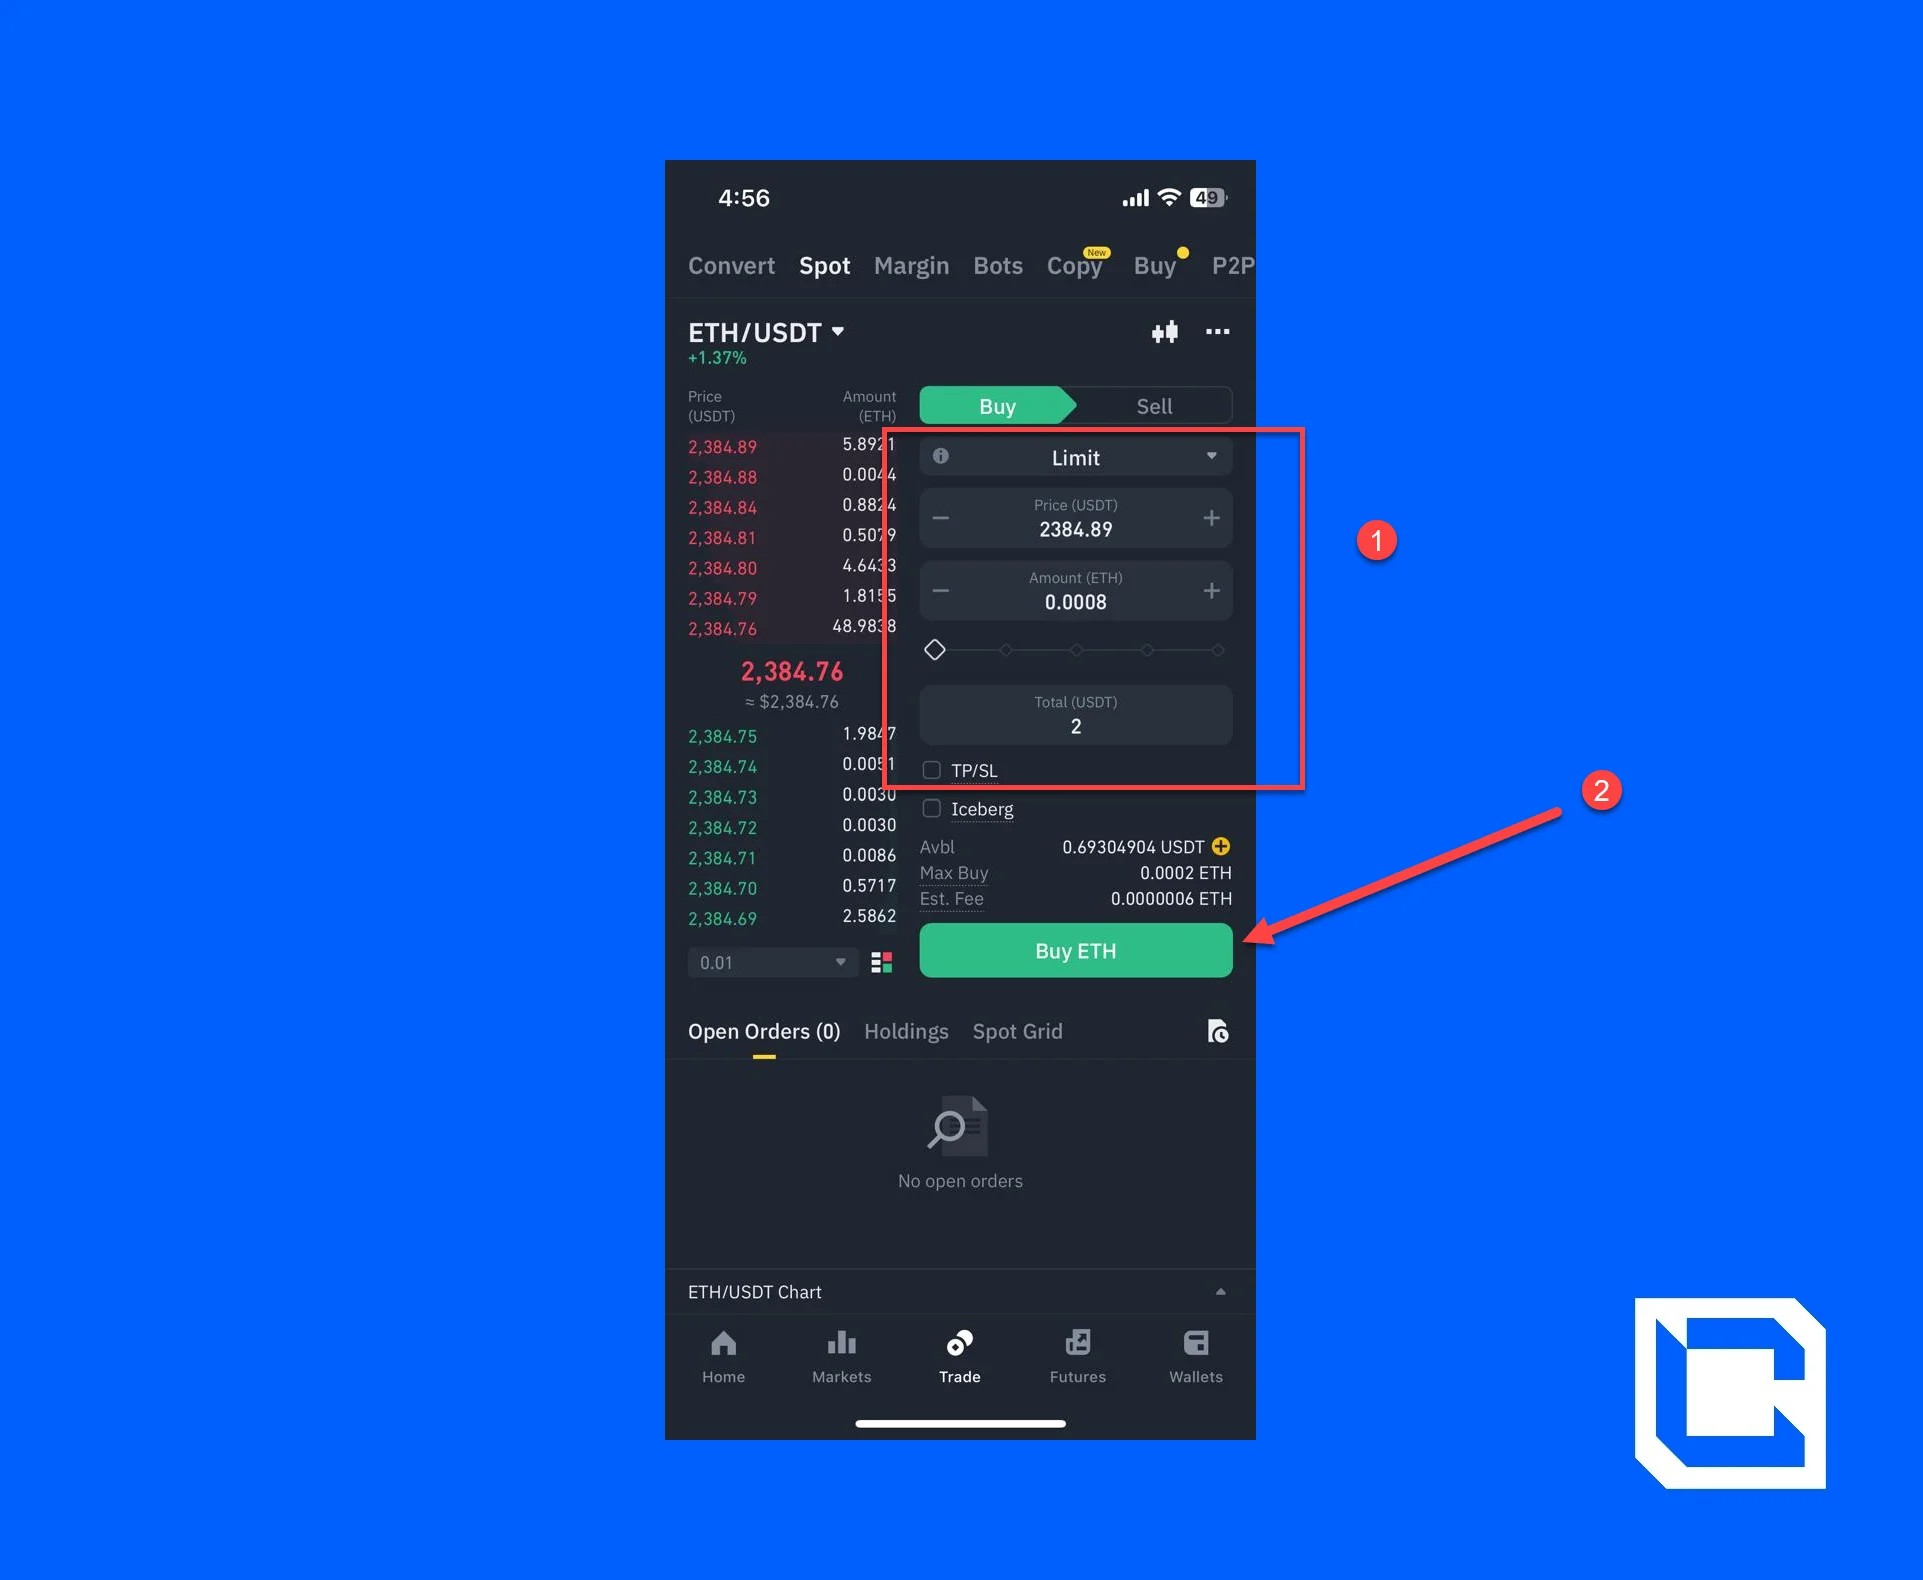
- Add a minimum of 2 USDT to buy ETH and tap the “Buy ETH” button.
Through Phantom Wallet
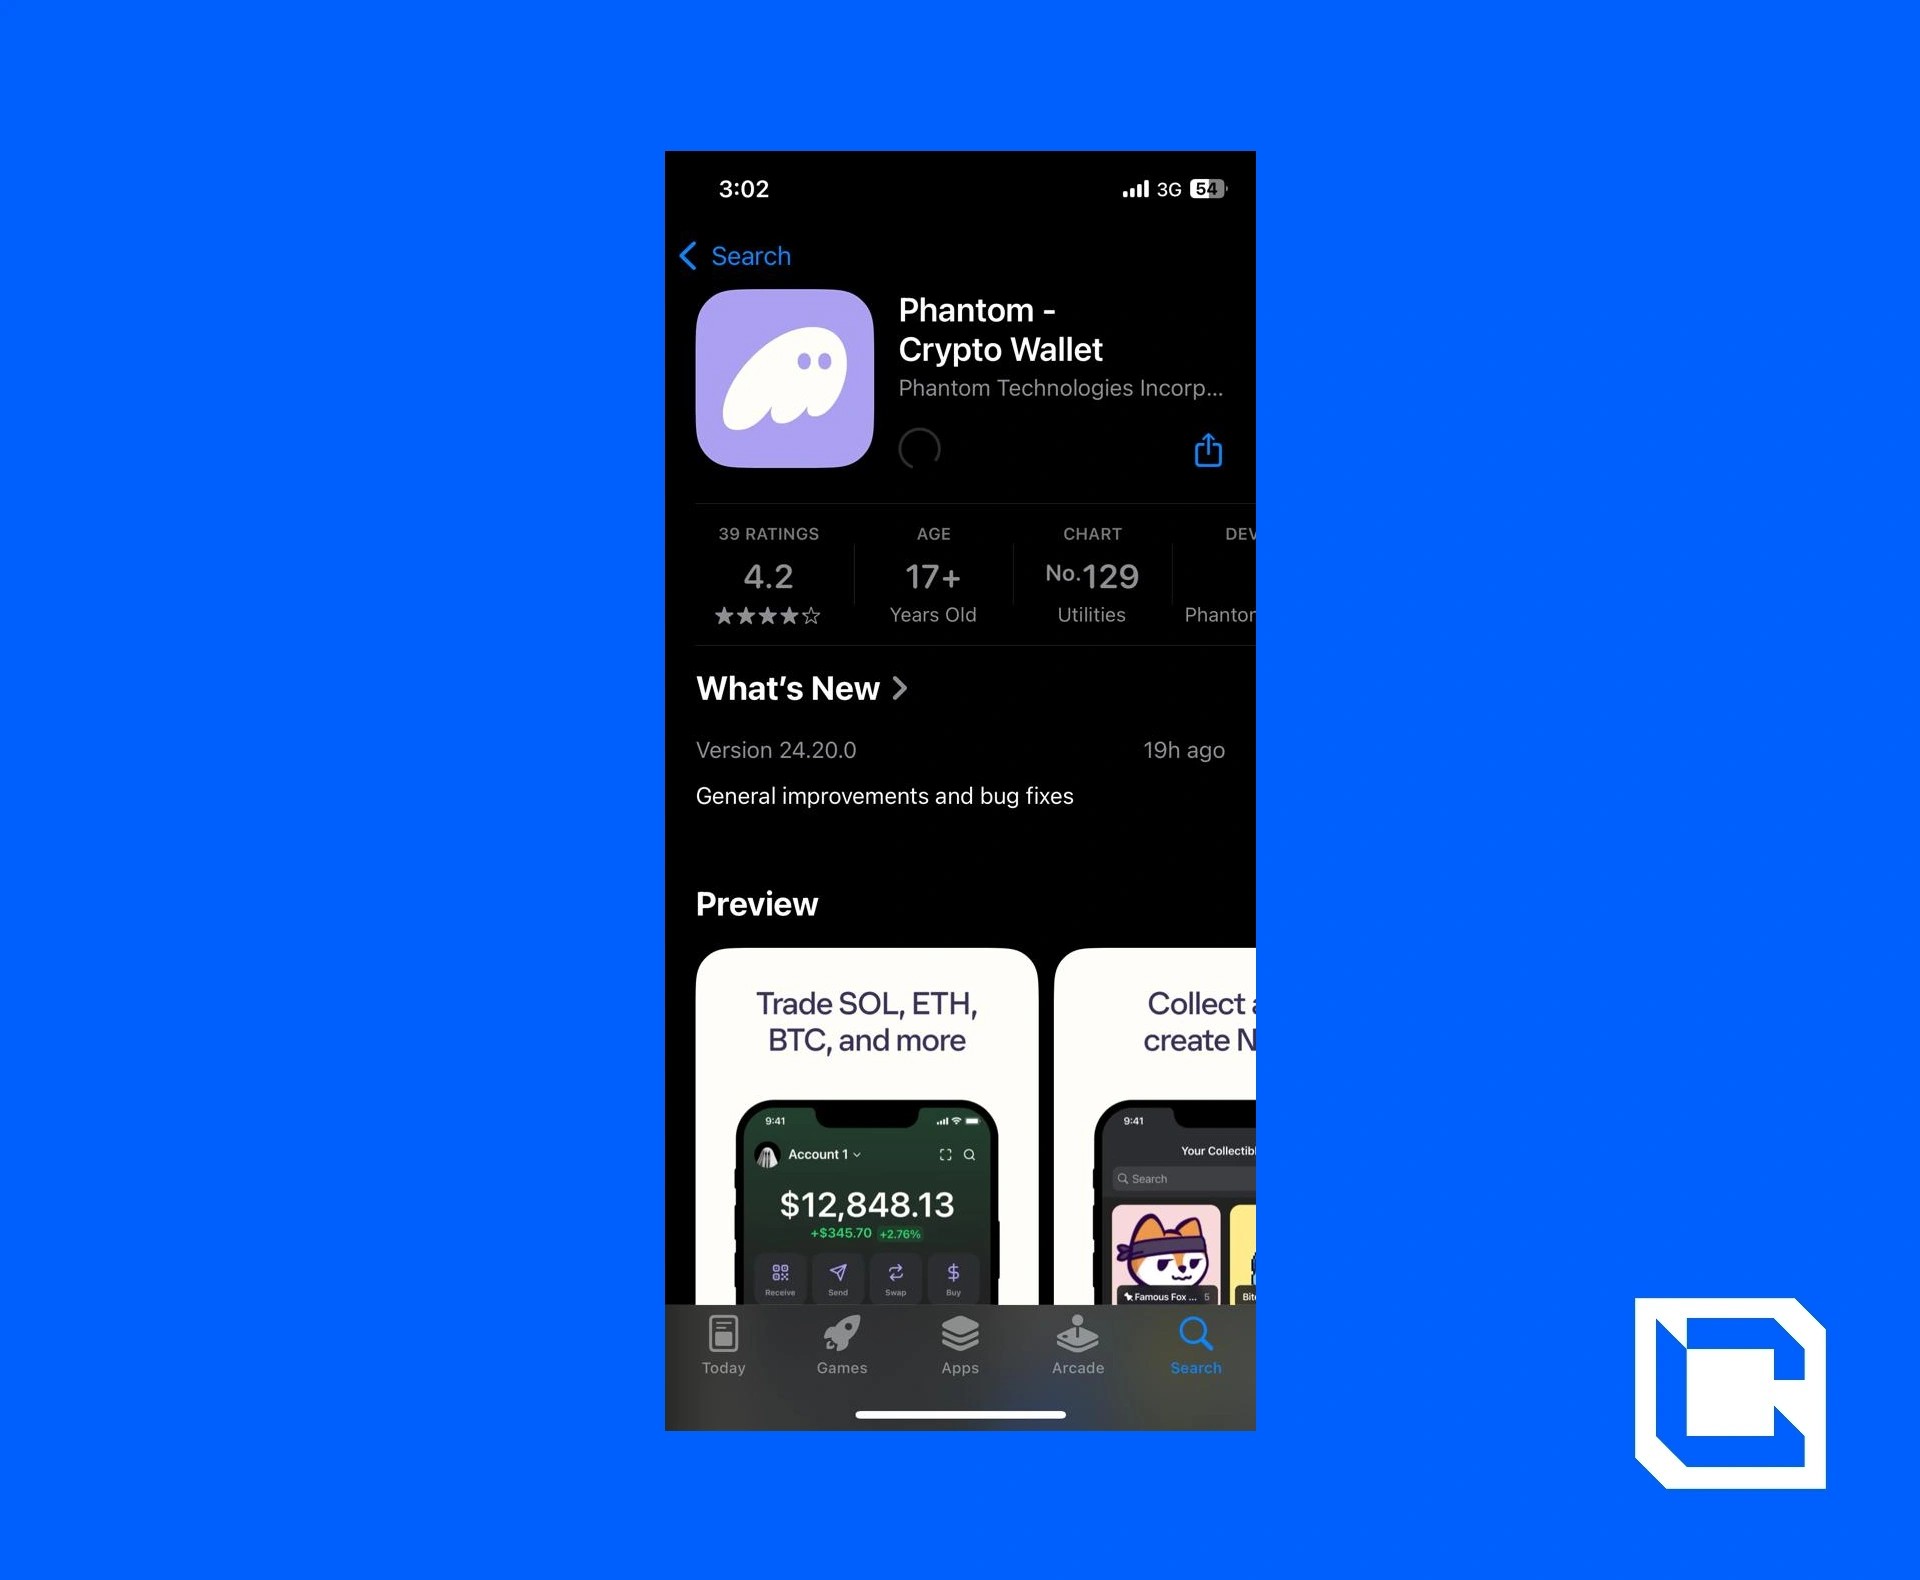
Now, if you want to buy Ethereum using a decentralised blockchain, you should choose a hot wallet to swap USDT for Ethereum. To do this, you need to first install and set up a wallet on Phantom Wallet.- Download the “Phantom Wallet” app to your mobile phone.
- Once downloaded, open the app and agree to the terms of service. After that, tap on the “Create a new wallet” button.
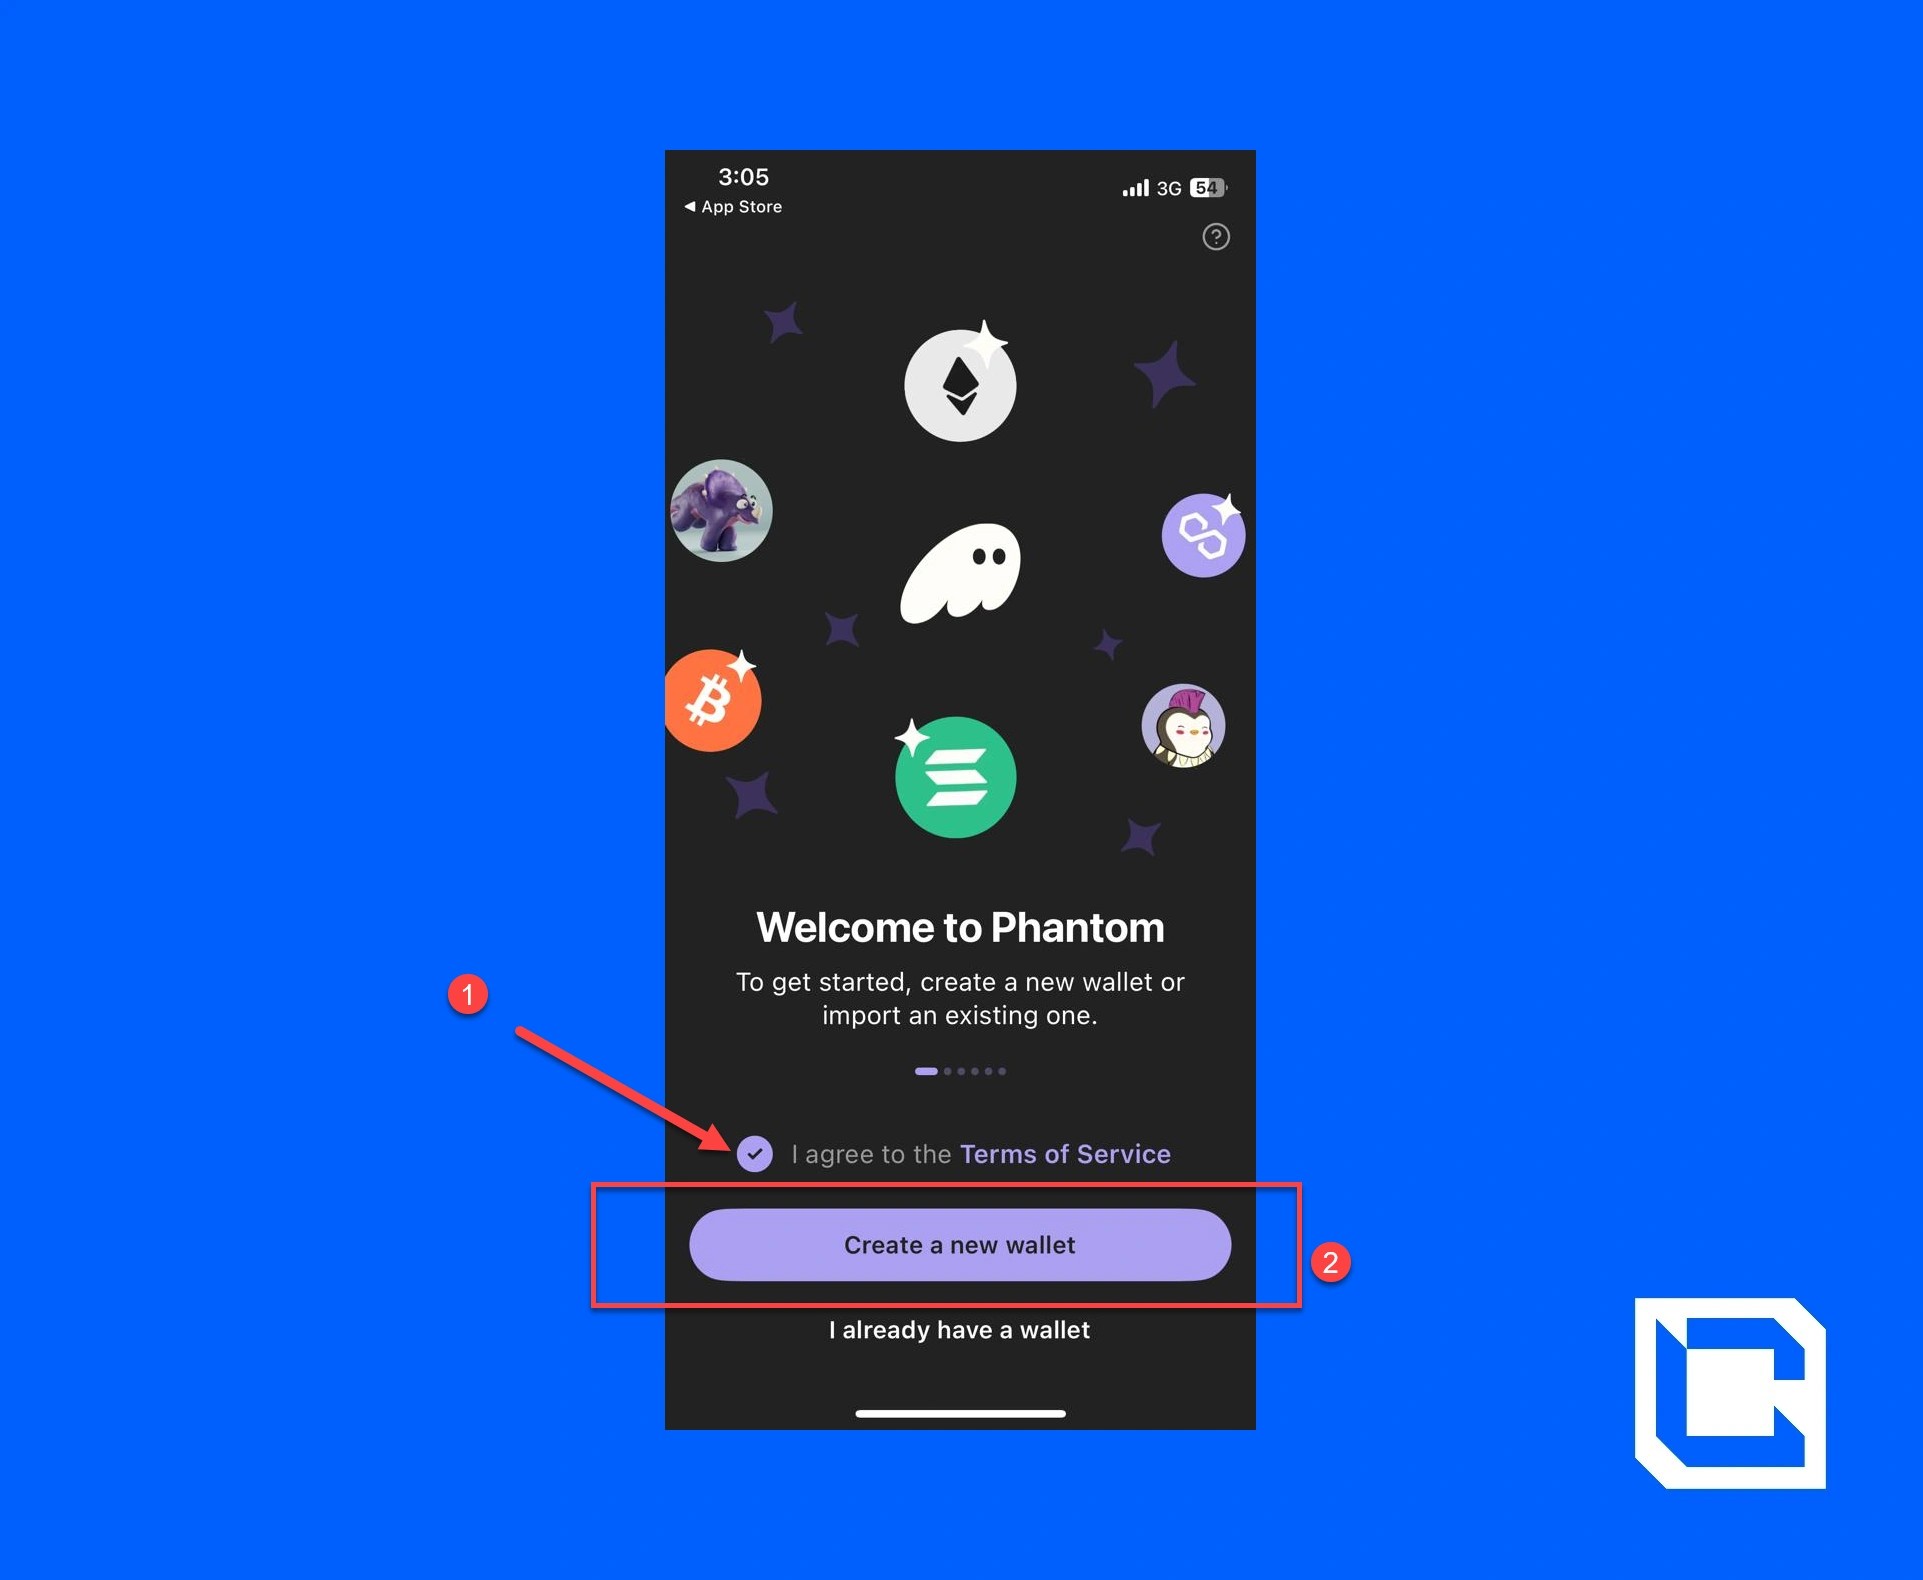
Note: If you already have an account, then simply tap on the “I already have a wallet” option.
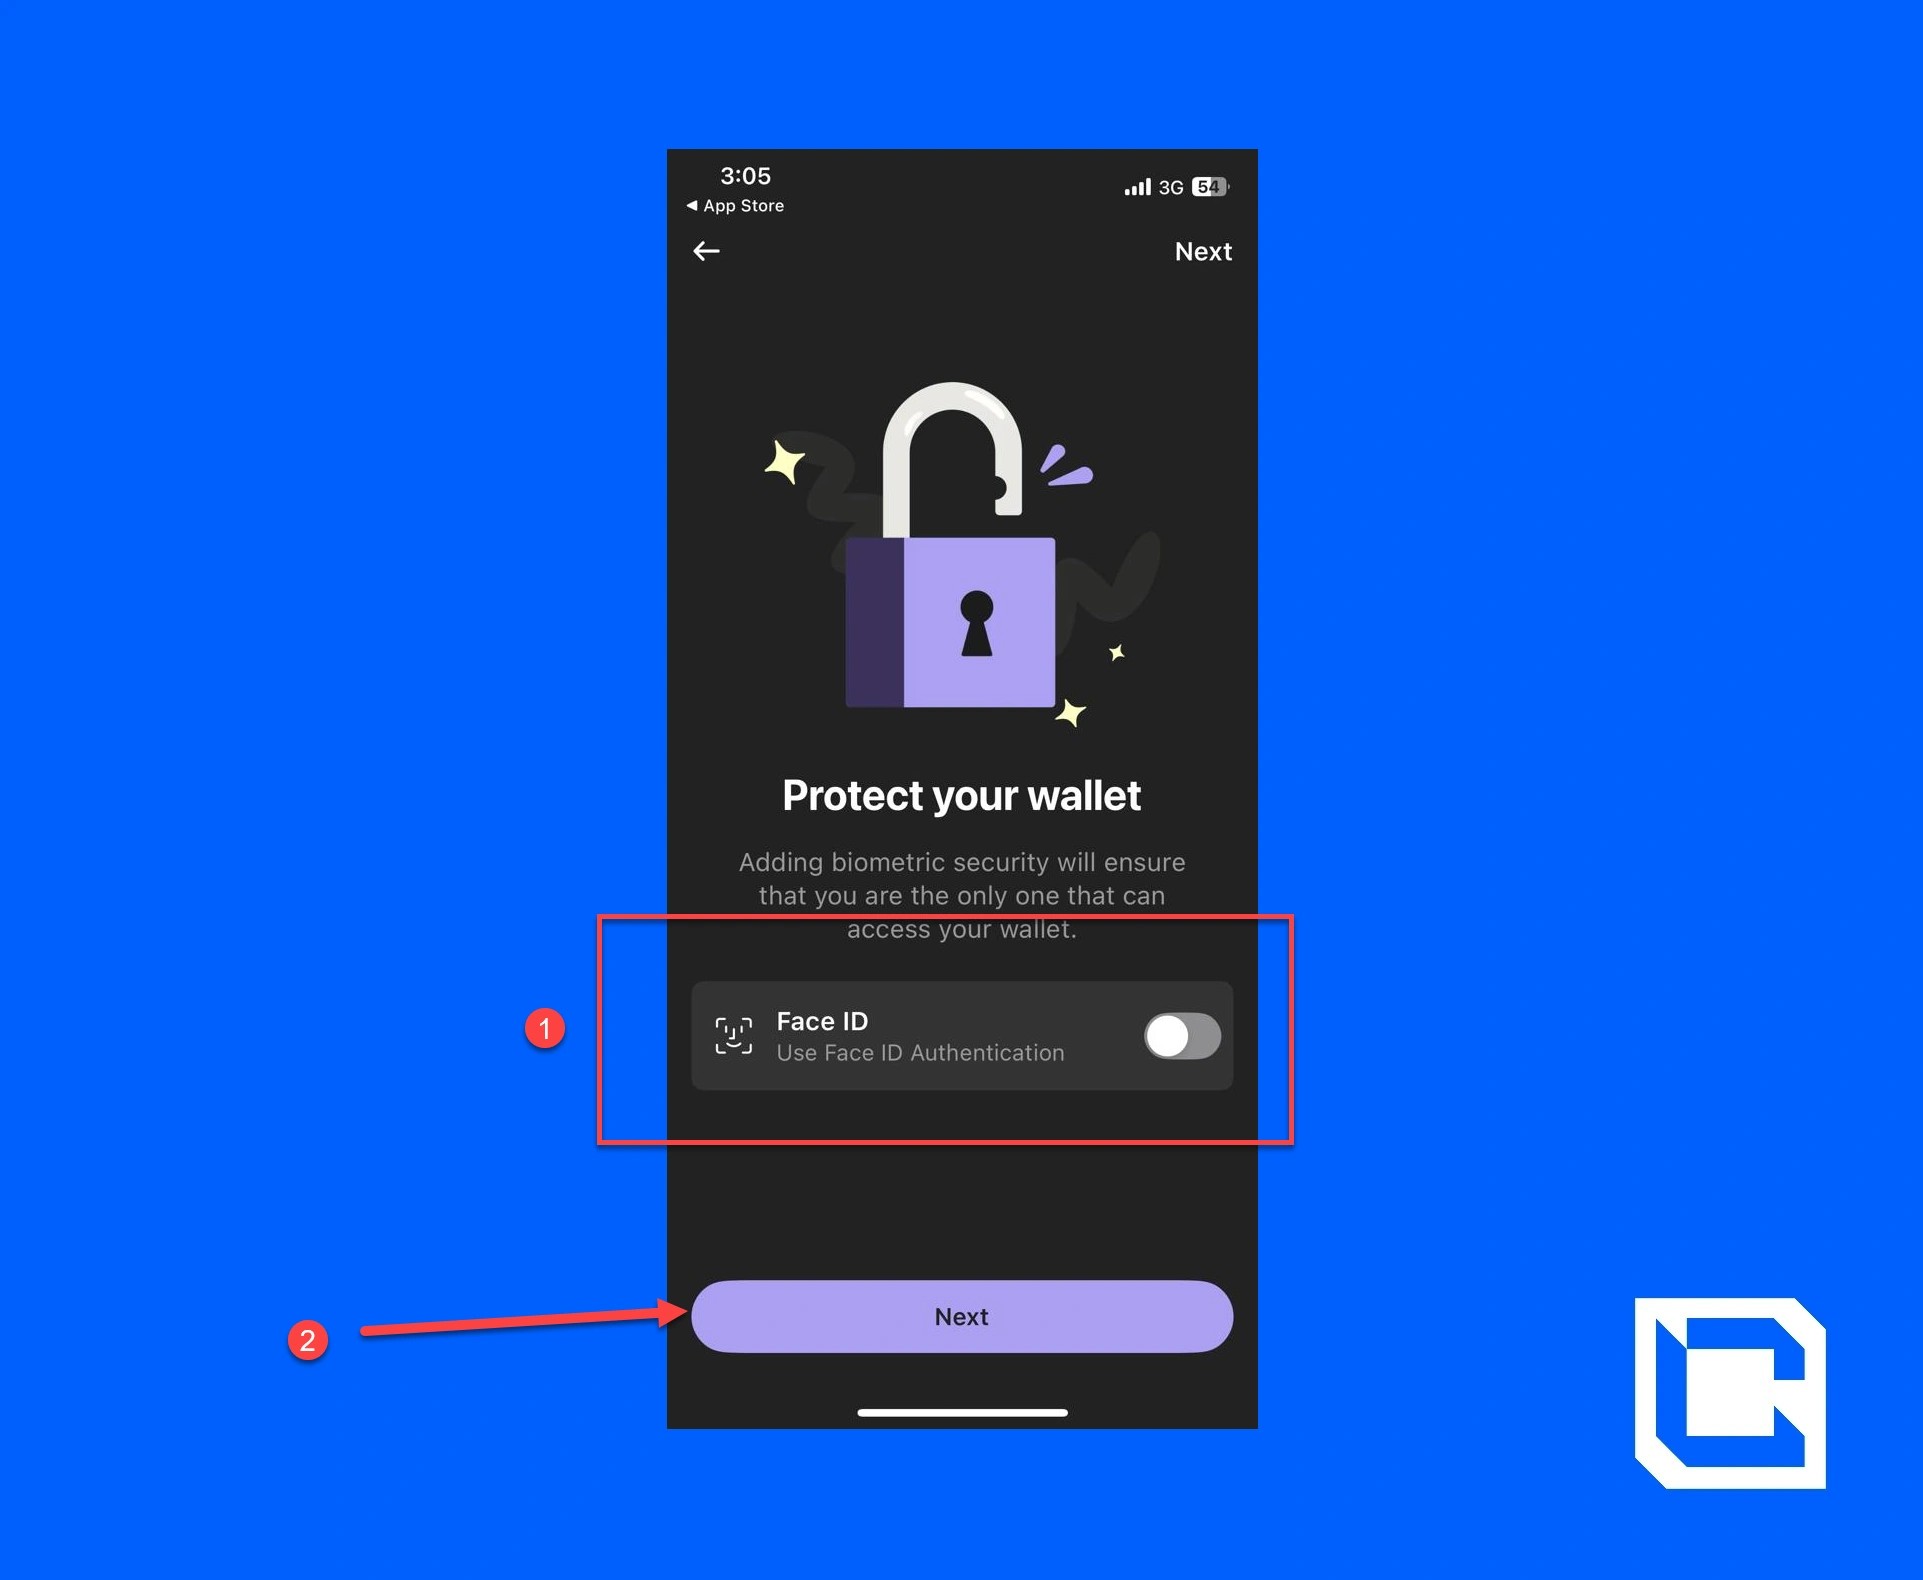
- Toggle the “Face ID” switch to on and tap the “Next” button.
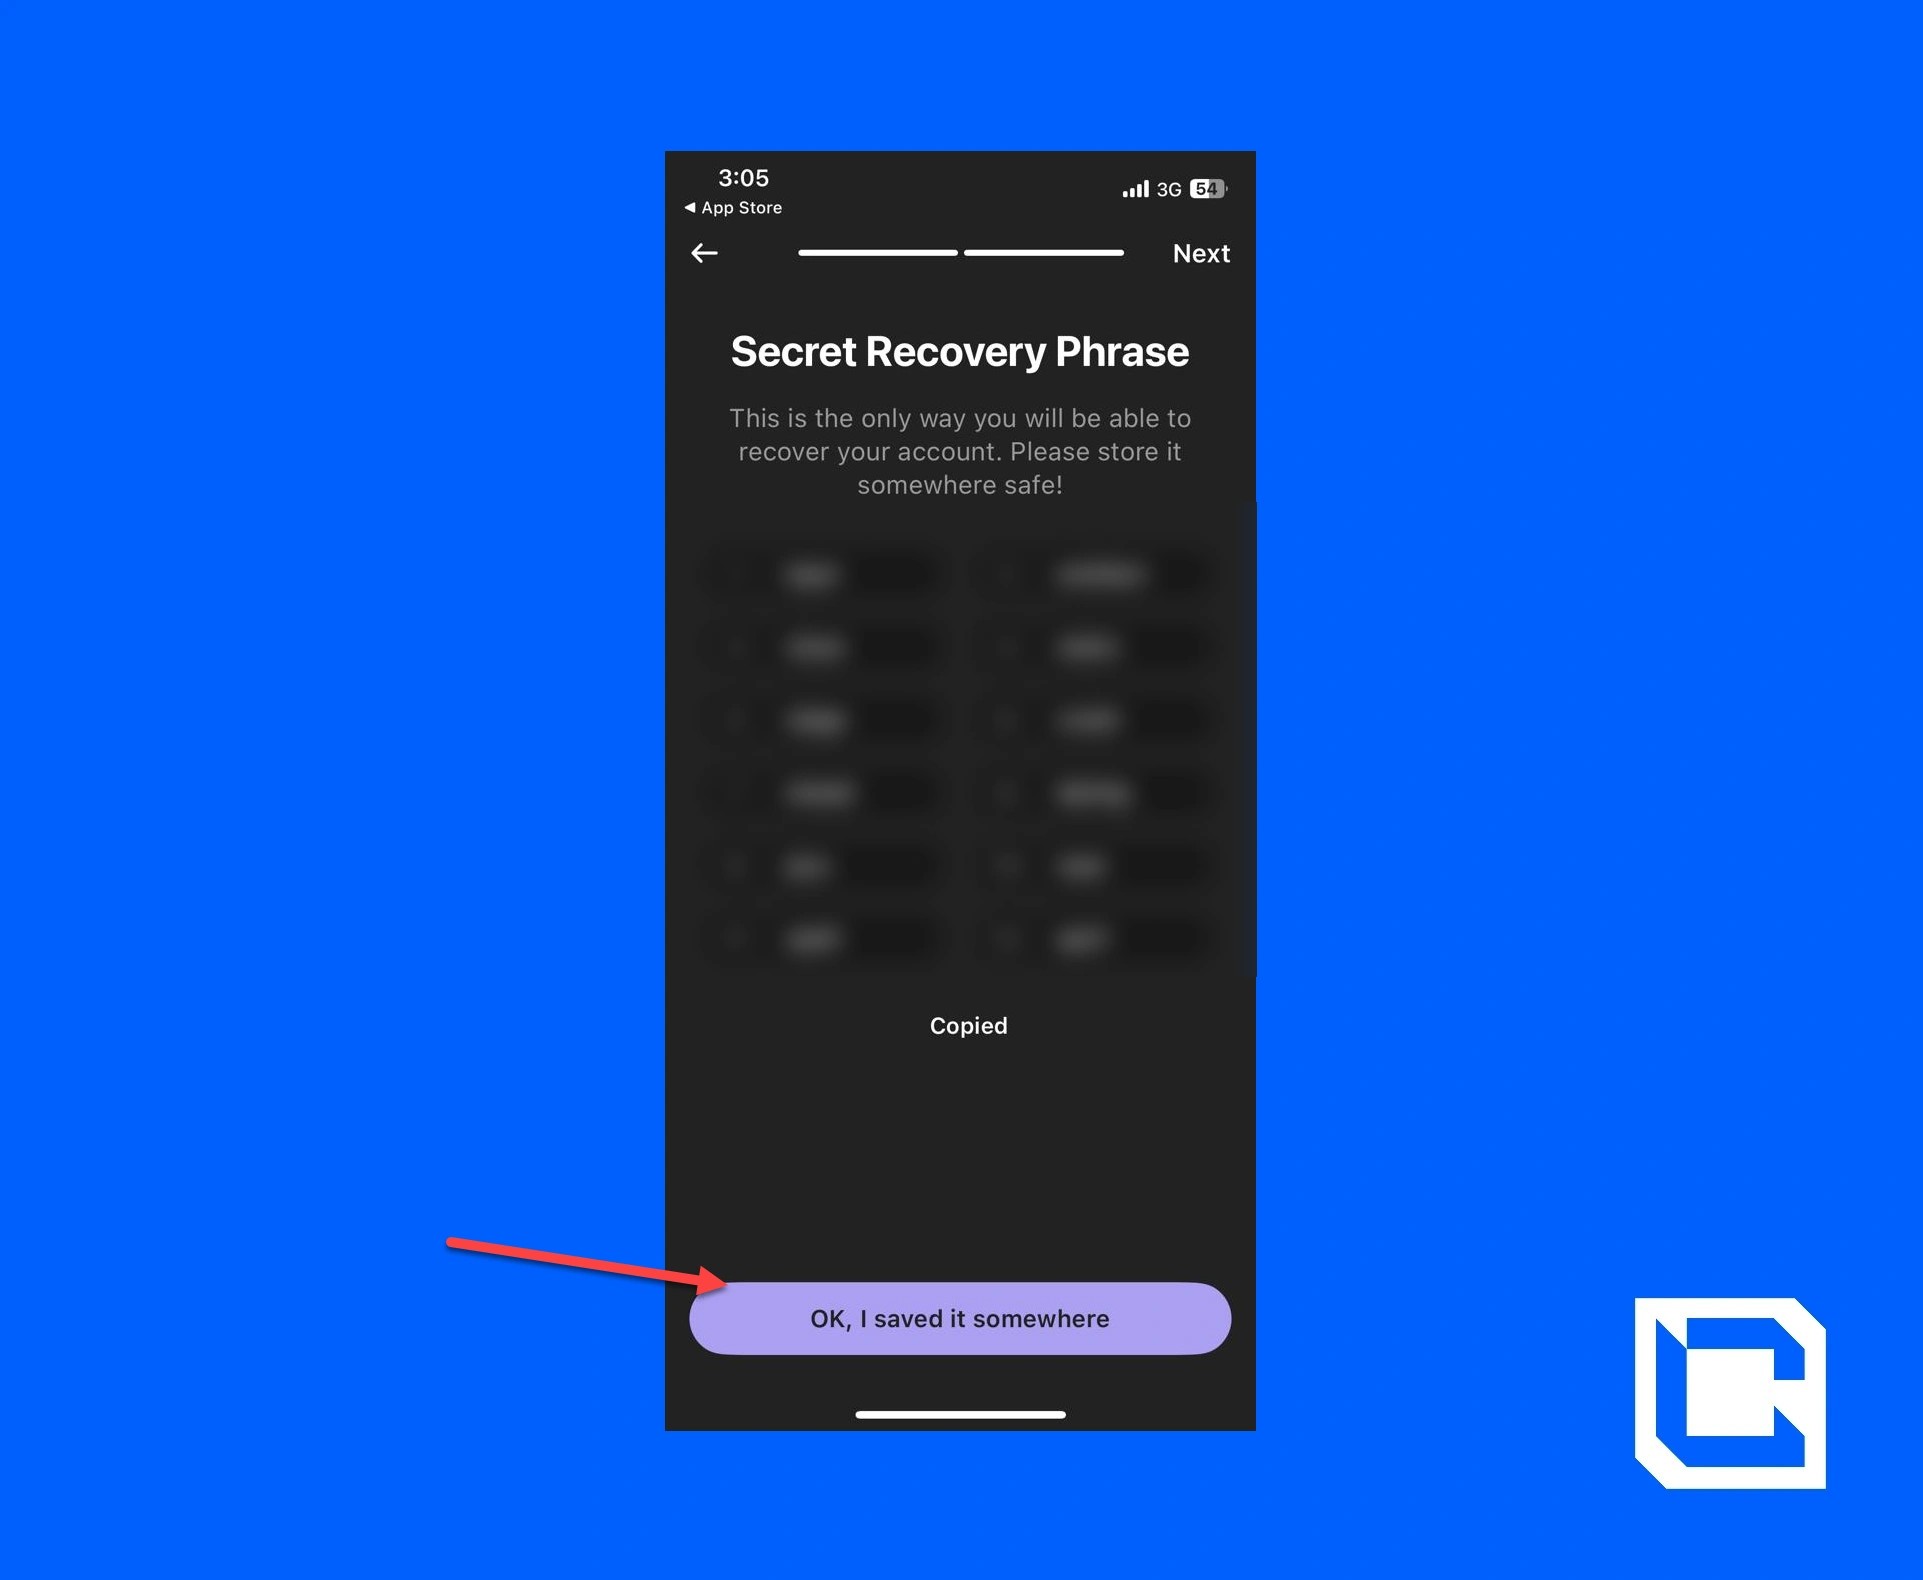
- Copy the recovery phrase and tap on the “OK, I saved it somewhere” button.
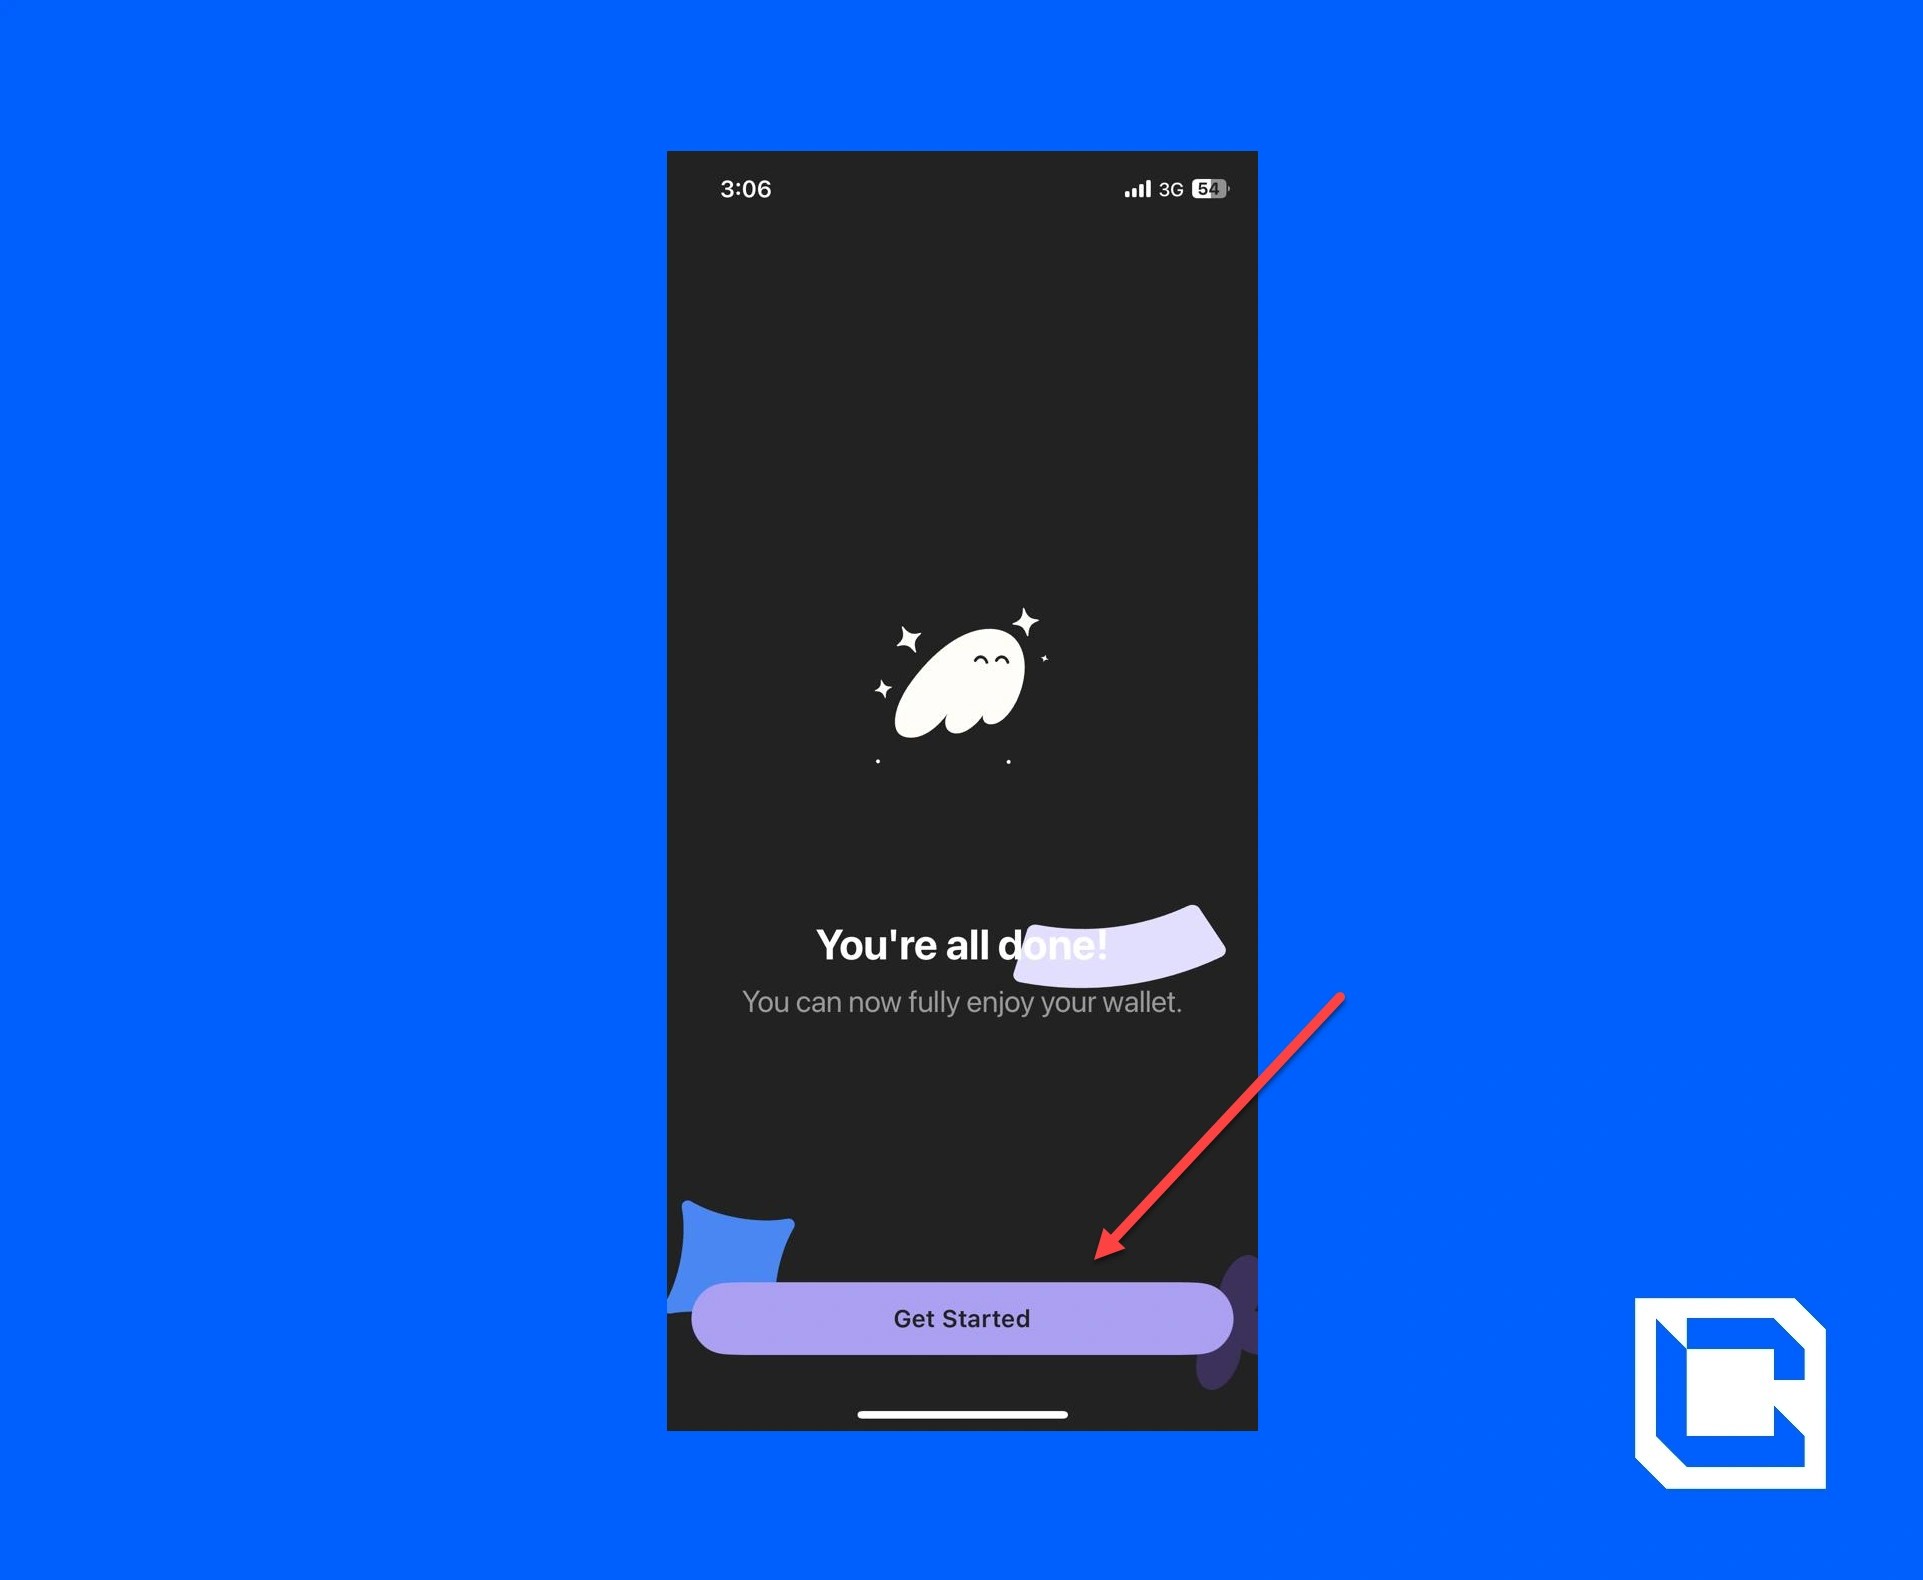
- A pop-up will appear on the screen. Tap on “Yes” to continue.
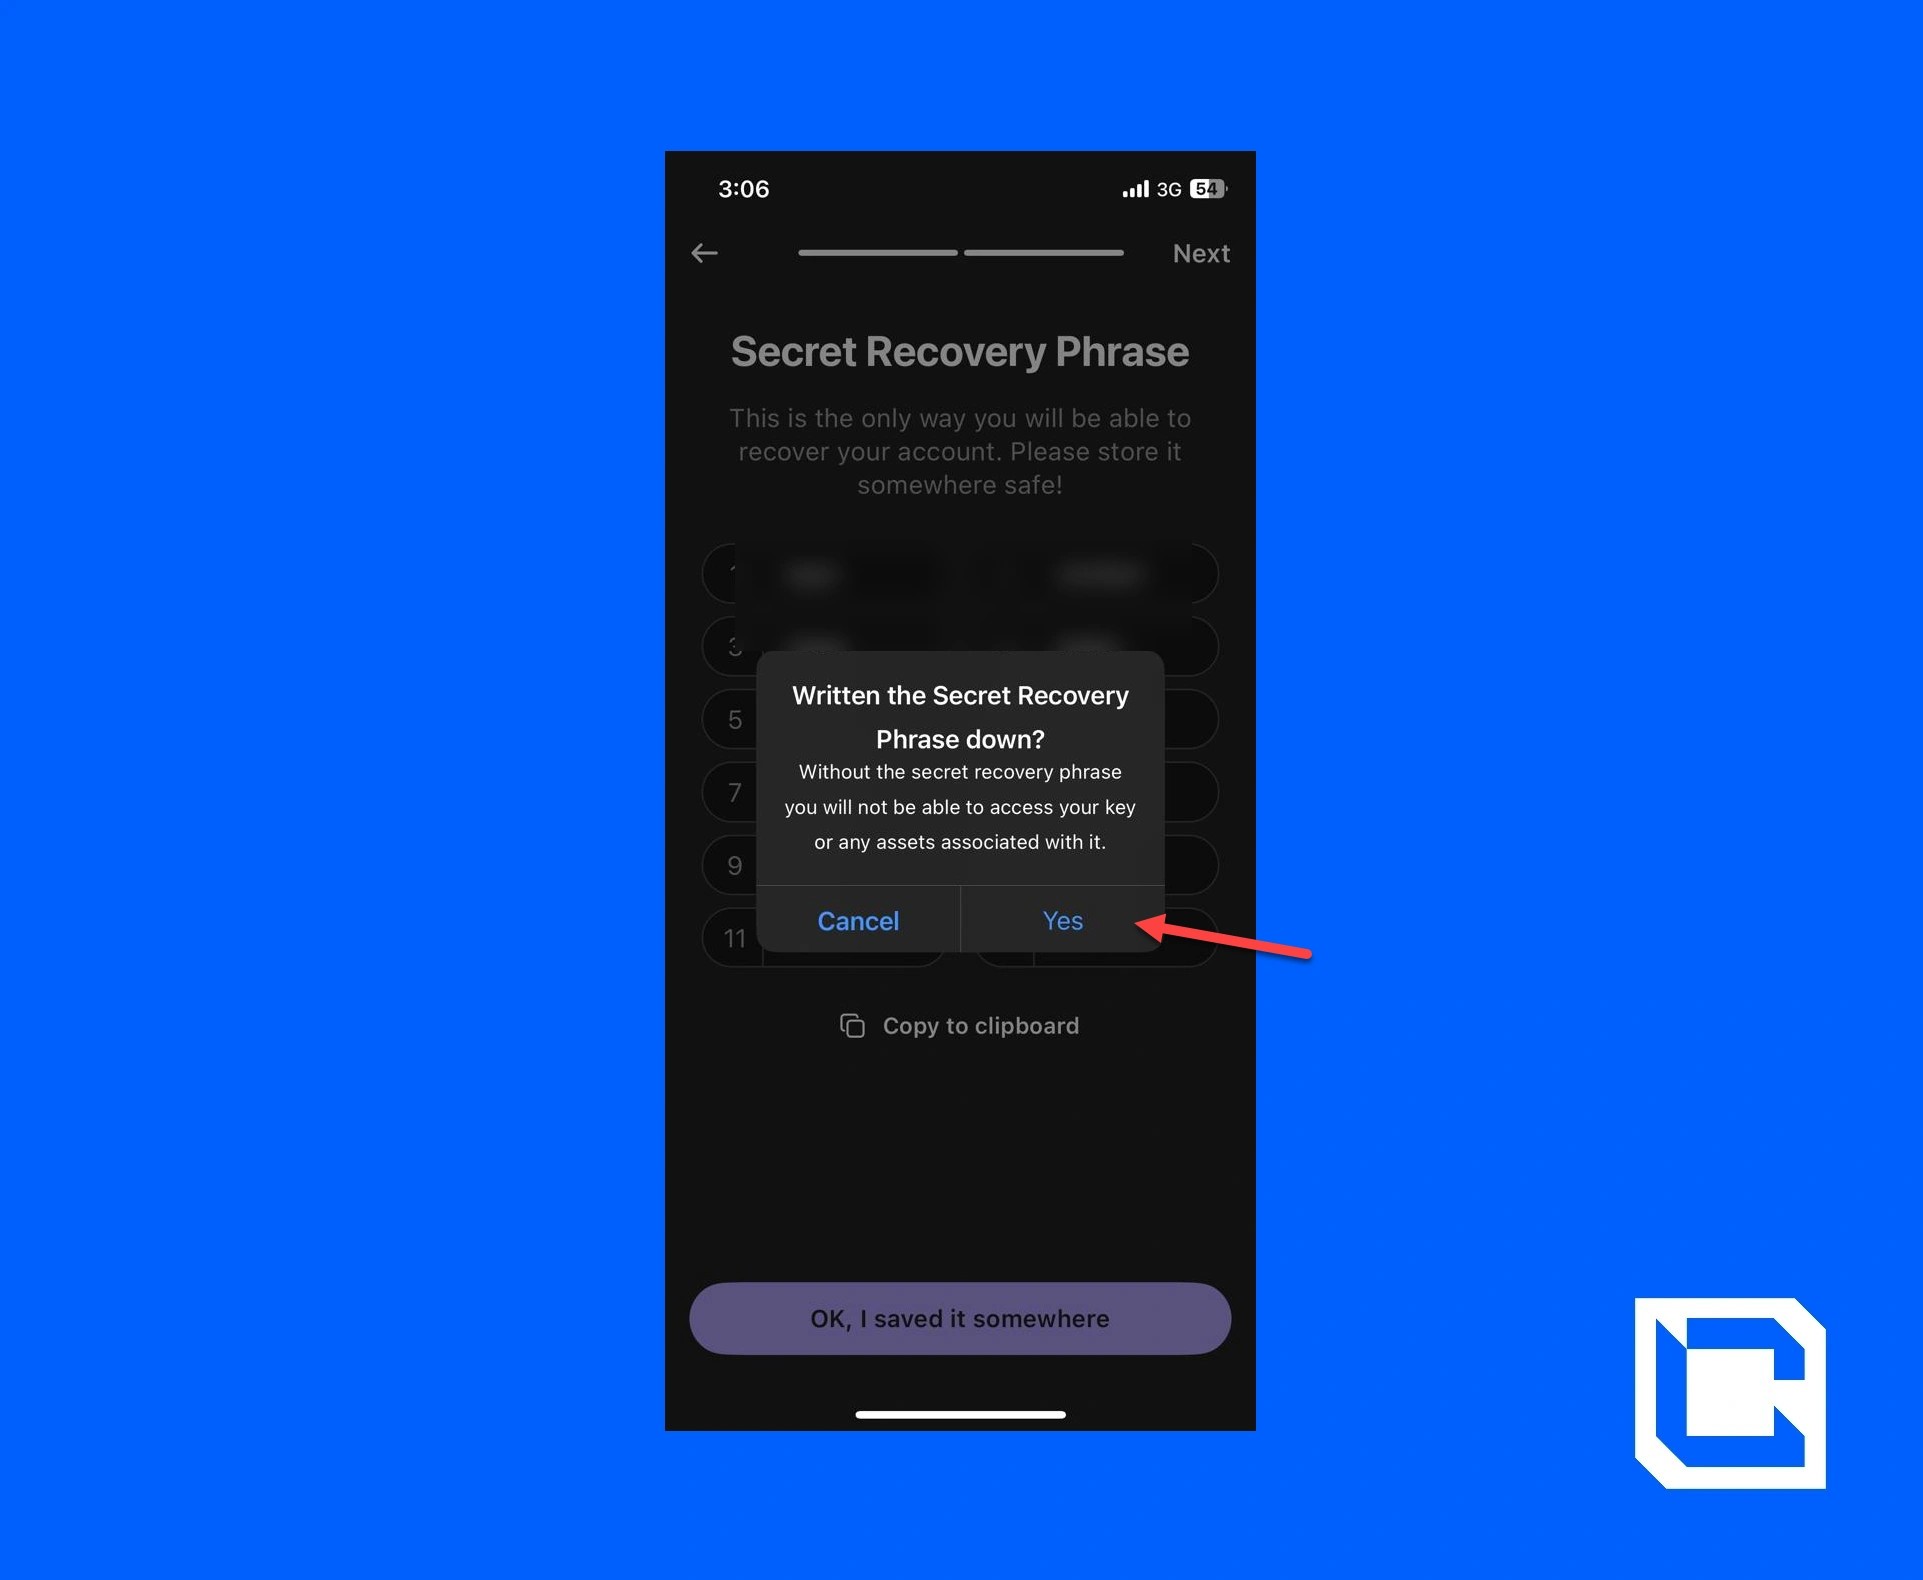
- Now, your account is ready. Just tap on the “Get Started” button.
Now that you set up the wallet, you need to add USDT to your Phantom Wallet. Since Ethereum is a major coin, we can buy it through any blockchain. We’ll be using Solana because it has the lowest exchange rate.
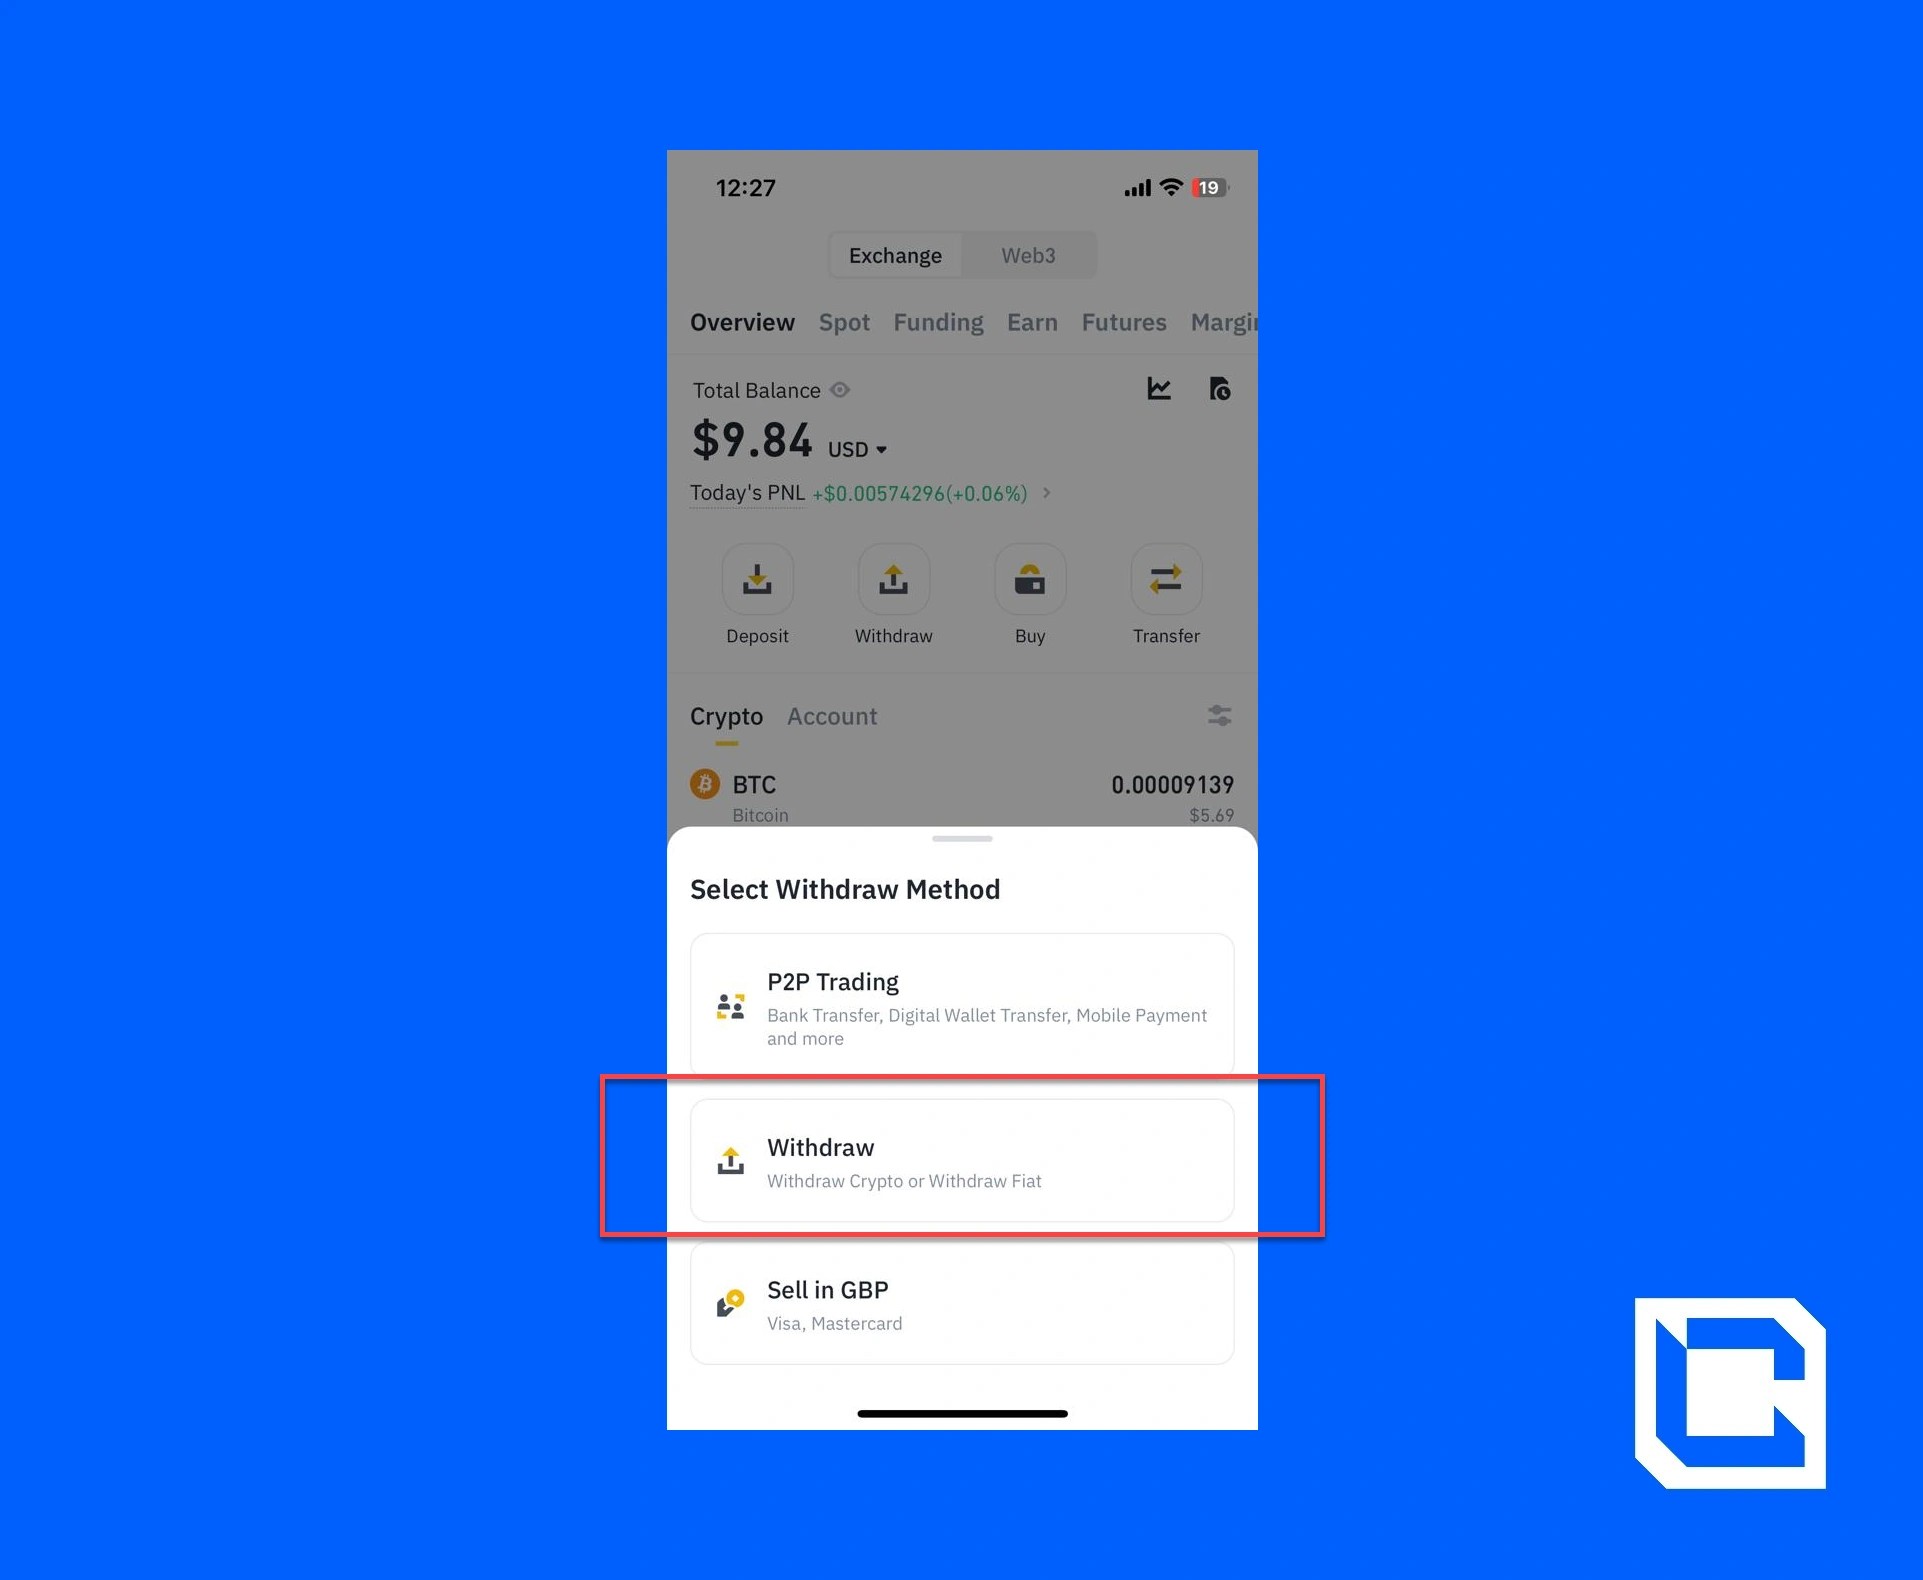
- Go to the Binance app and tap on the “Withdraw” icon.
![]()
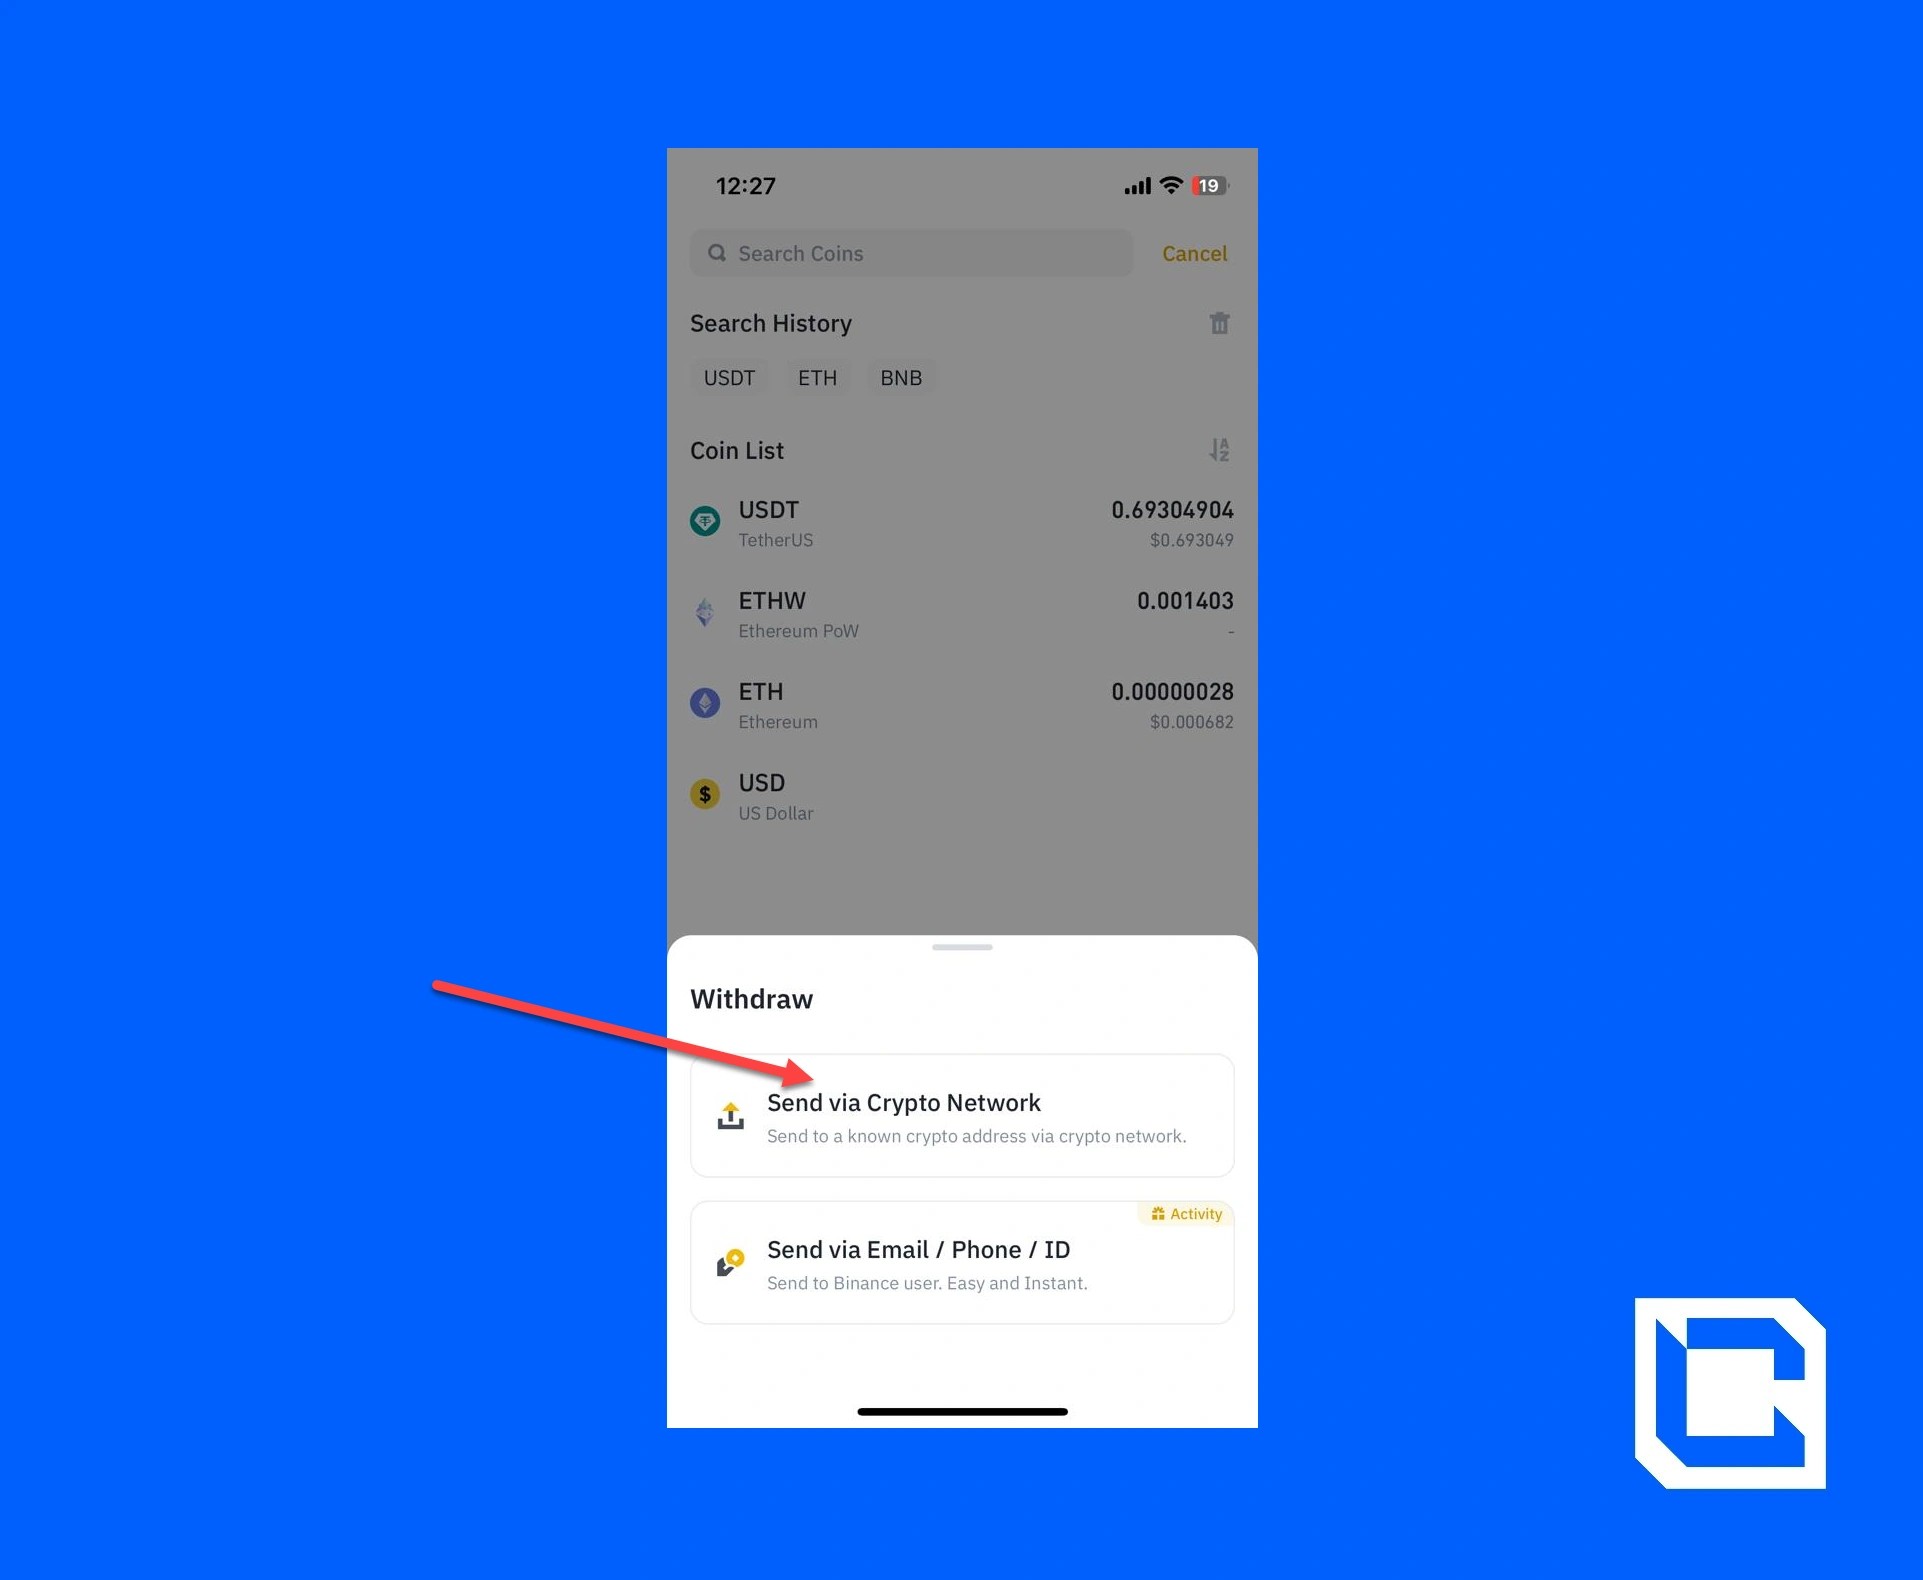
- Again, tap on the “Withdraw” option.
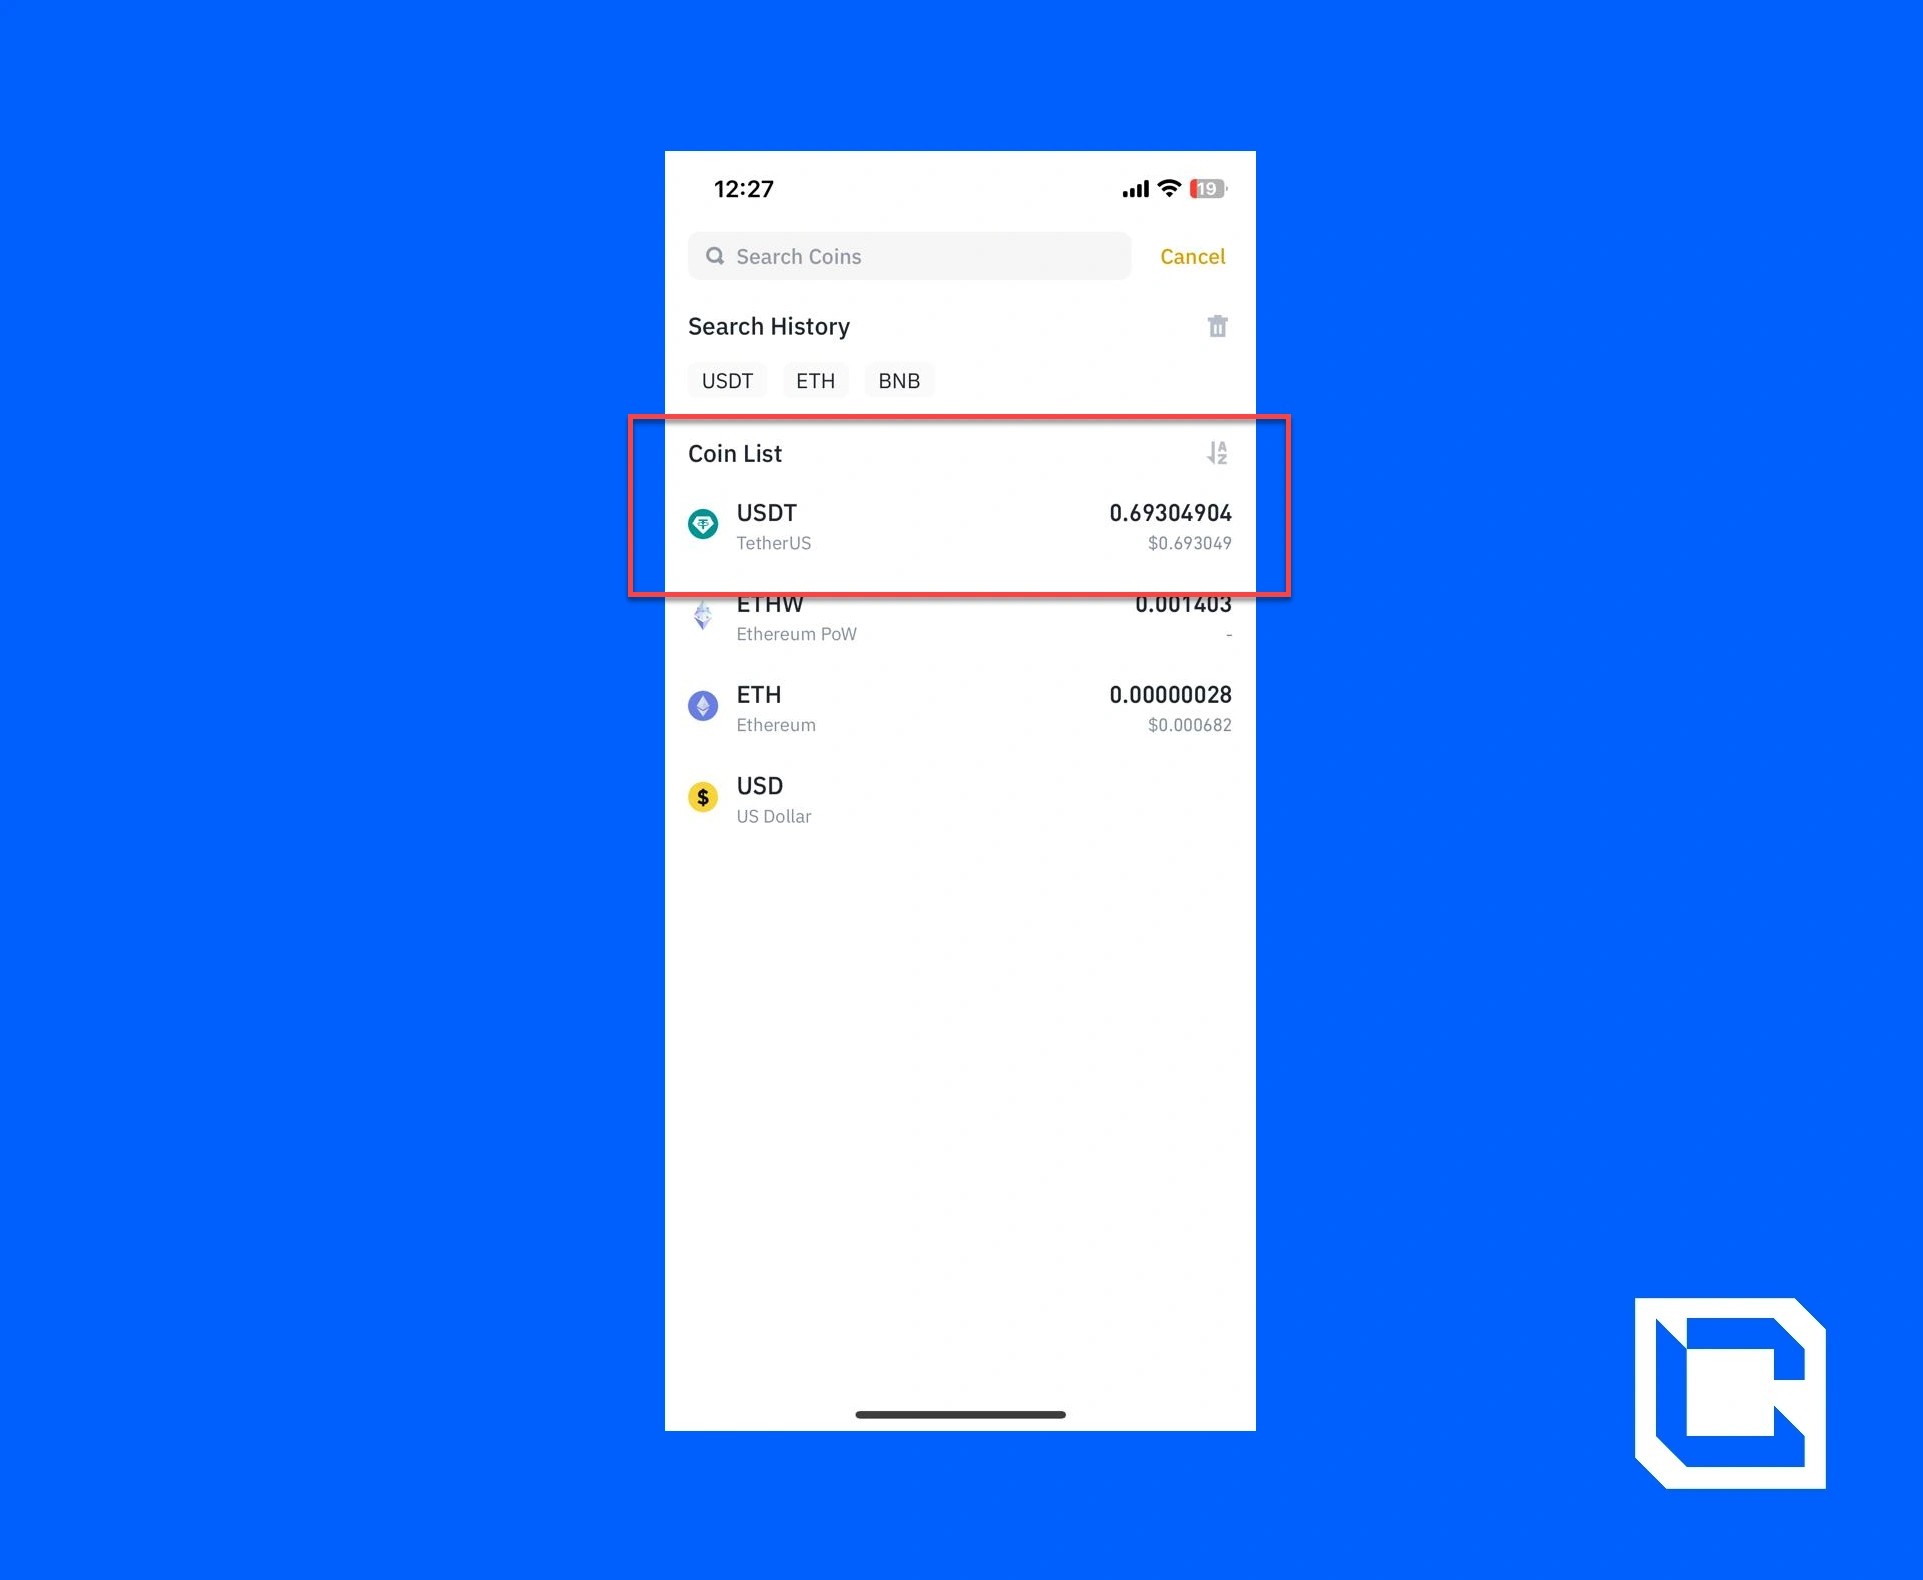
- Choose the USDT option.
- Tap on the “Send via Crypto Network” option.
- Now open your Phantom Wallet and tap on the “Ethereum” option.
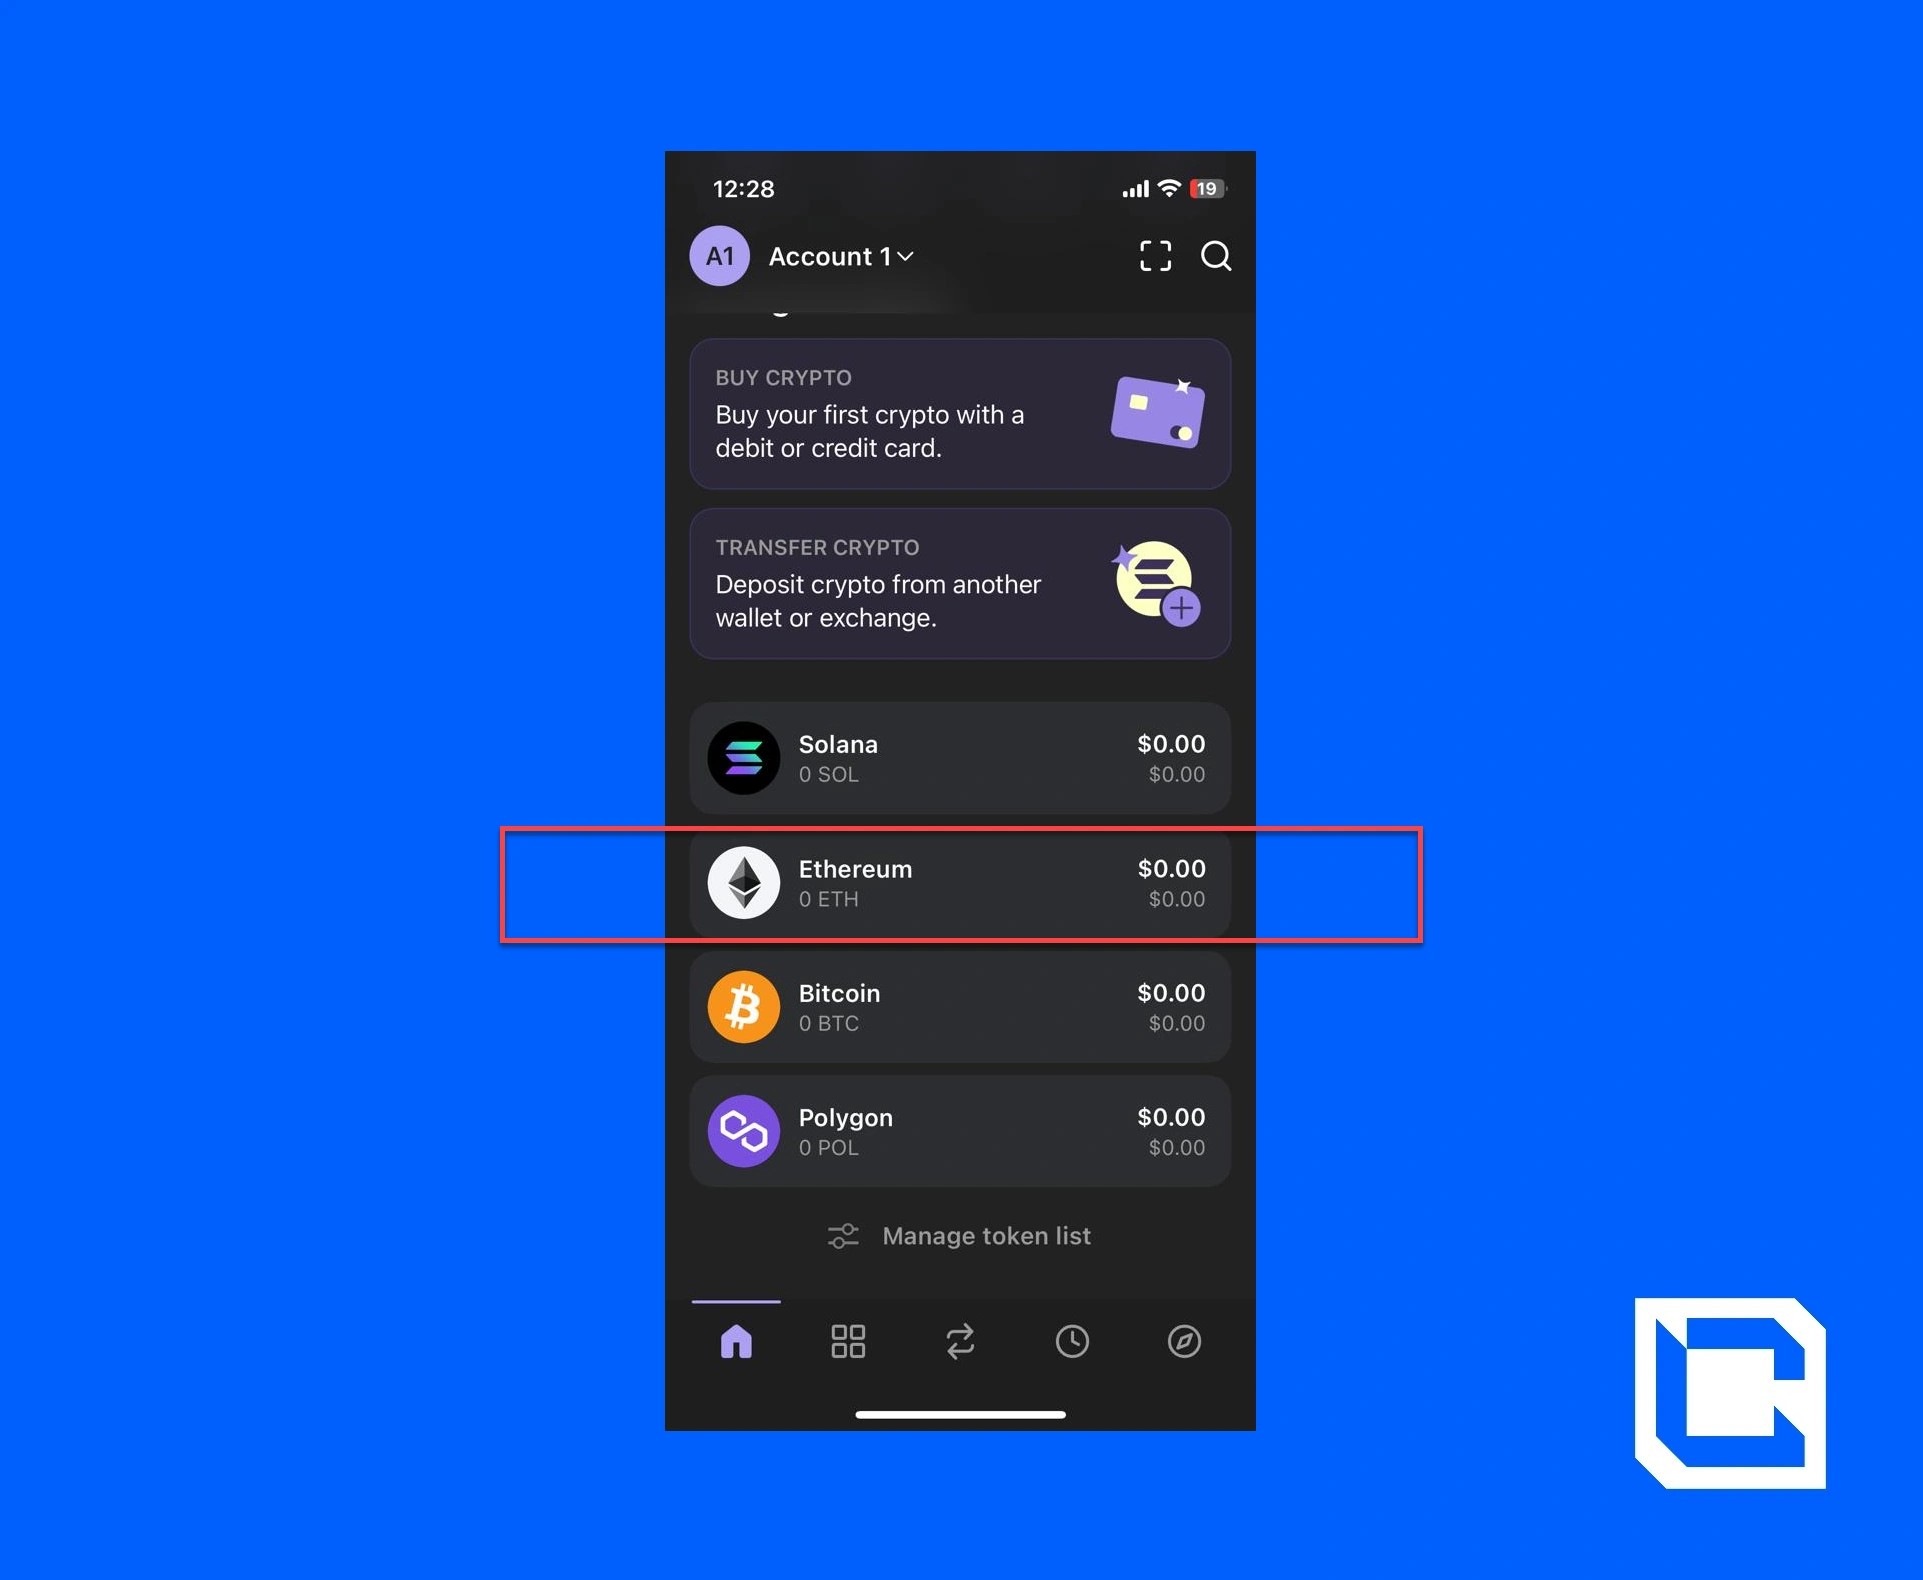
- Now tap on the “Receive” icon.
![]()
- Copy the address for USDT.

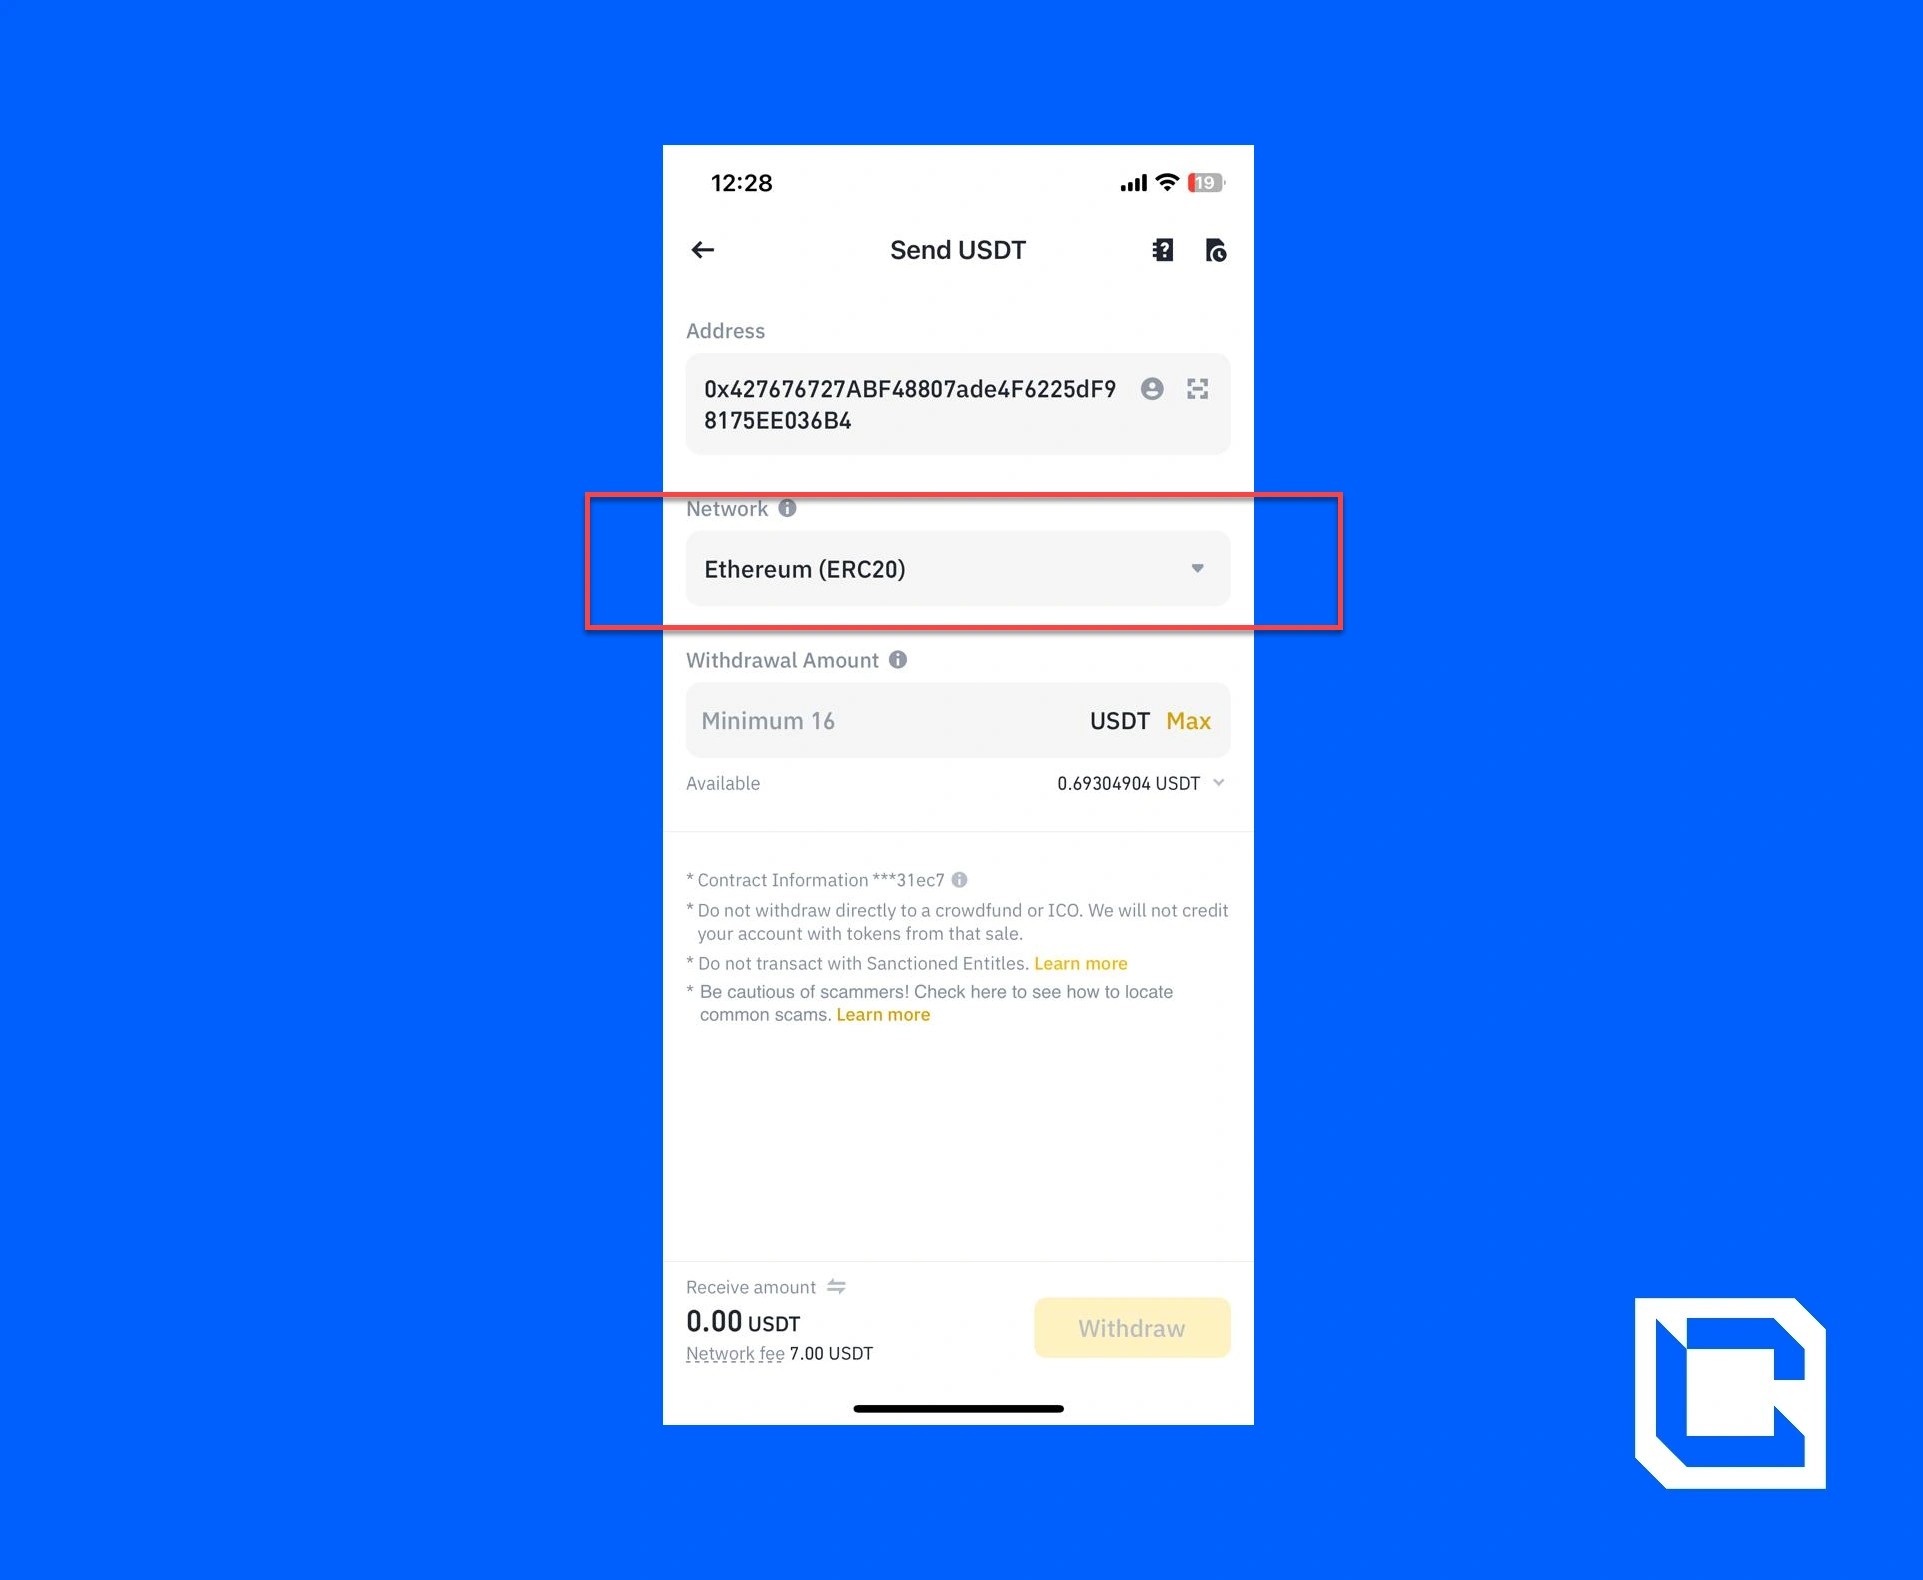
- Go back and paste the previously copied USDT address of your Phantom Wallet.

- Select the network by which you want to send this USDT.
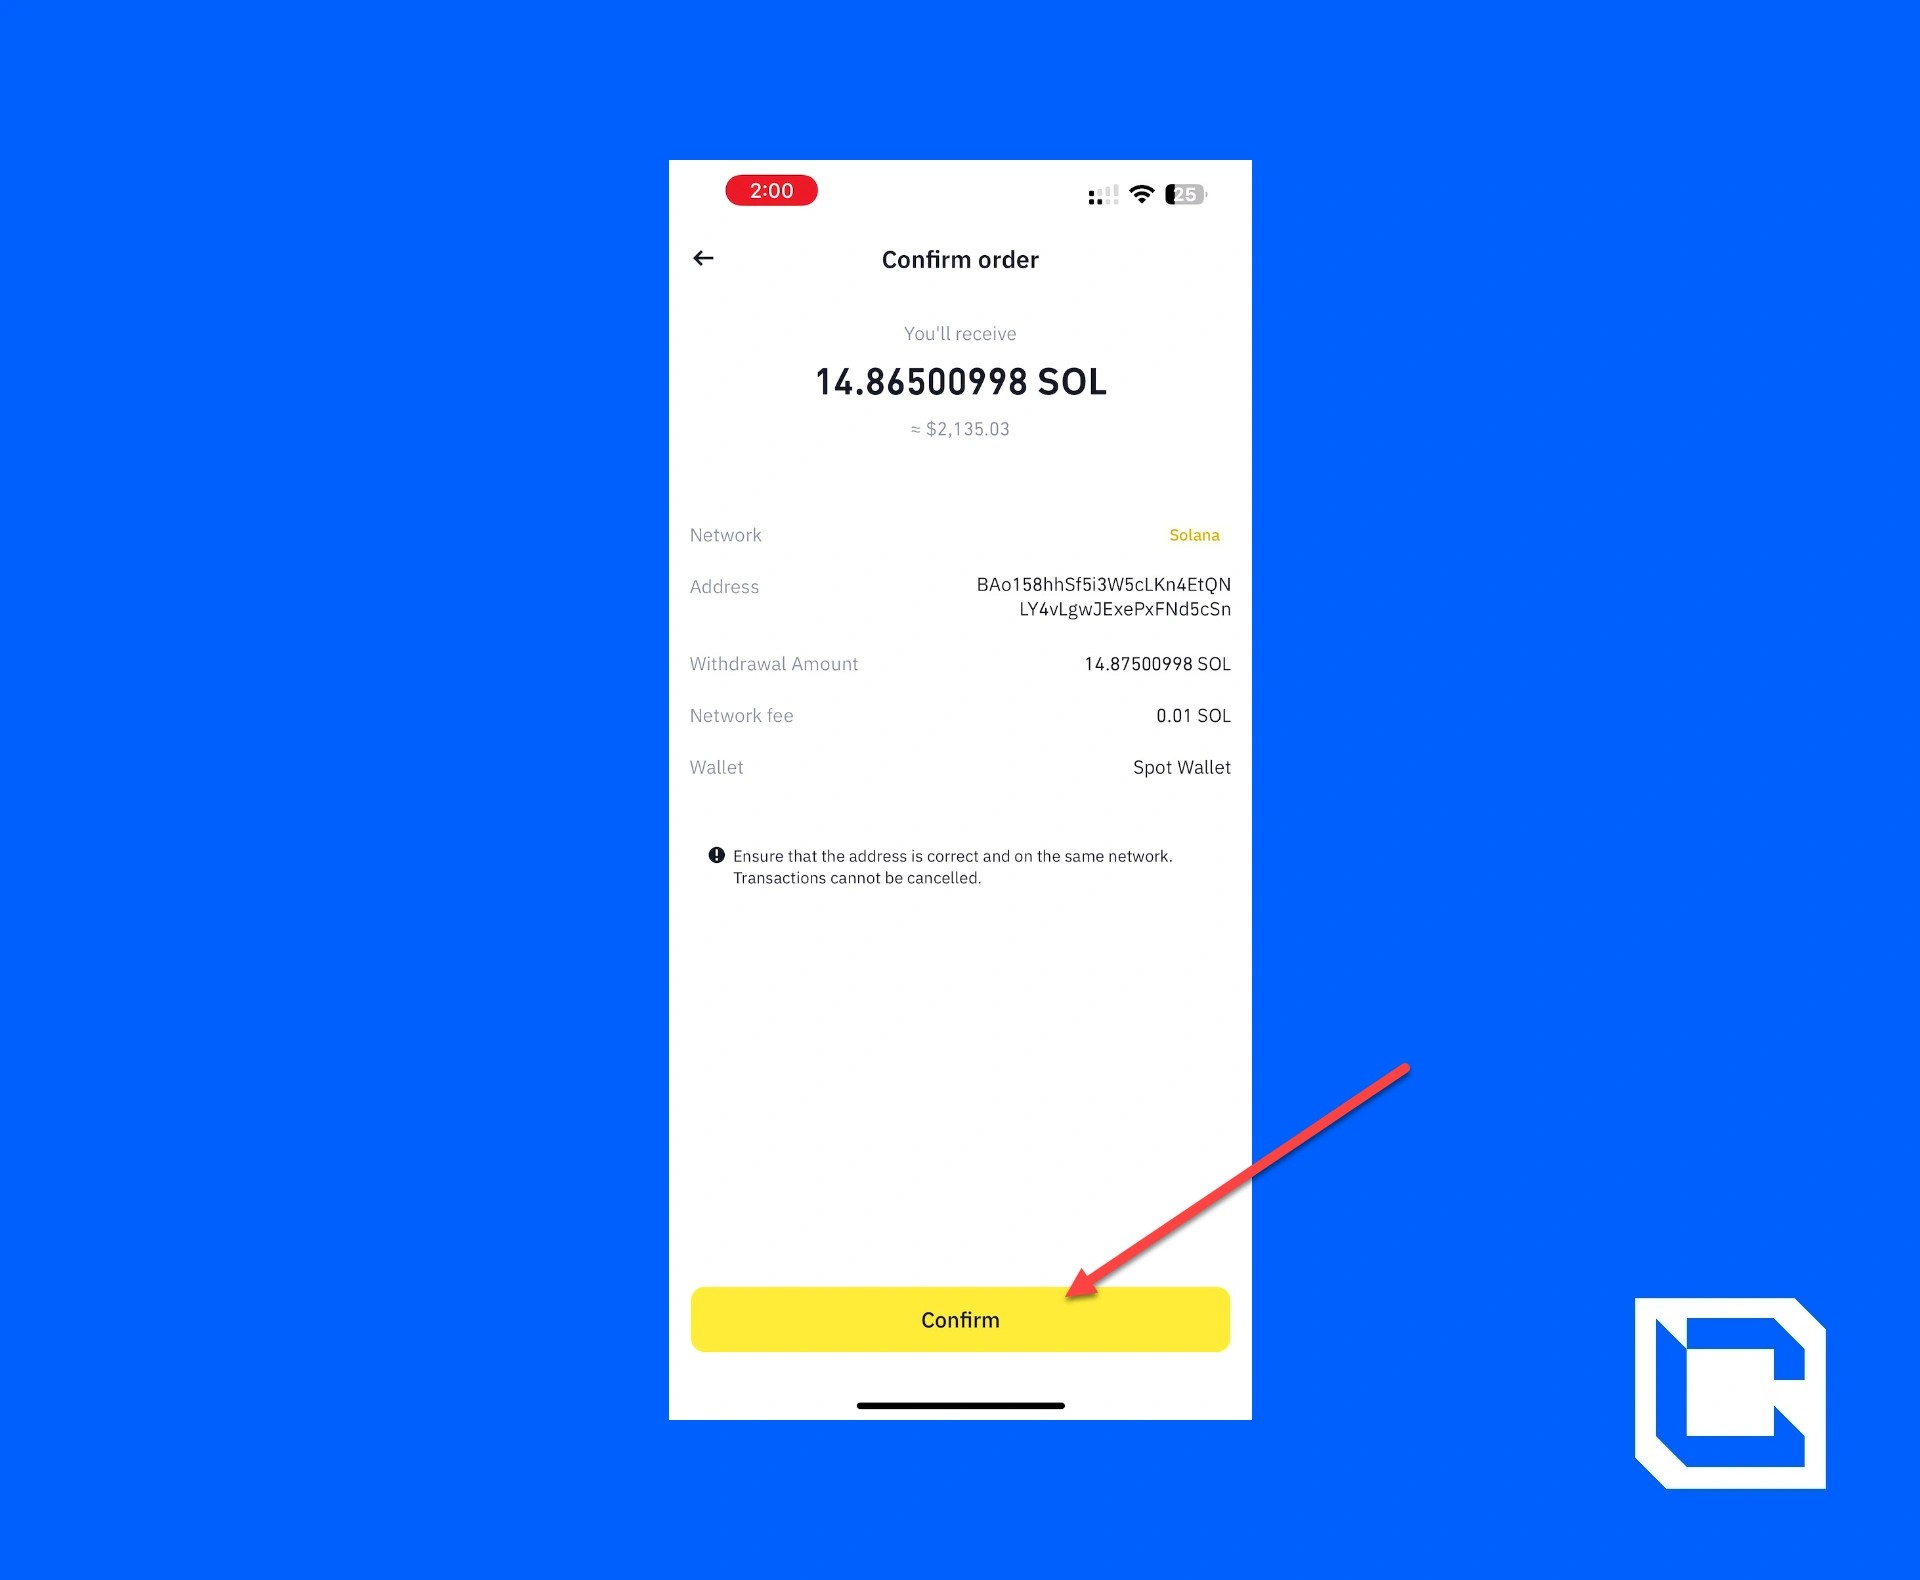
- Enter the amount of USDT you want to send and tap on the “Withdraw” button.
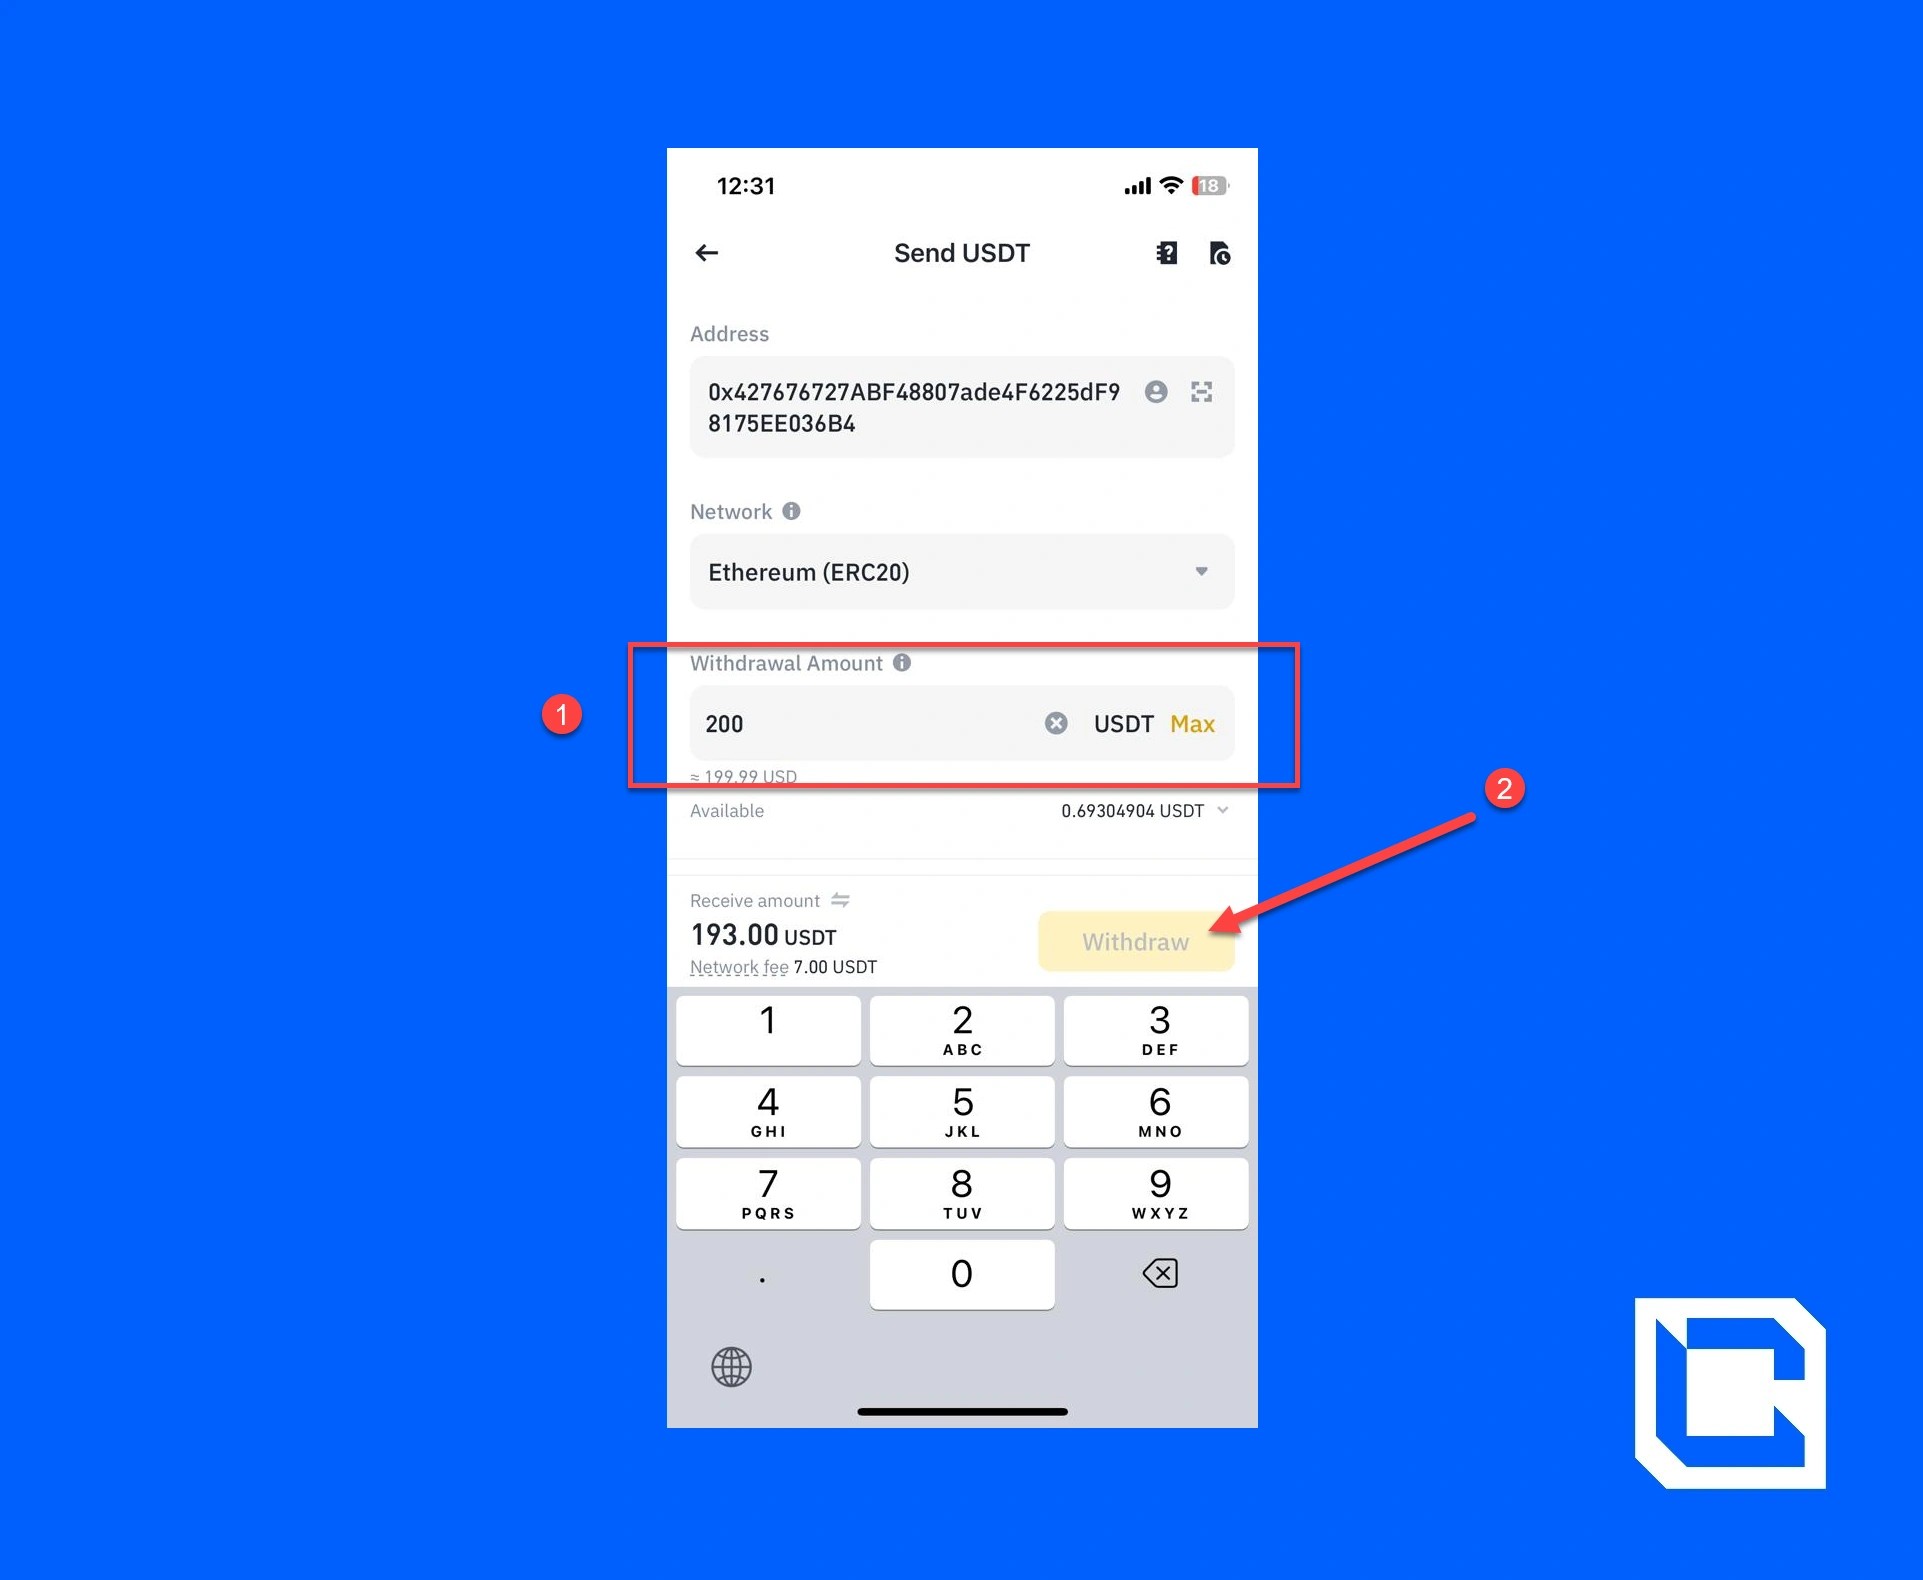
- Tap on the “Confirm” button.
- Complete the authentication process for both Email and the Authenticator App.
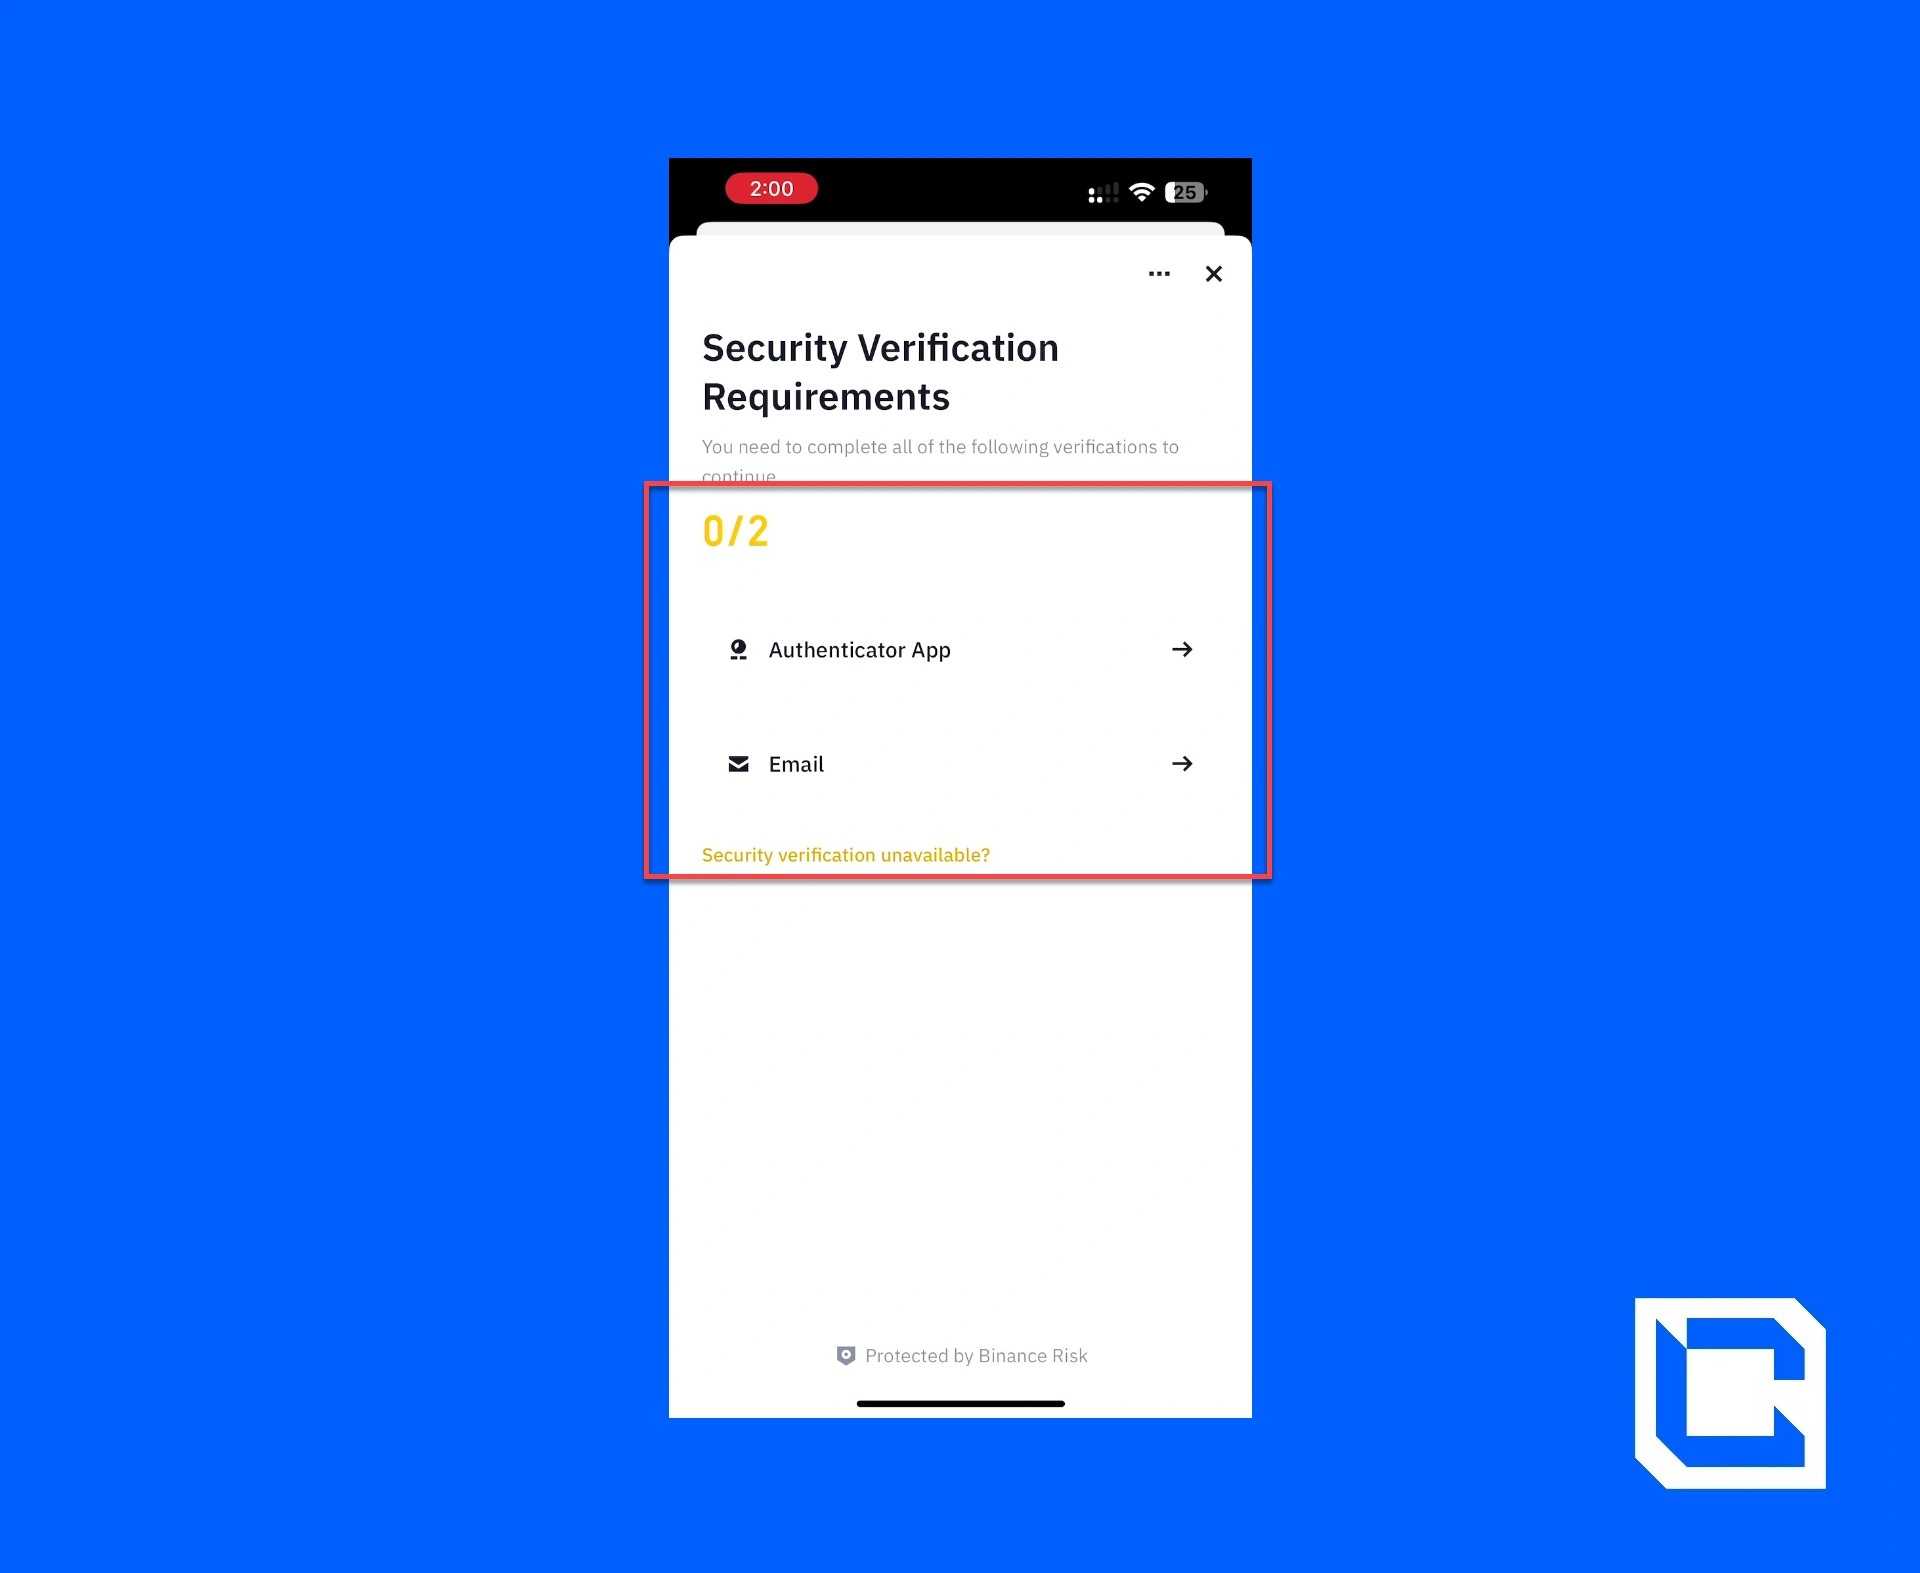
After the verification process is complete, the USDT on the Ethereum network will be transferred to your Phantom Wallet.
Now that you have USDT in your wallet, we can proceed with learning how to buy Ethereum. As mentioned before, we’ll be swapping out USDT for Ethereum.
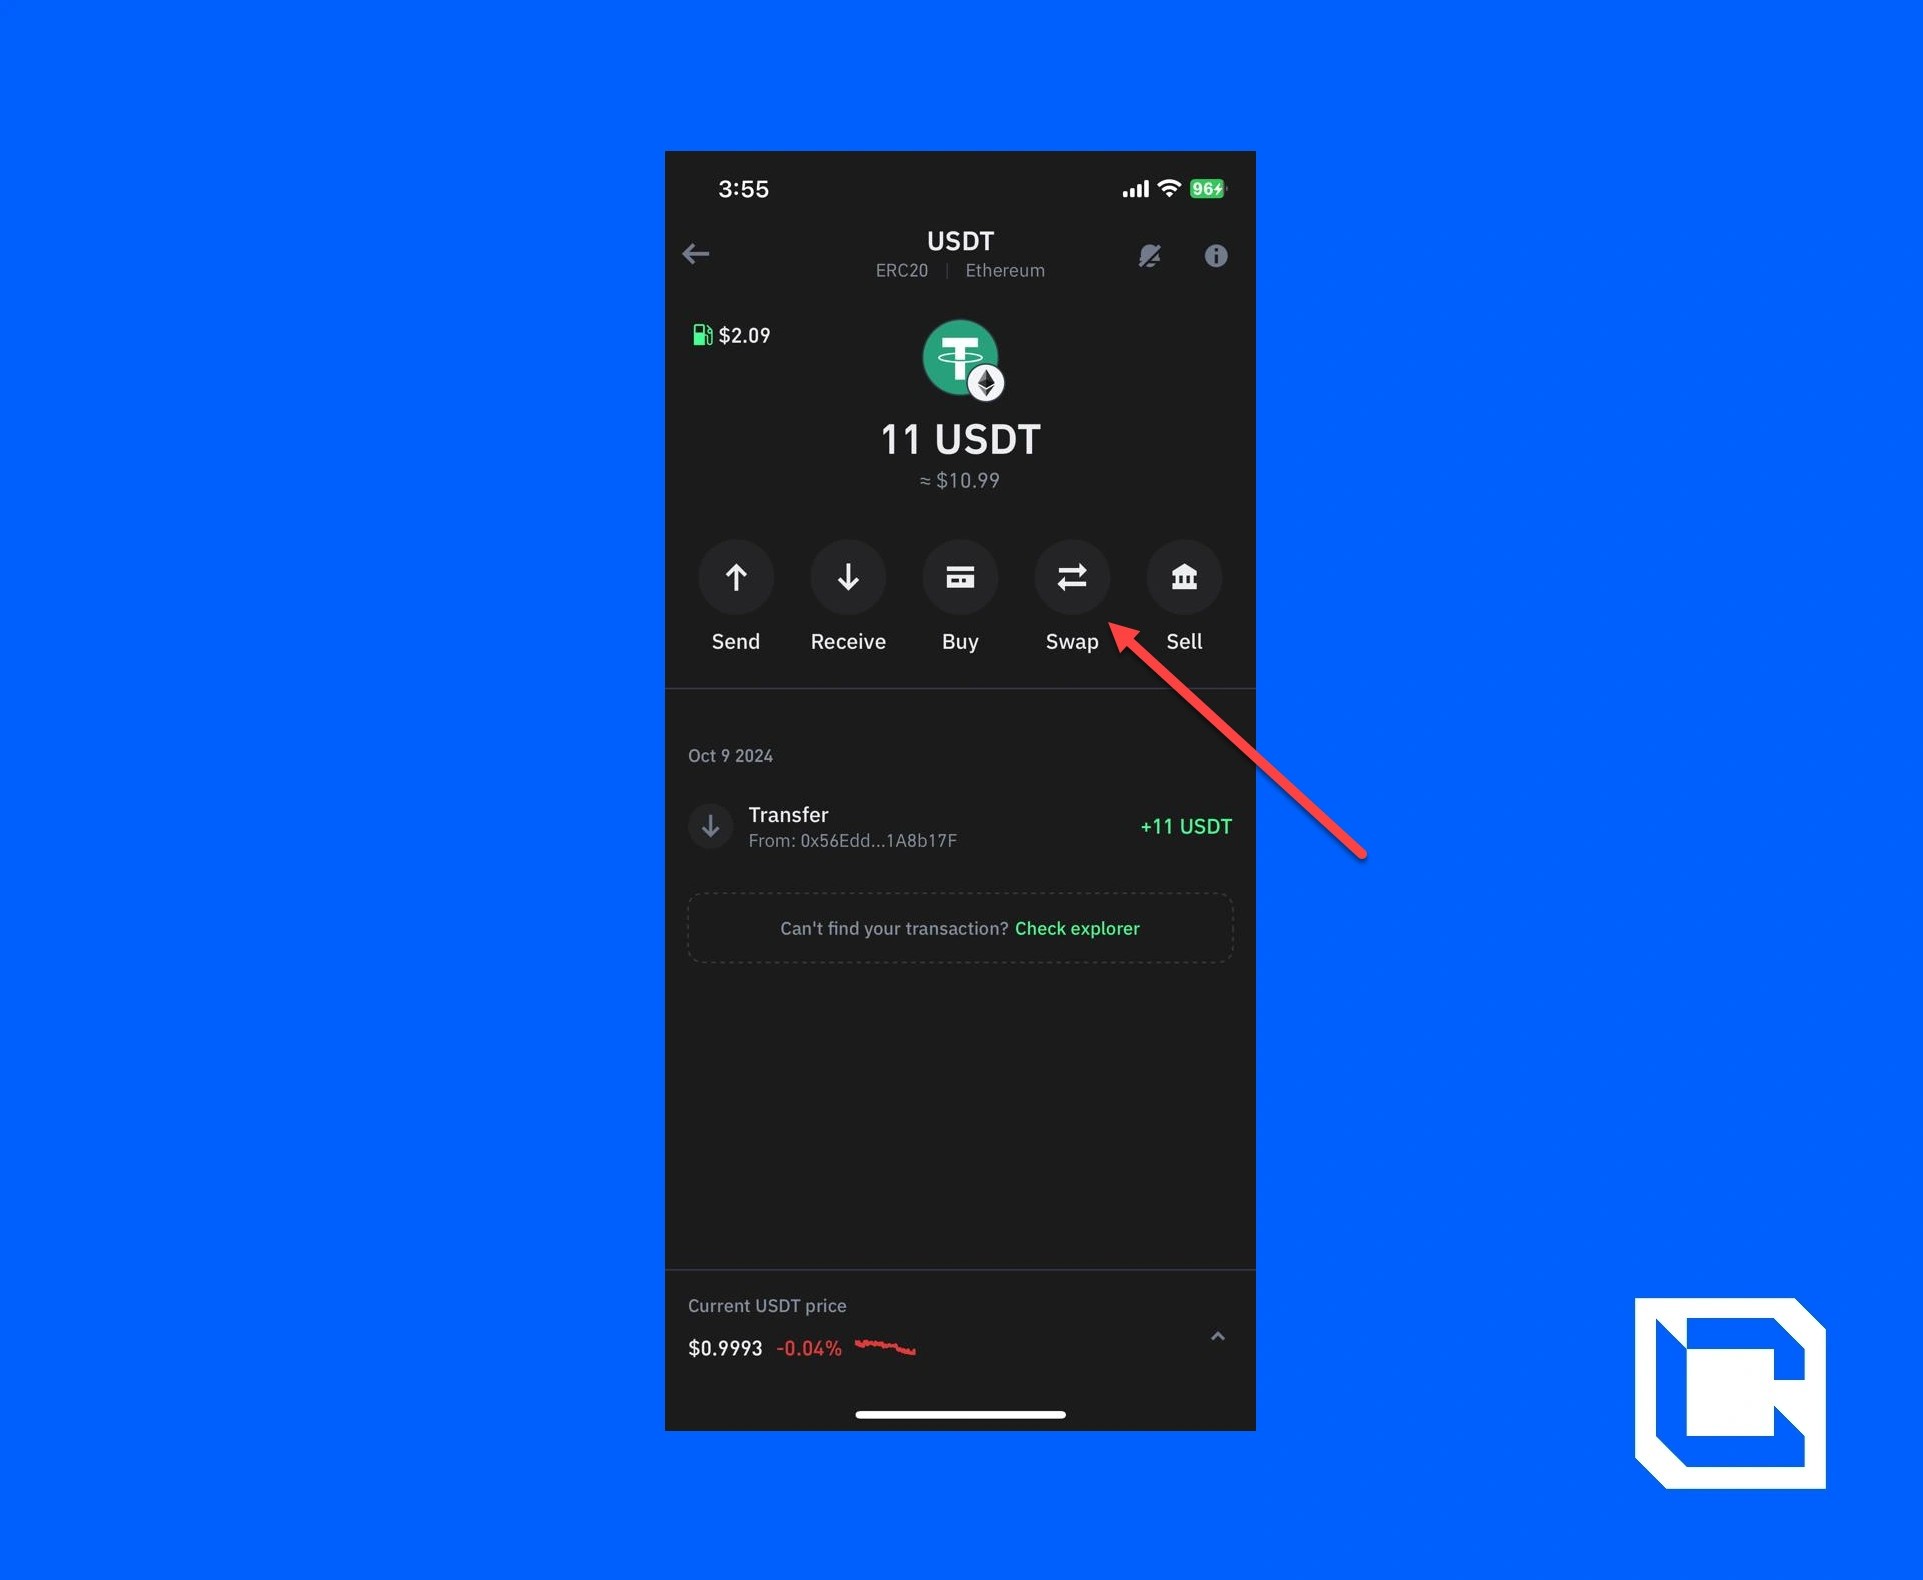
- Start by opening your Phantom Wallet again and tap on the USDT network.
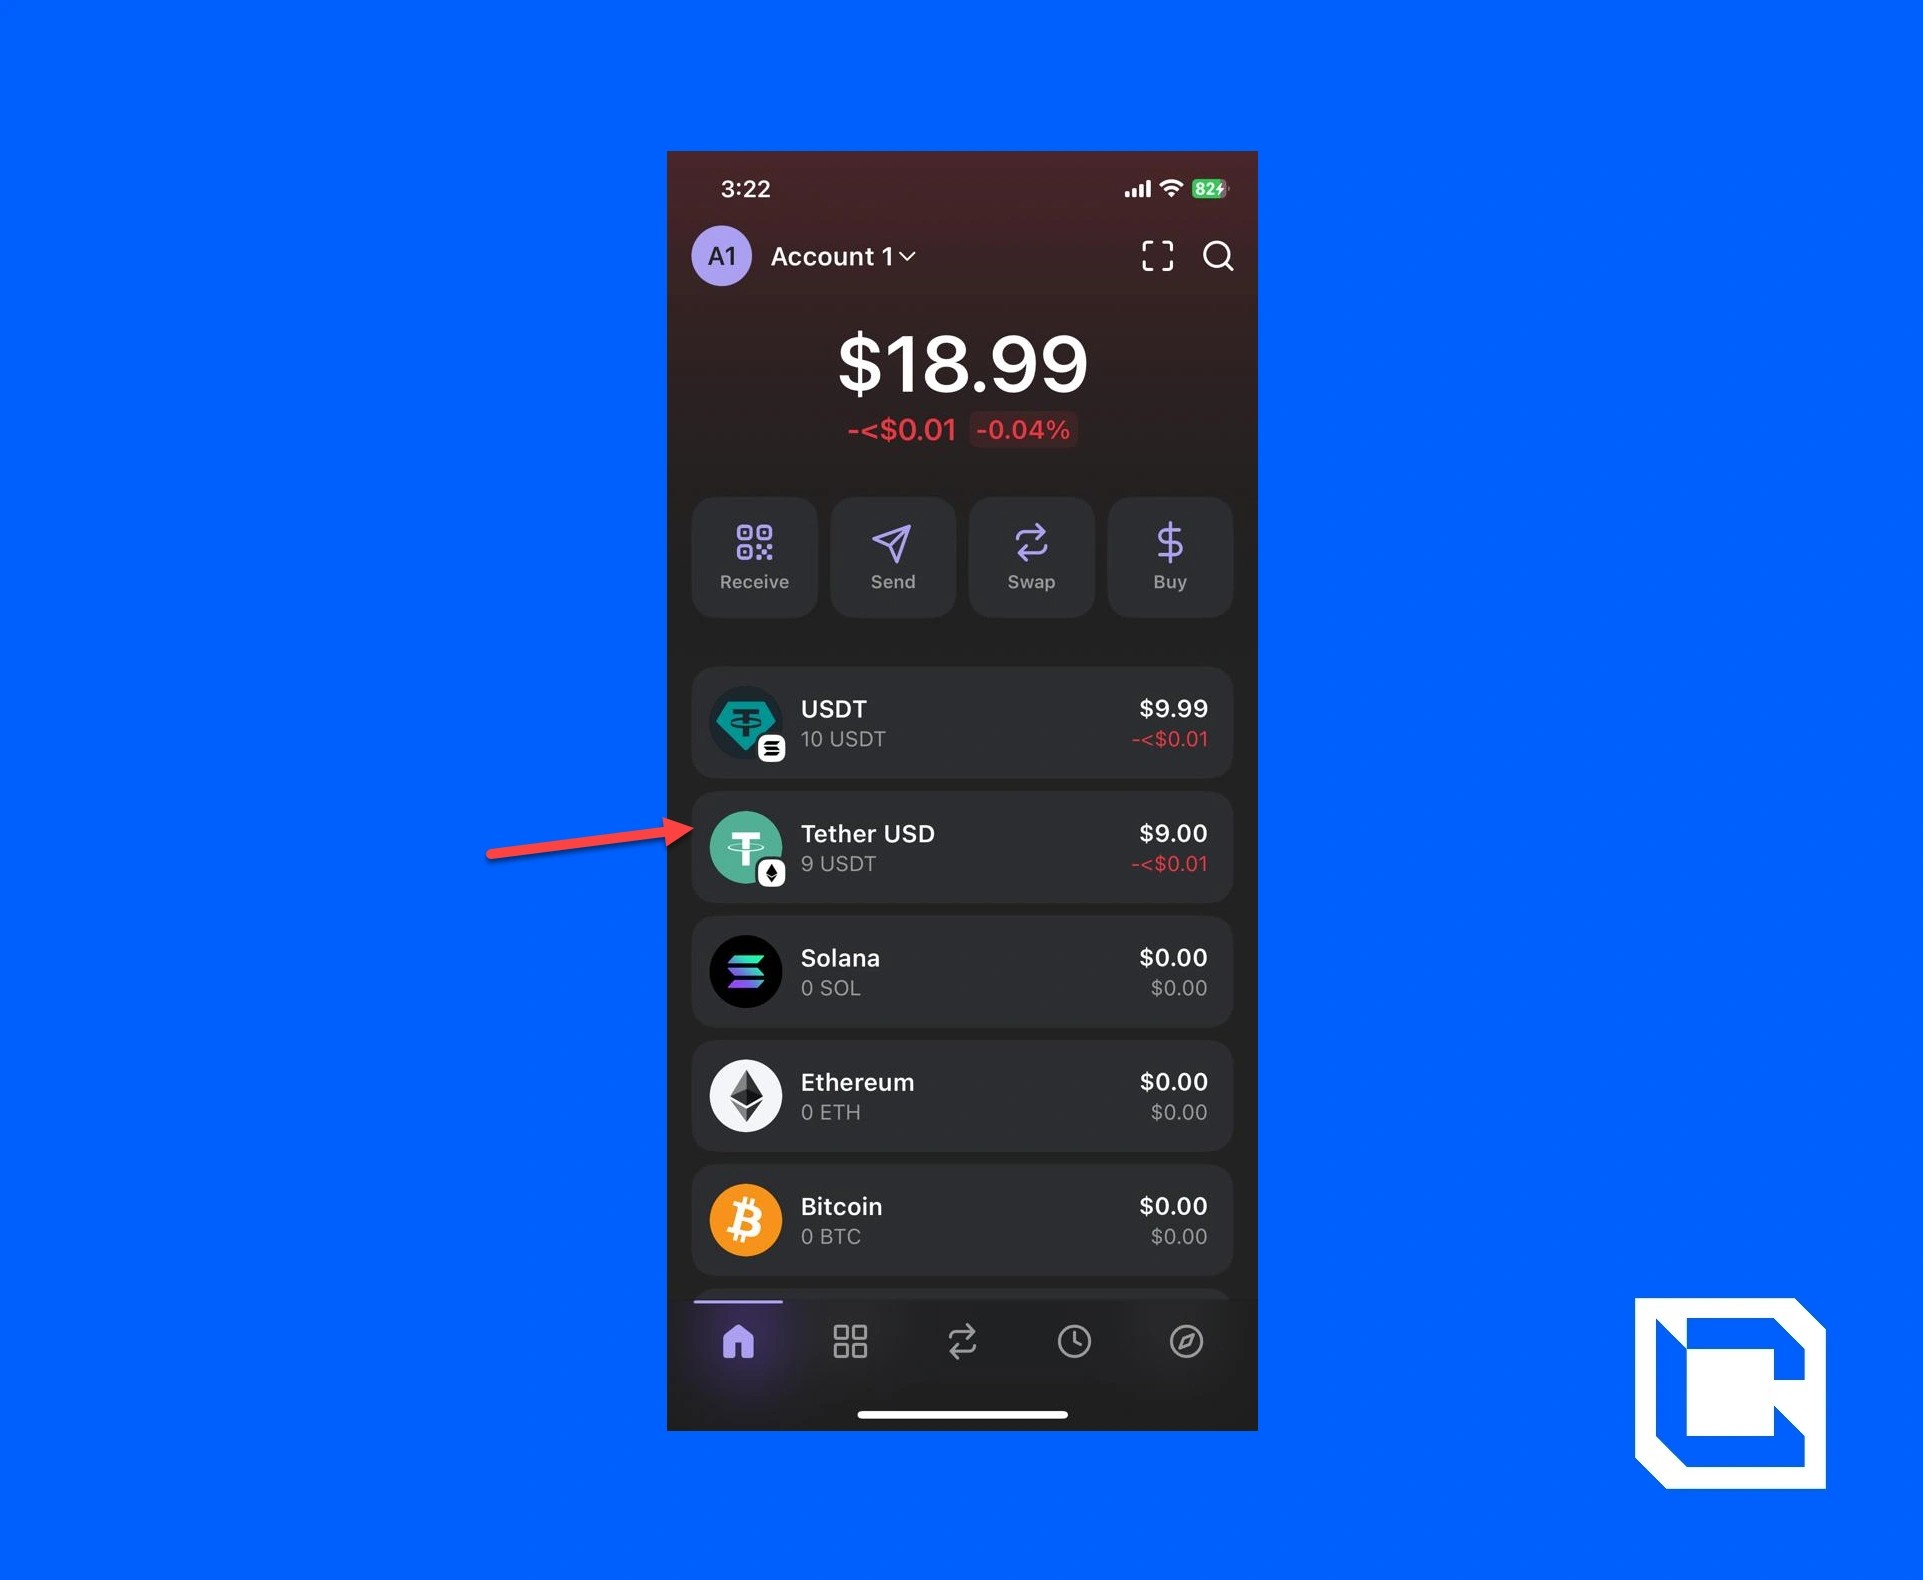
- Now tap on the “Swap” icon.
![]()
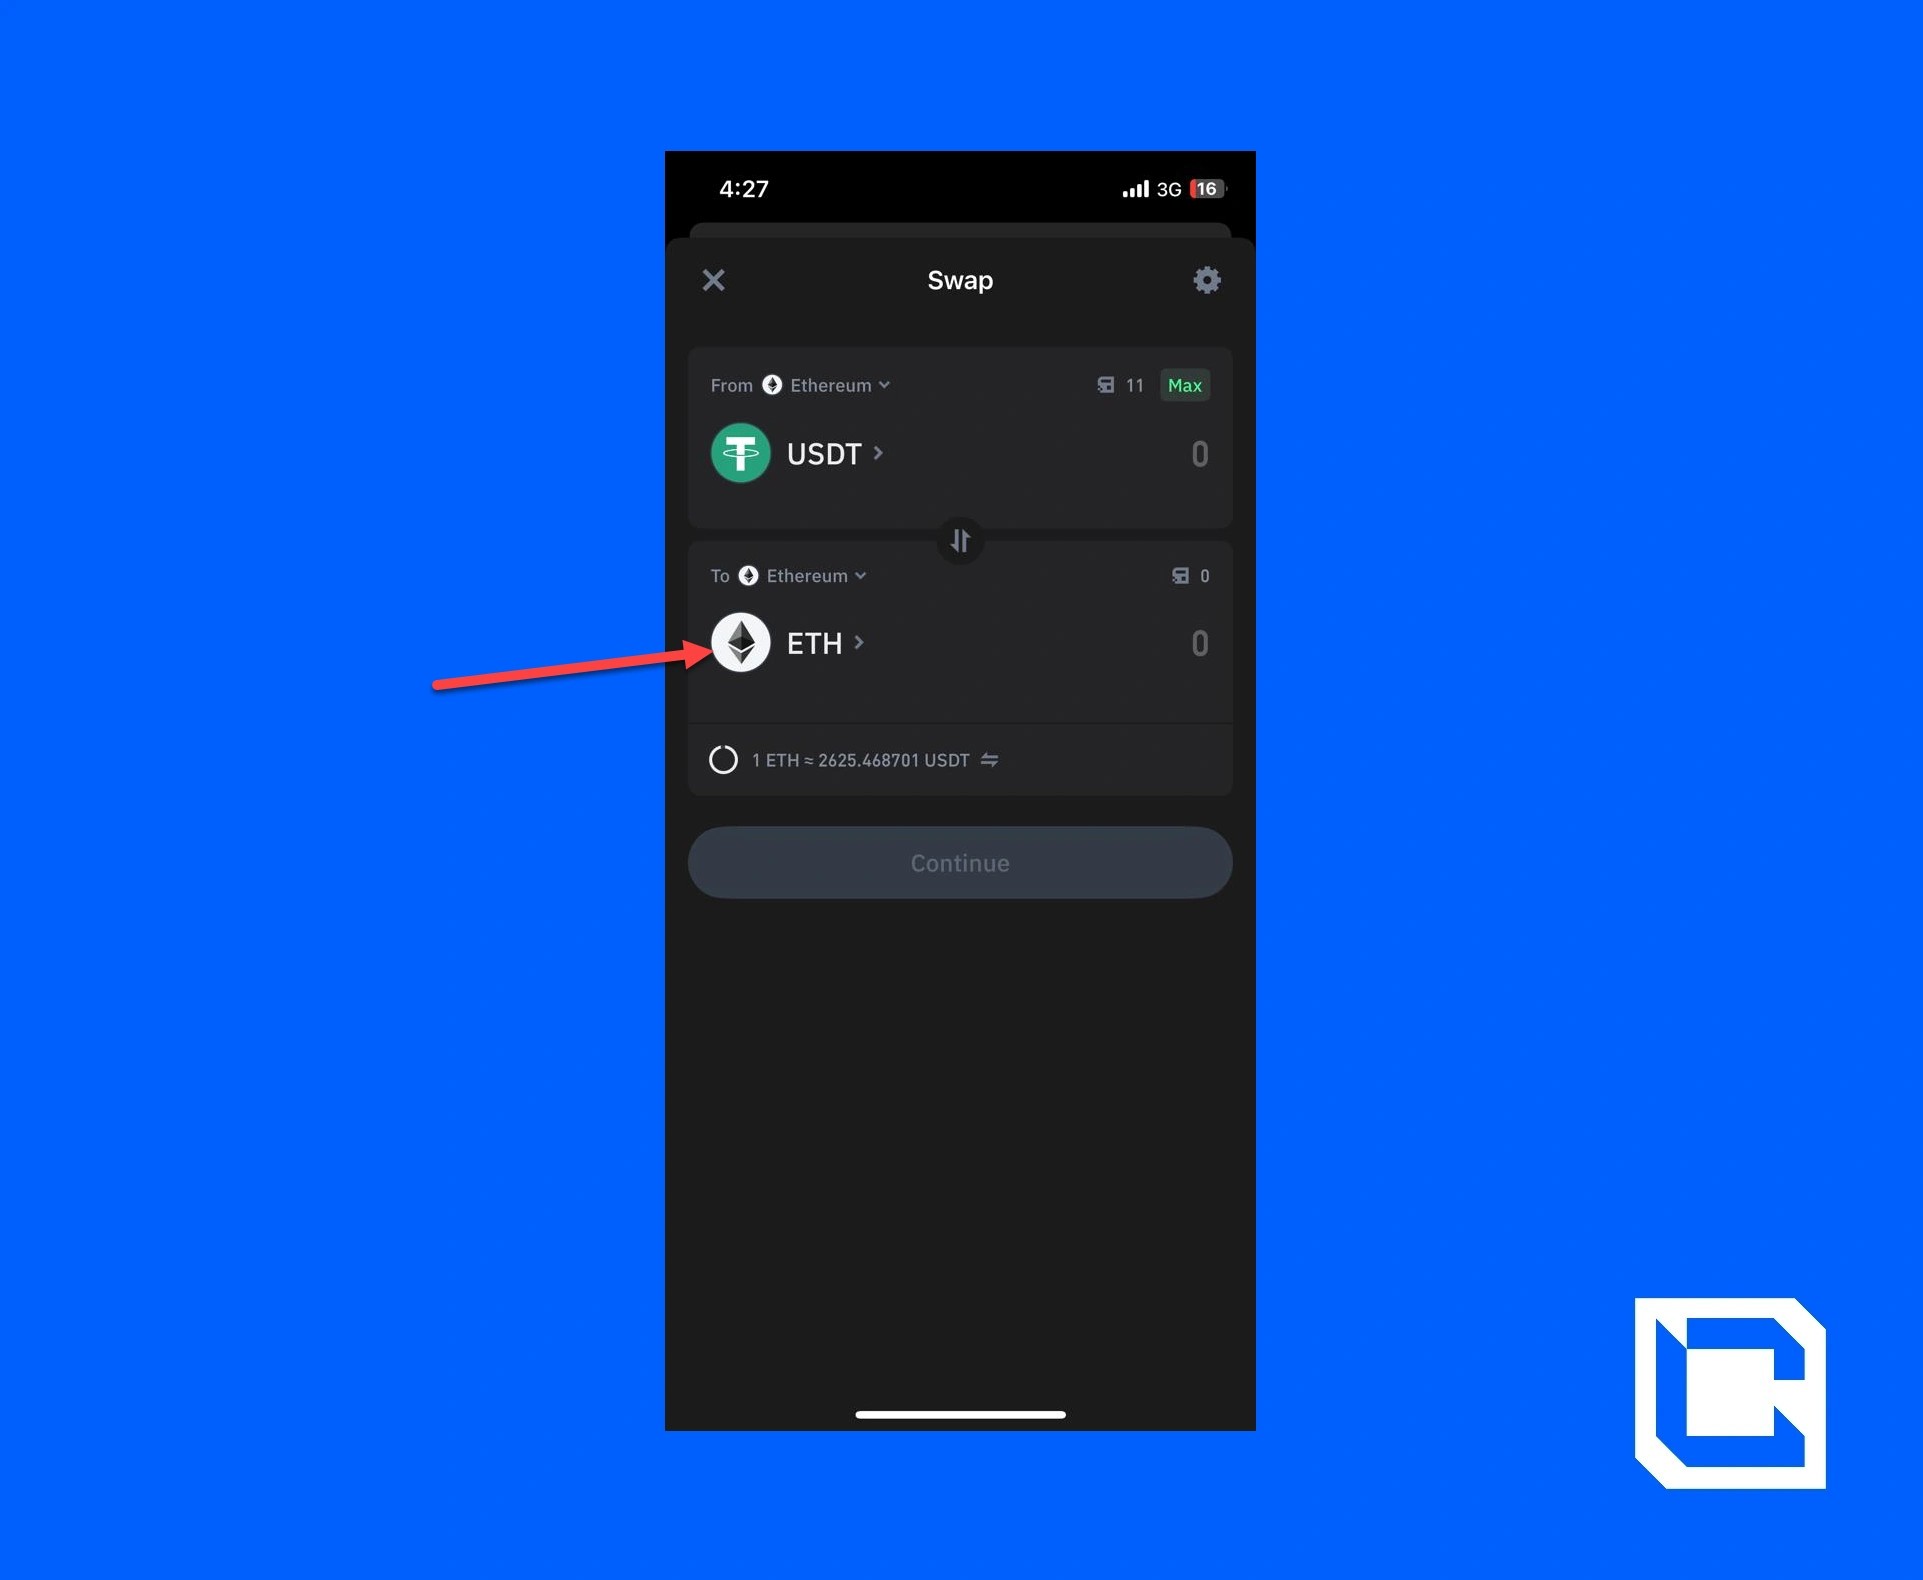
- Set the bottom coin to “Ethereum” on the Ethereum blockchain.
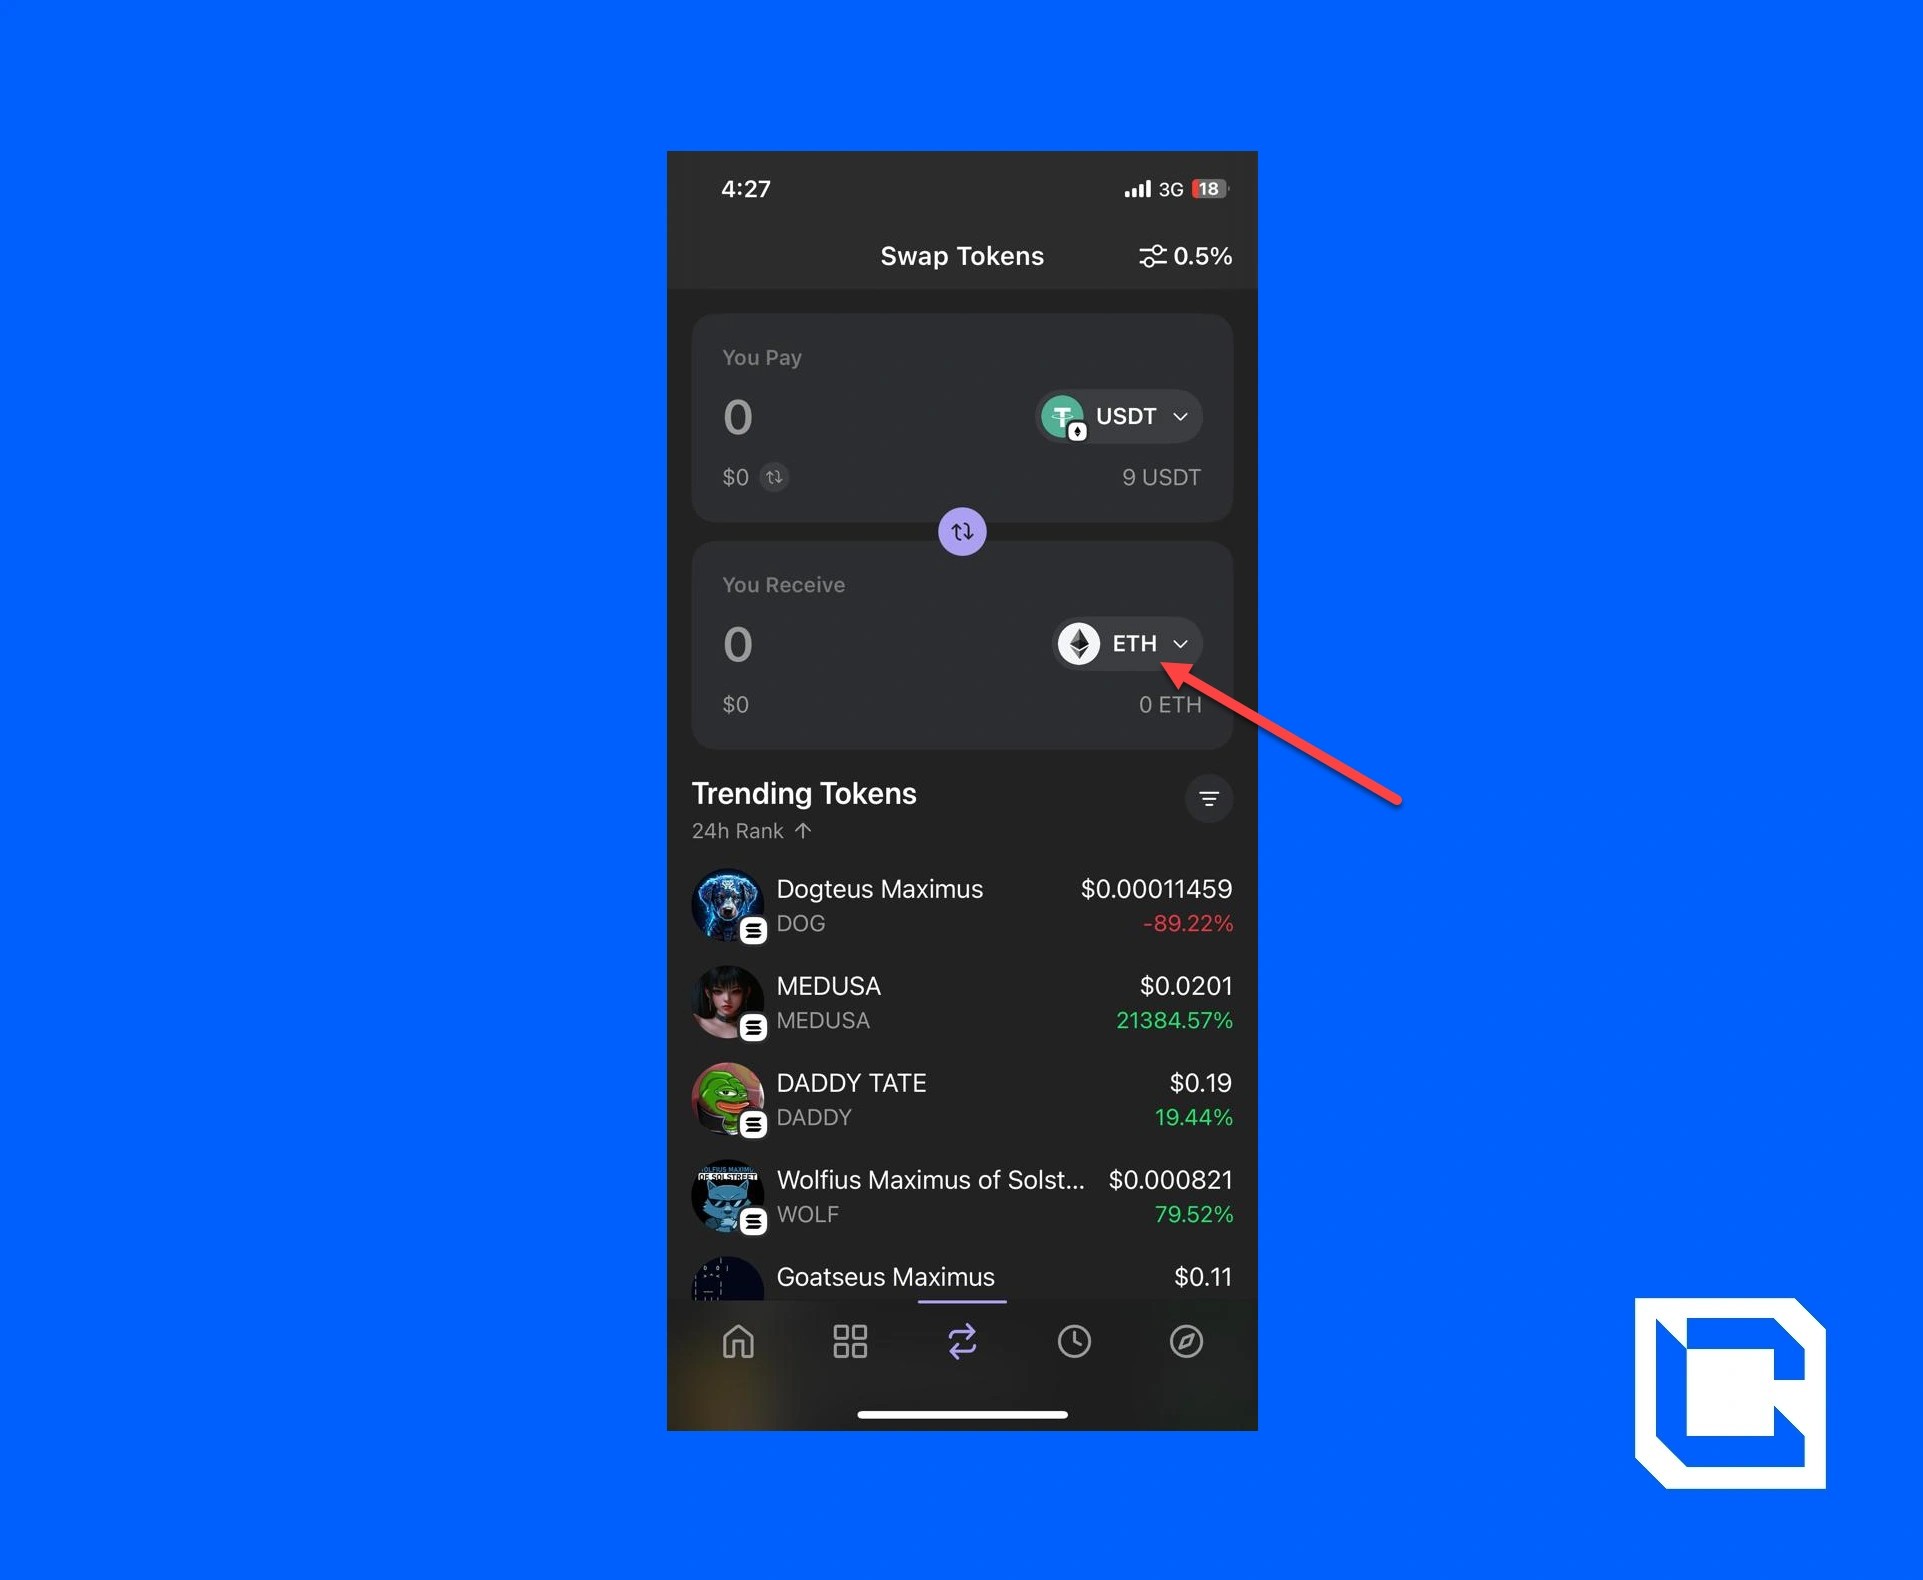
Note: Make sure to check the Ethereum blockchain symbol under the Ethereum image.
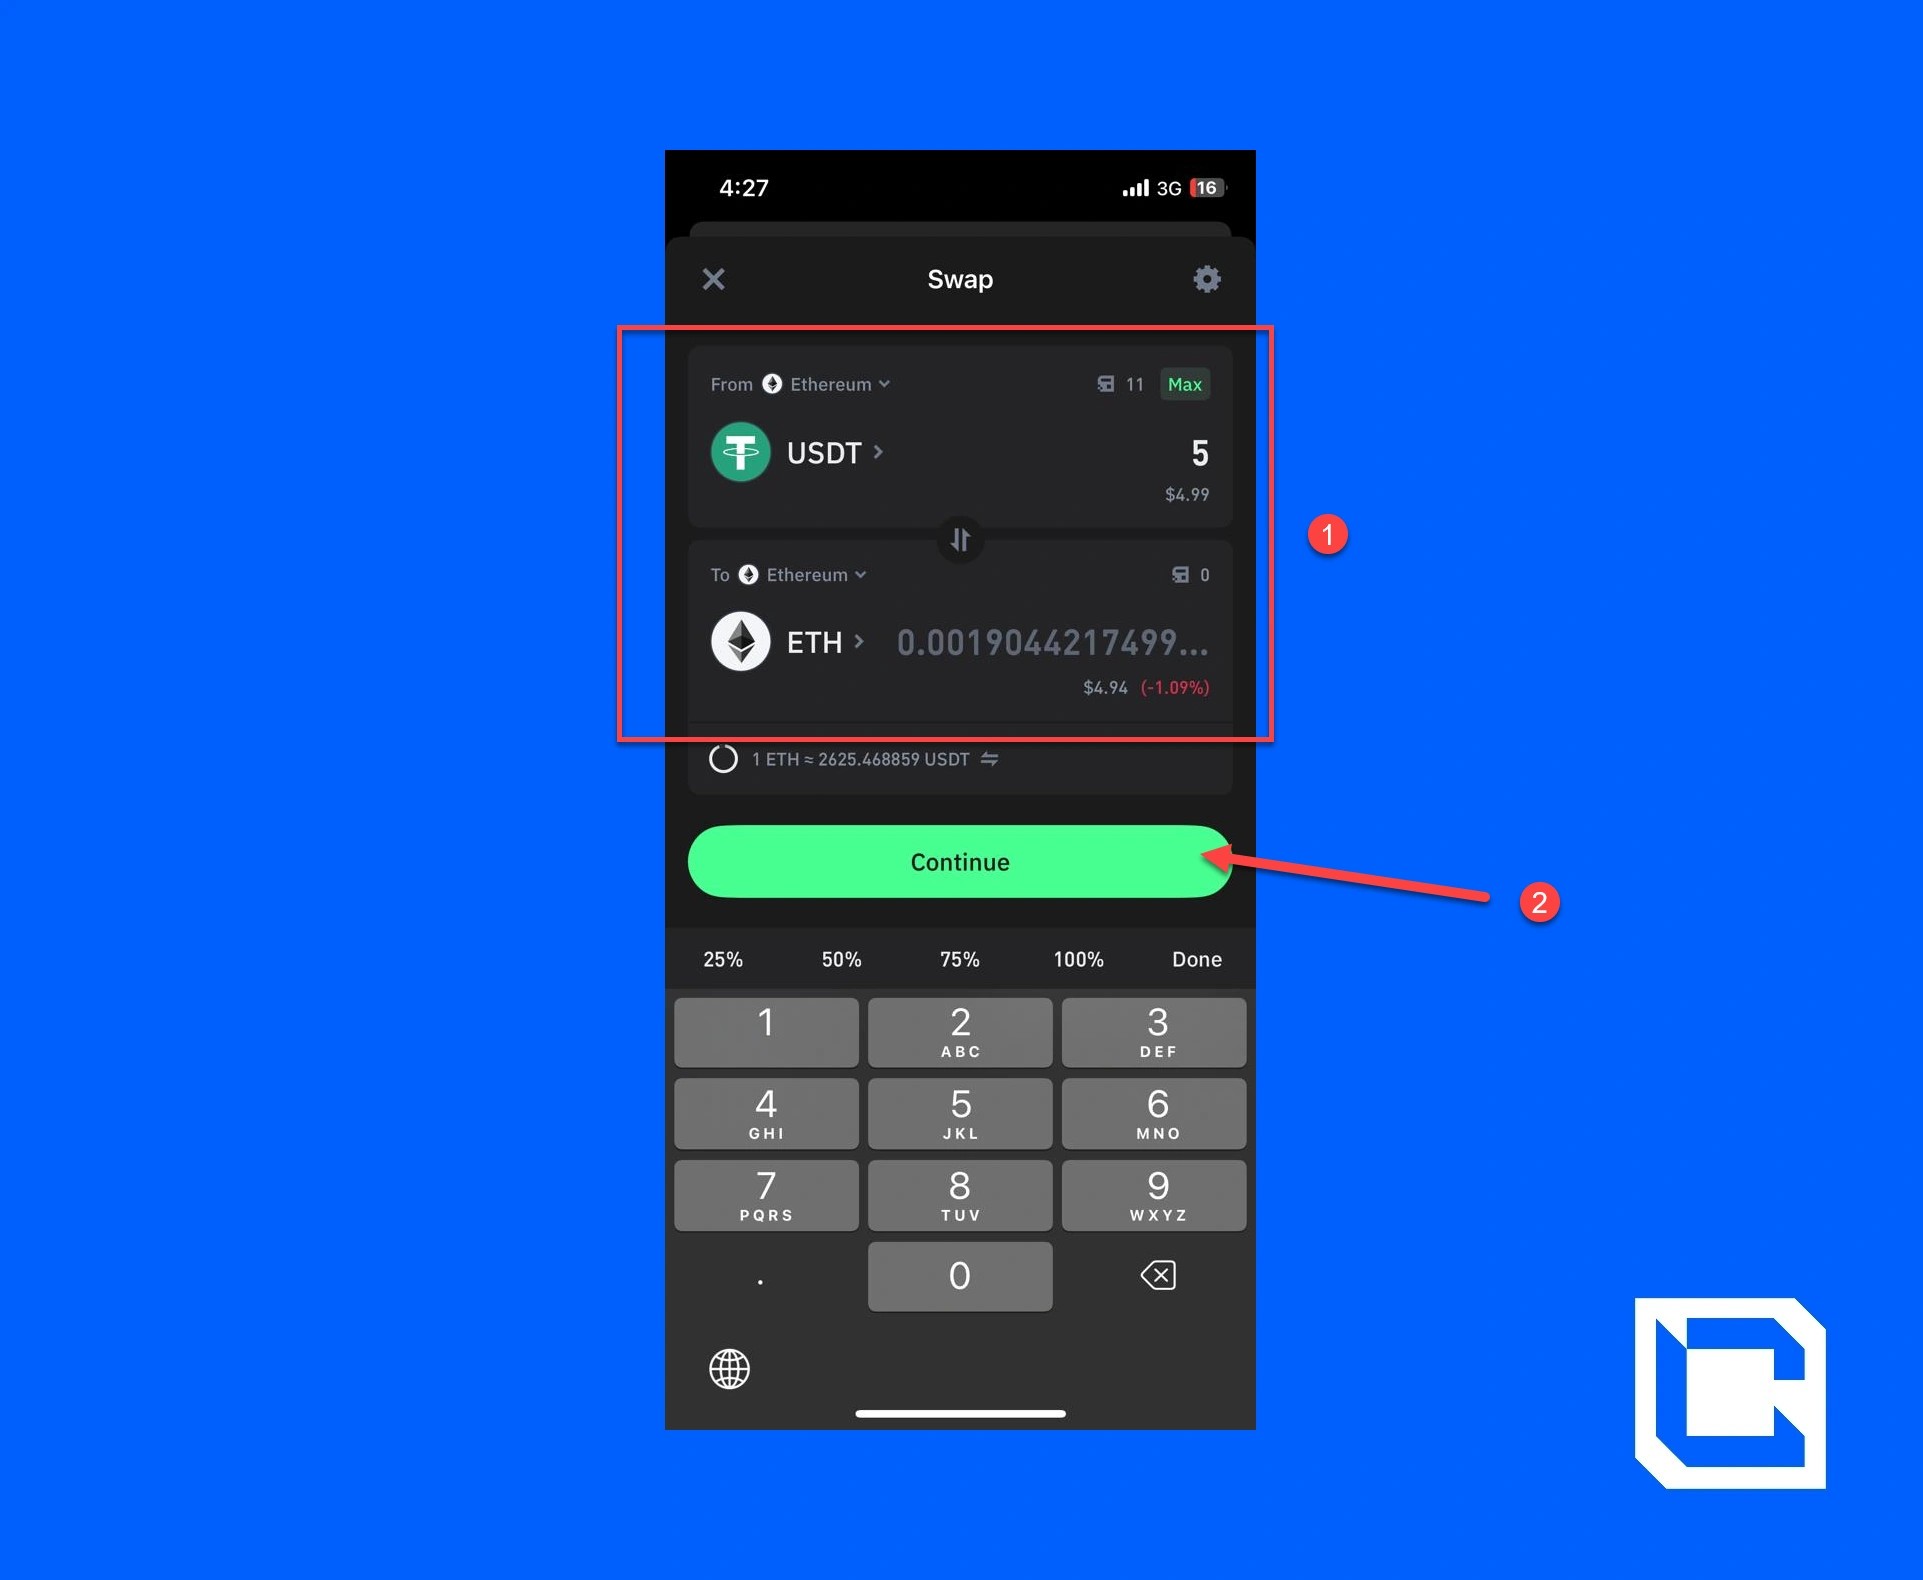
- Now, enter the amount and trap it on the “Review Order” button.
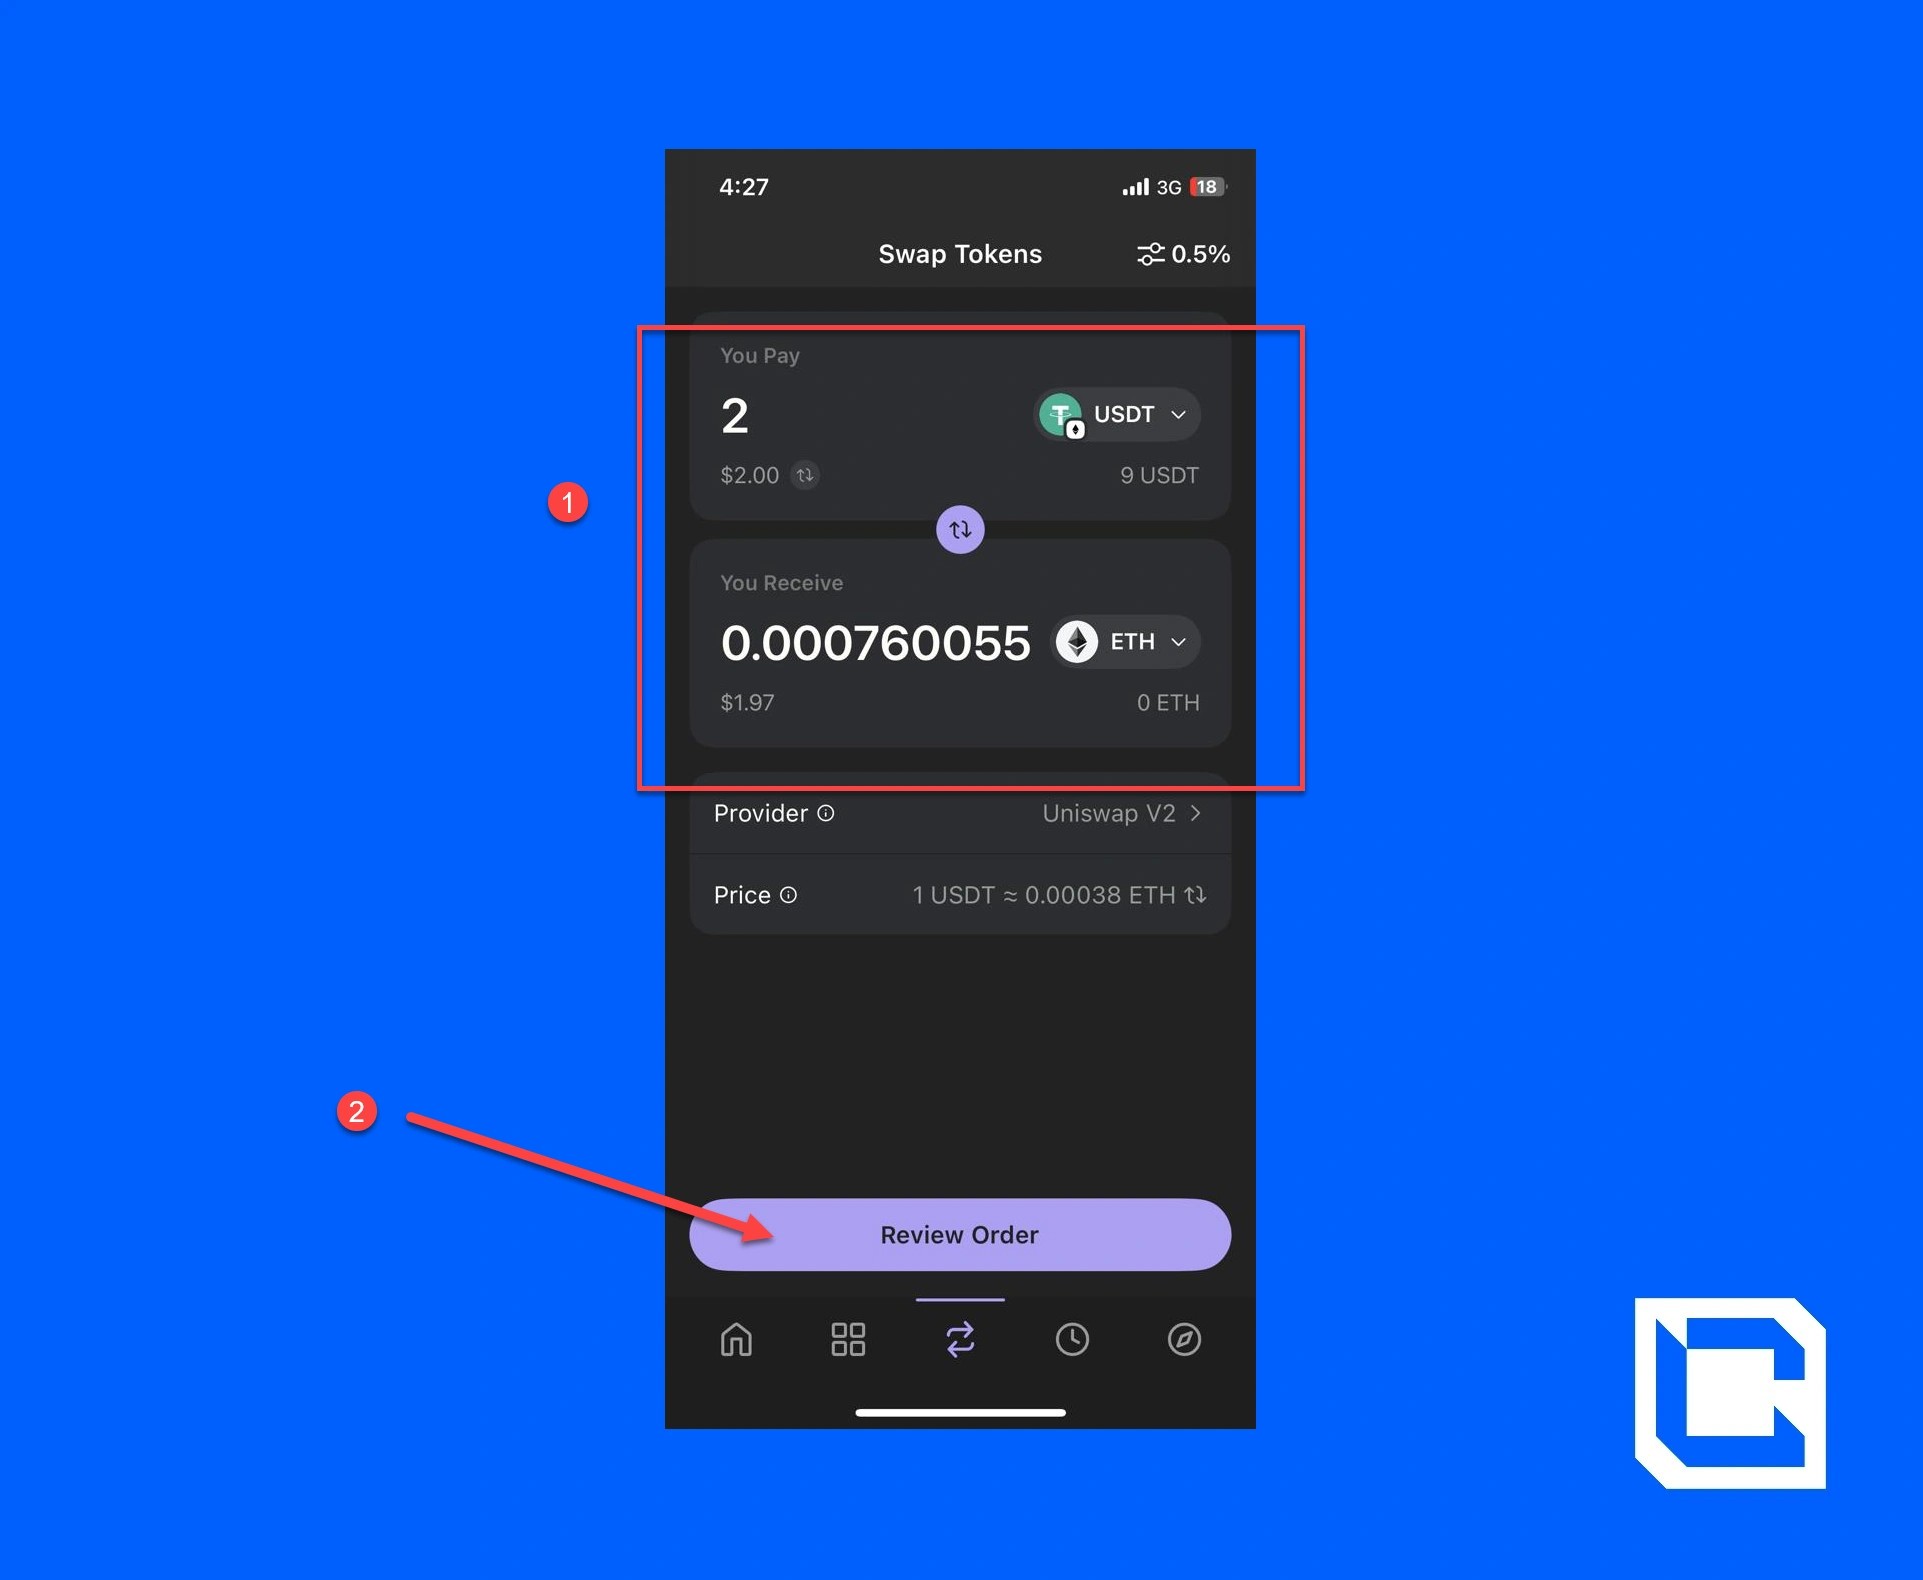
After making sure everything is alright, tap on the “Swap” button and the coins will be added to your wallet.
Through Trust Wallet
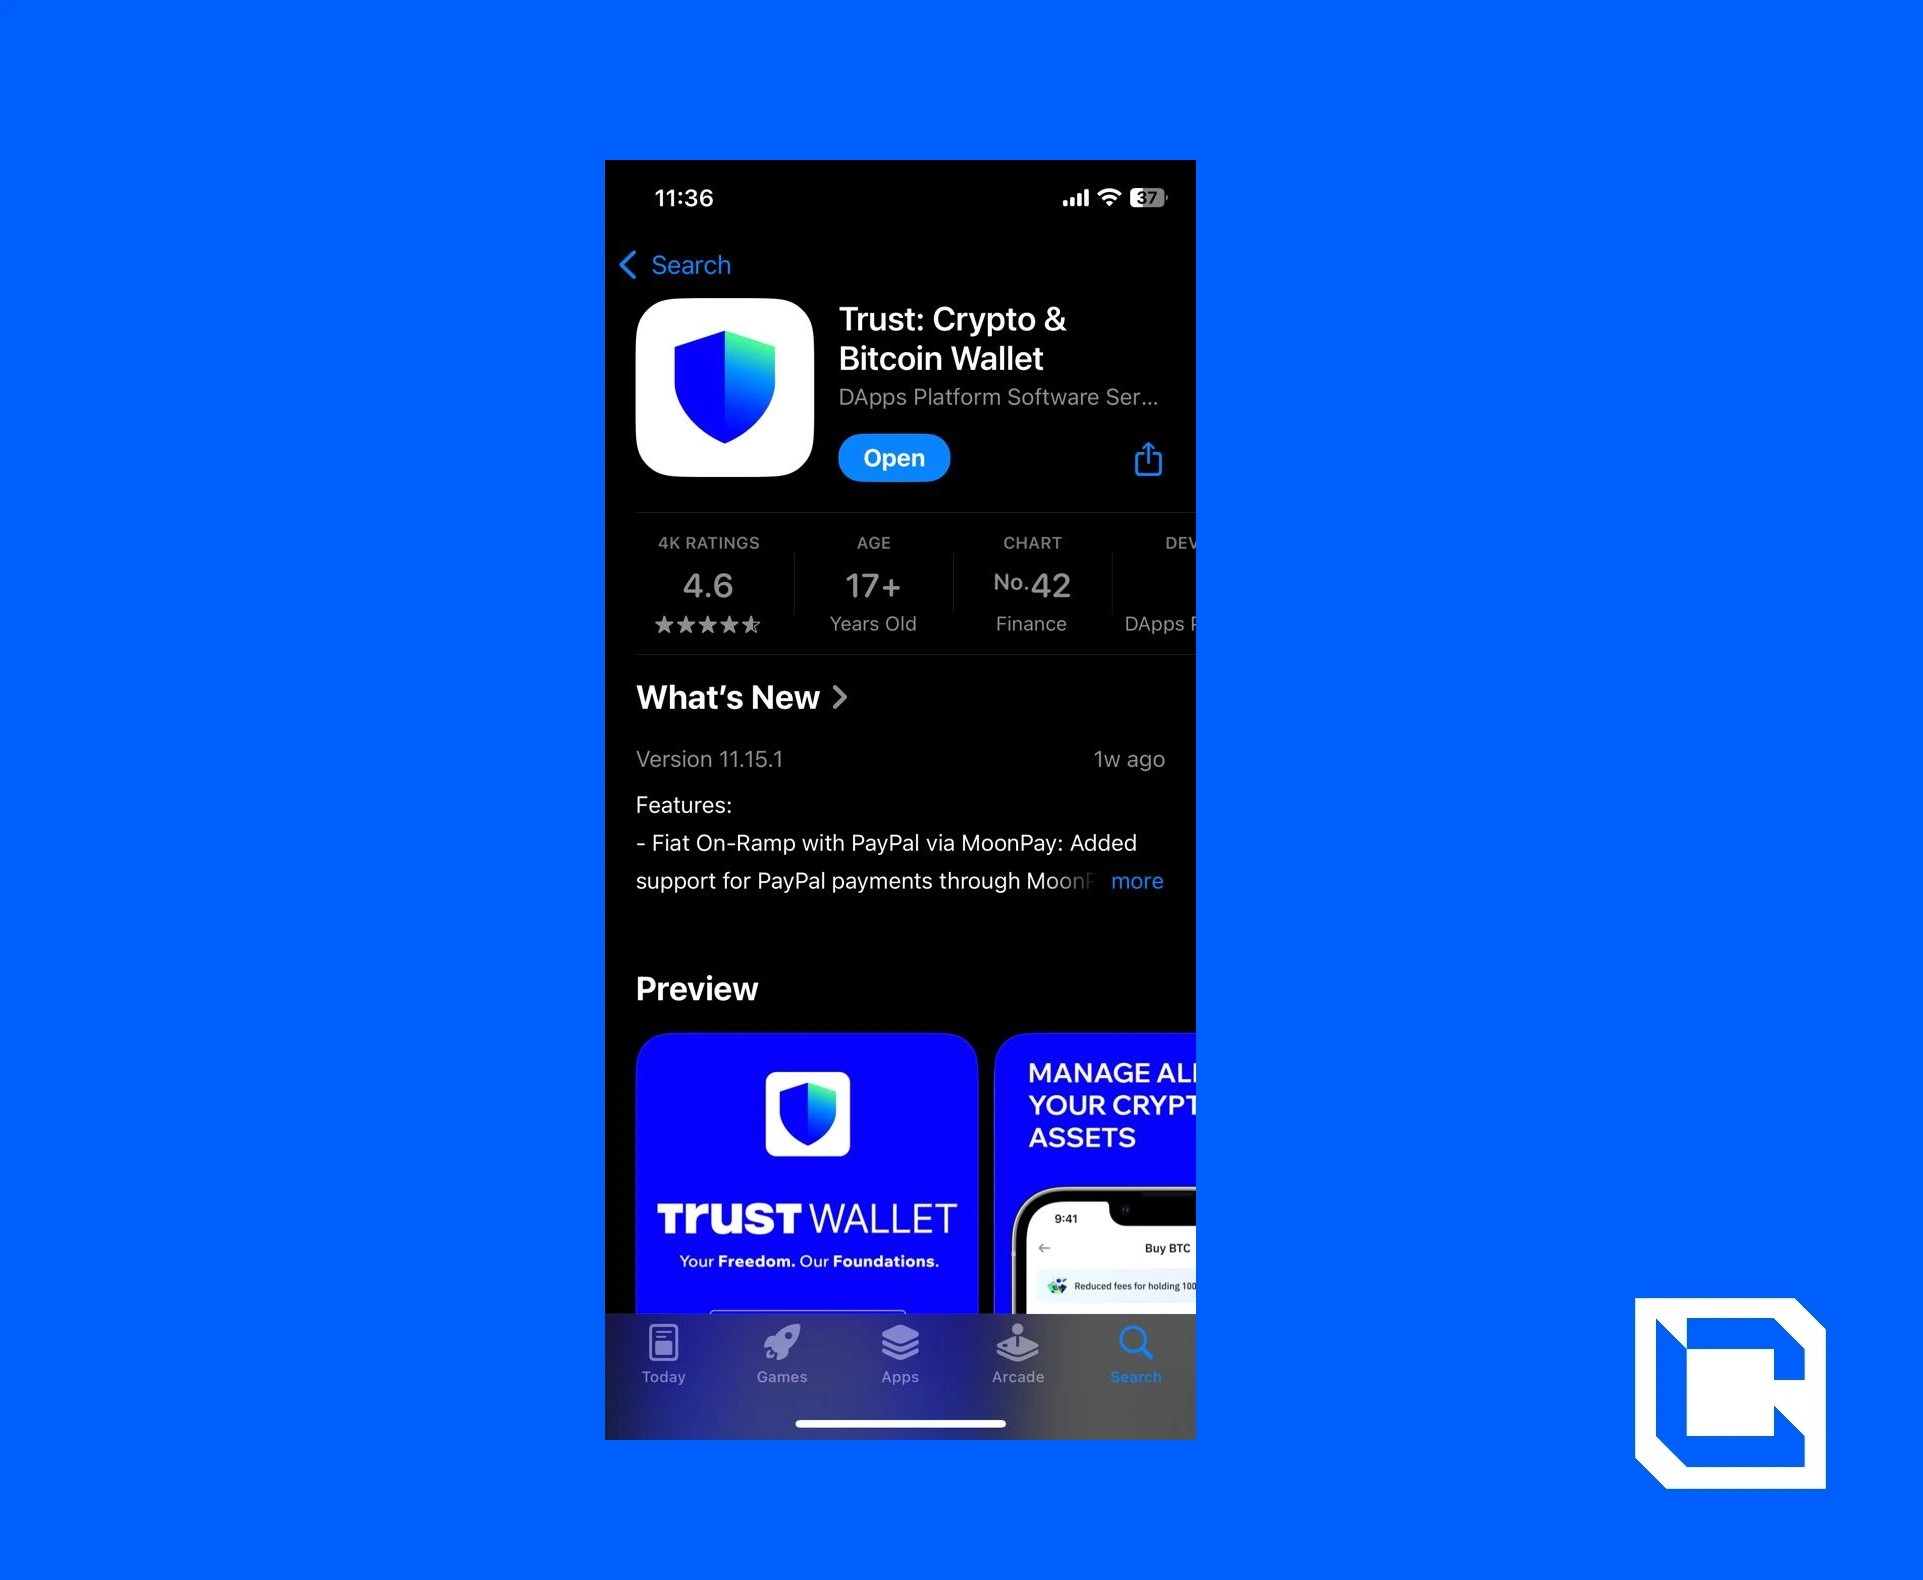
Now that you know how to buy Ethereum through Phantom Wallet, you should know that you can also buy it from the Trust Wallet.- Start by going to your App Store and downloading the Trust Wallet app.
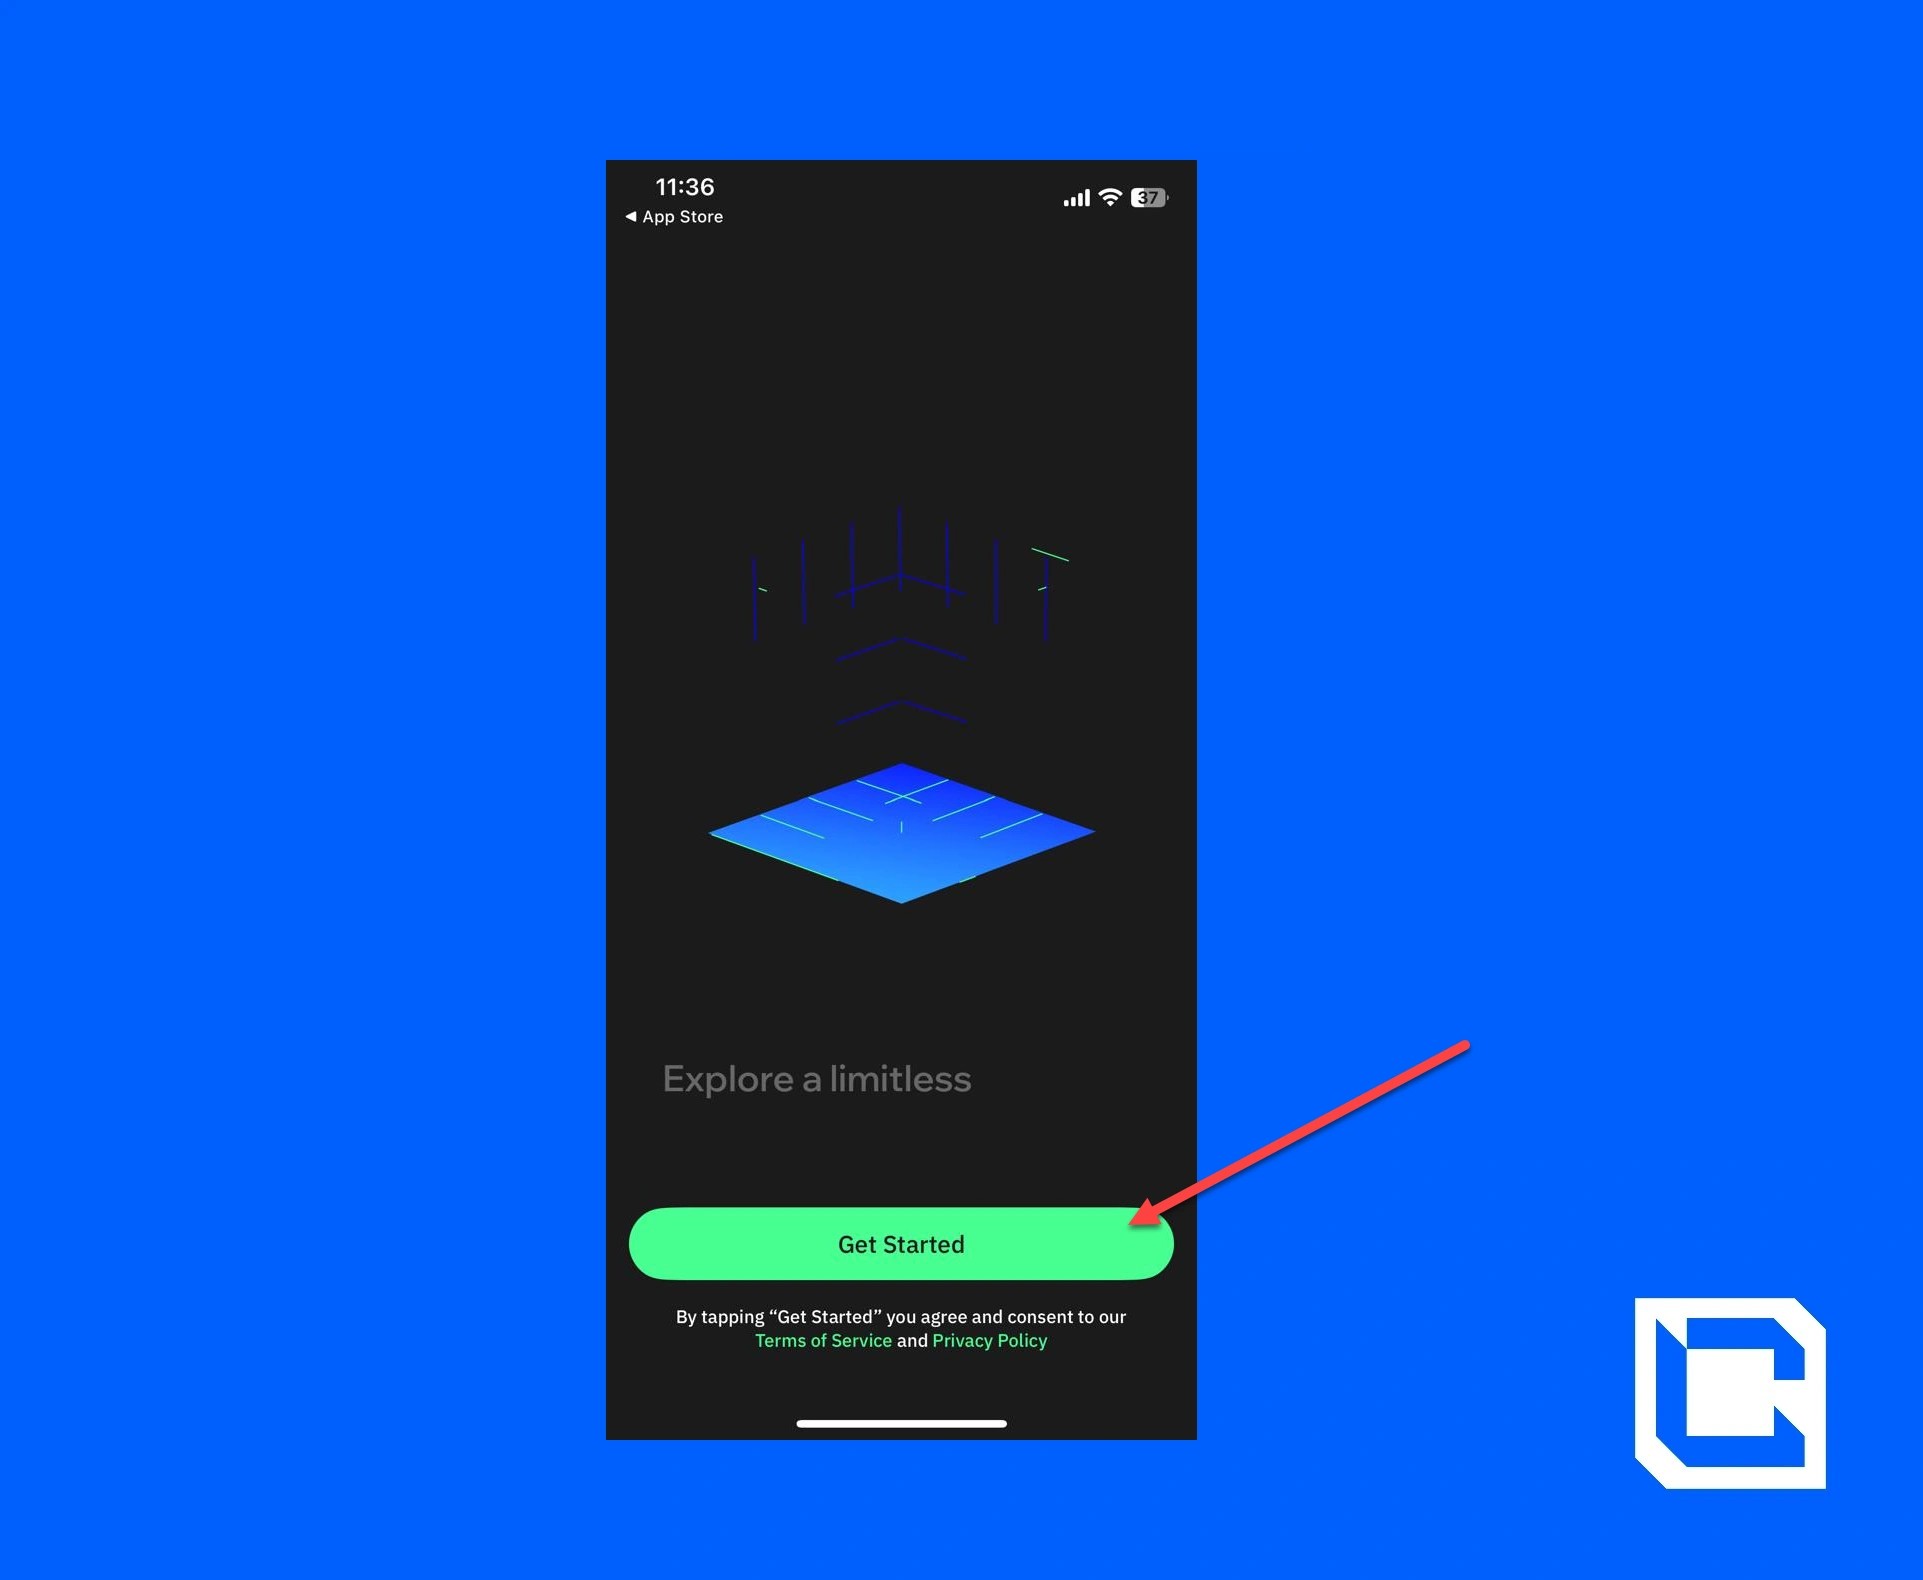
- Tap on the “Get Started” button.
- Tap on the “Create a new wallet” option.
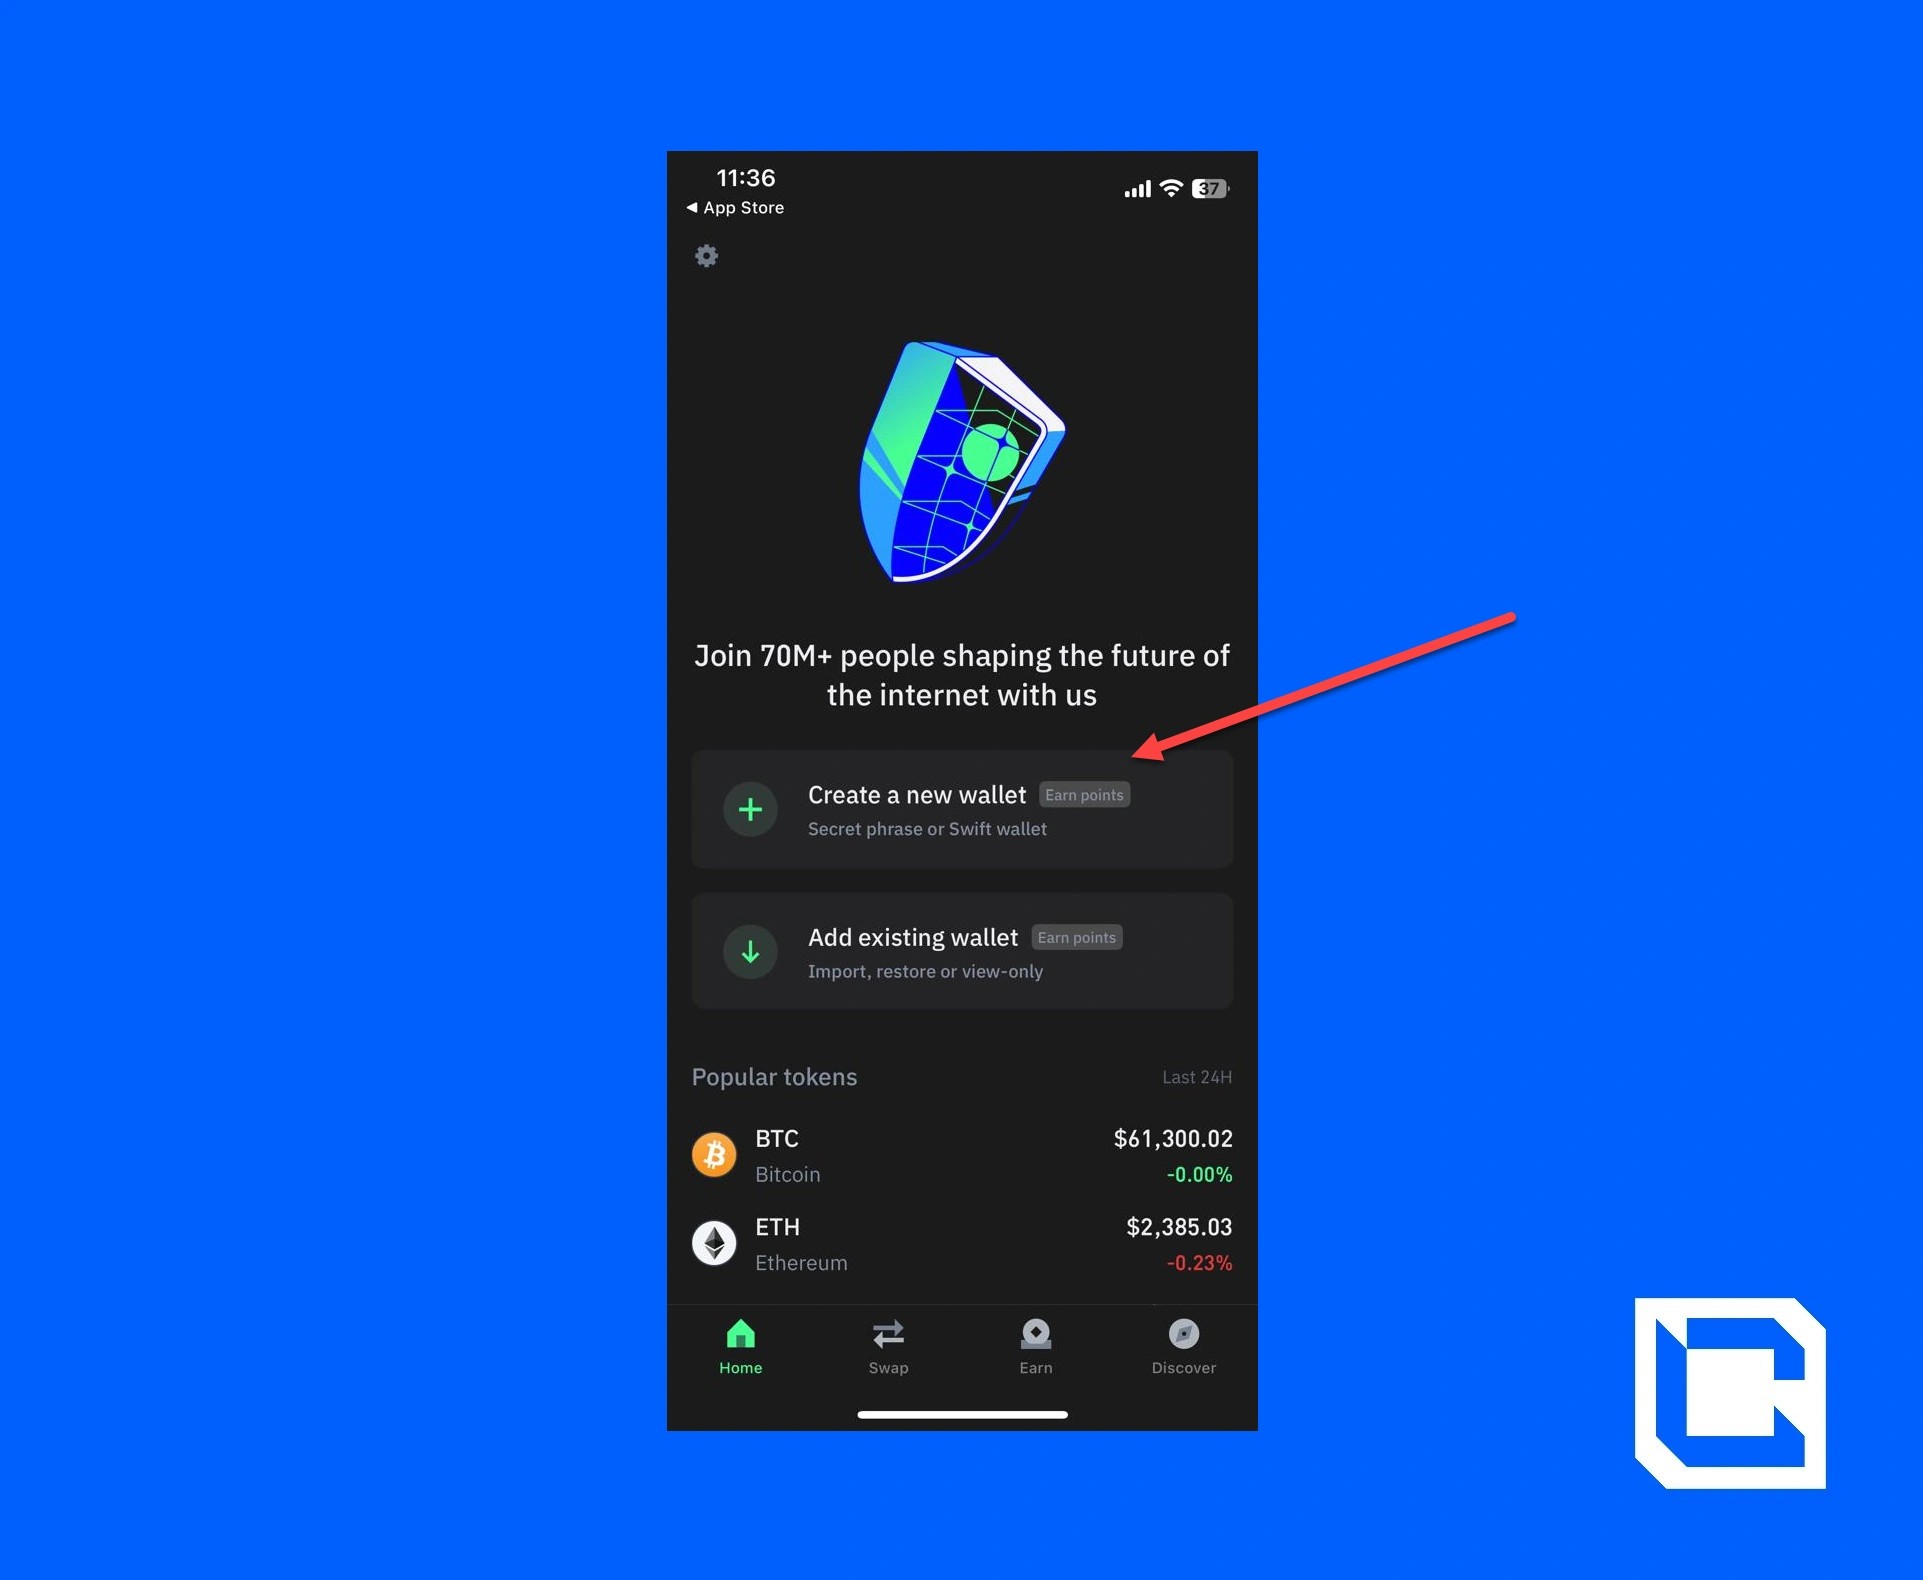
Note: If you already have a wallet, then you’ll choose the “Add existing wallet” option.
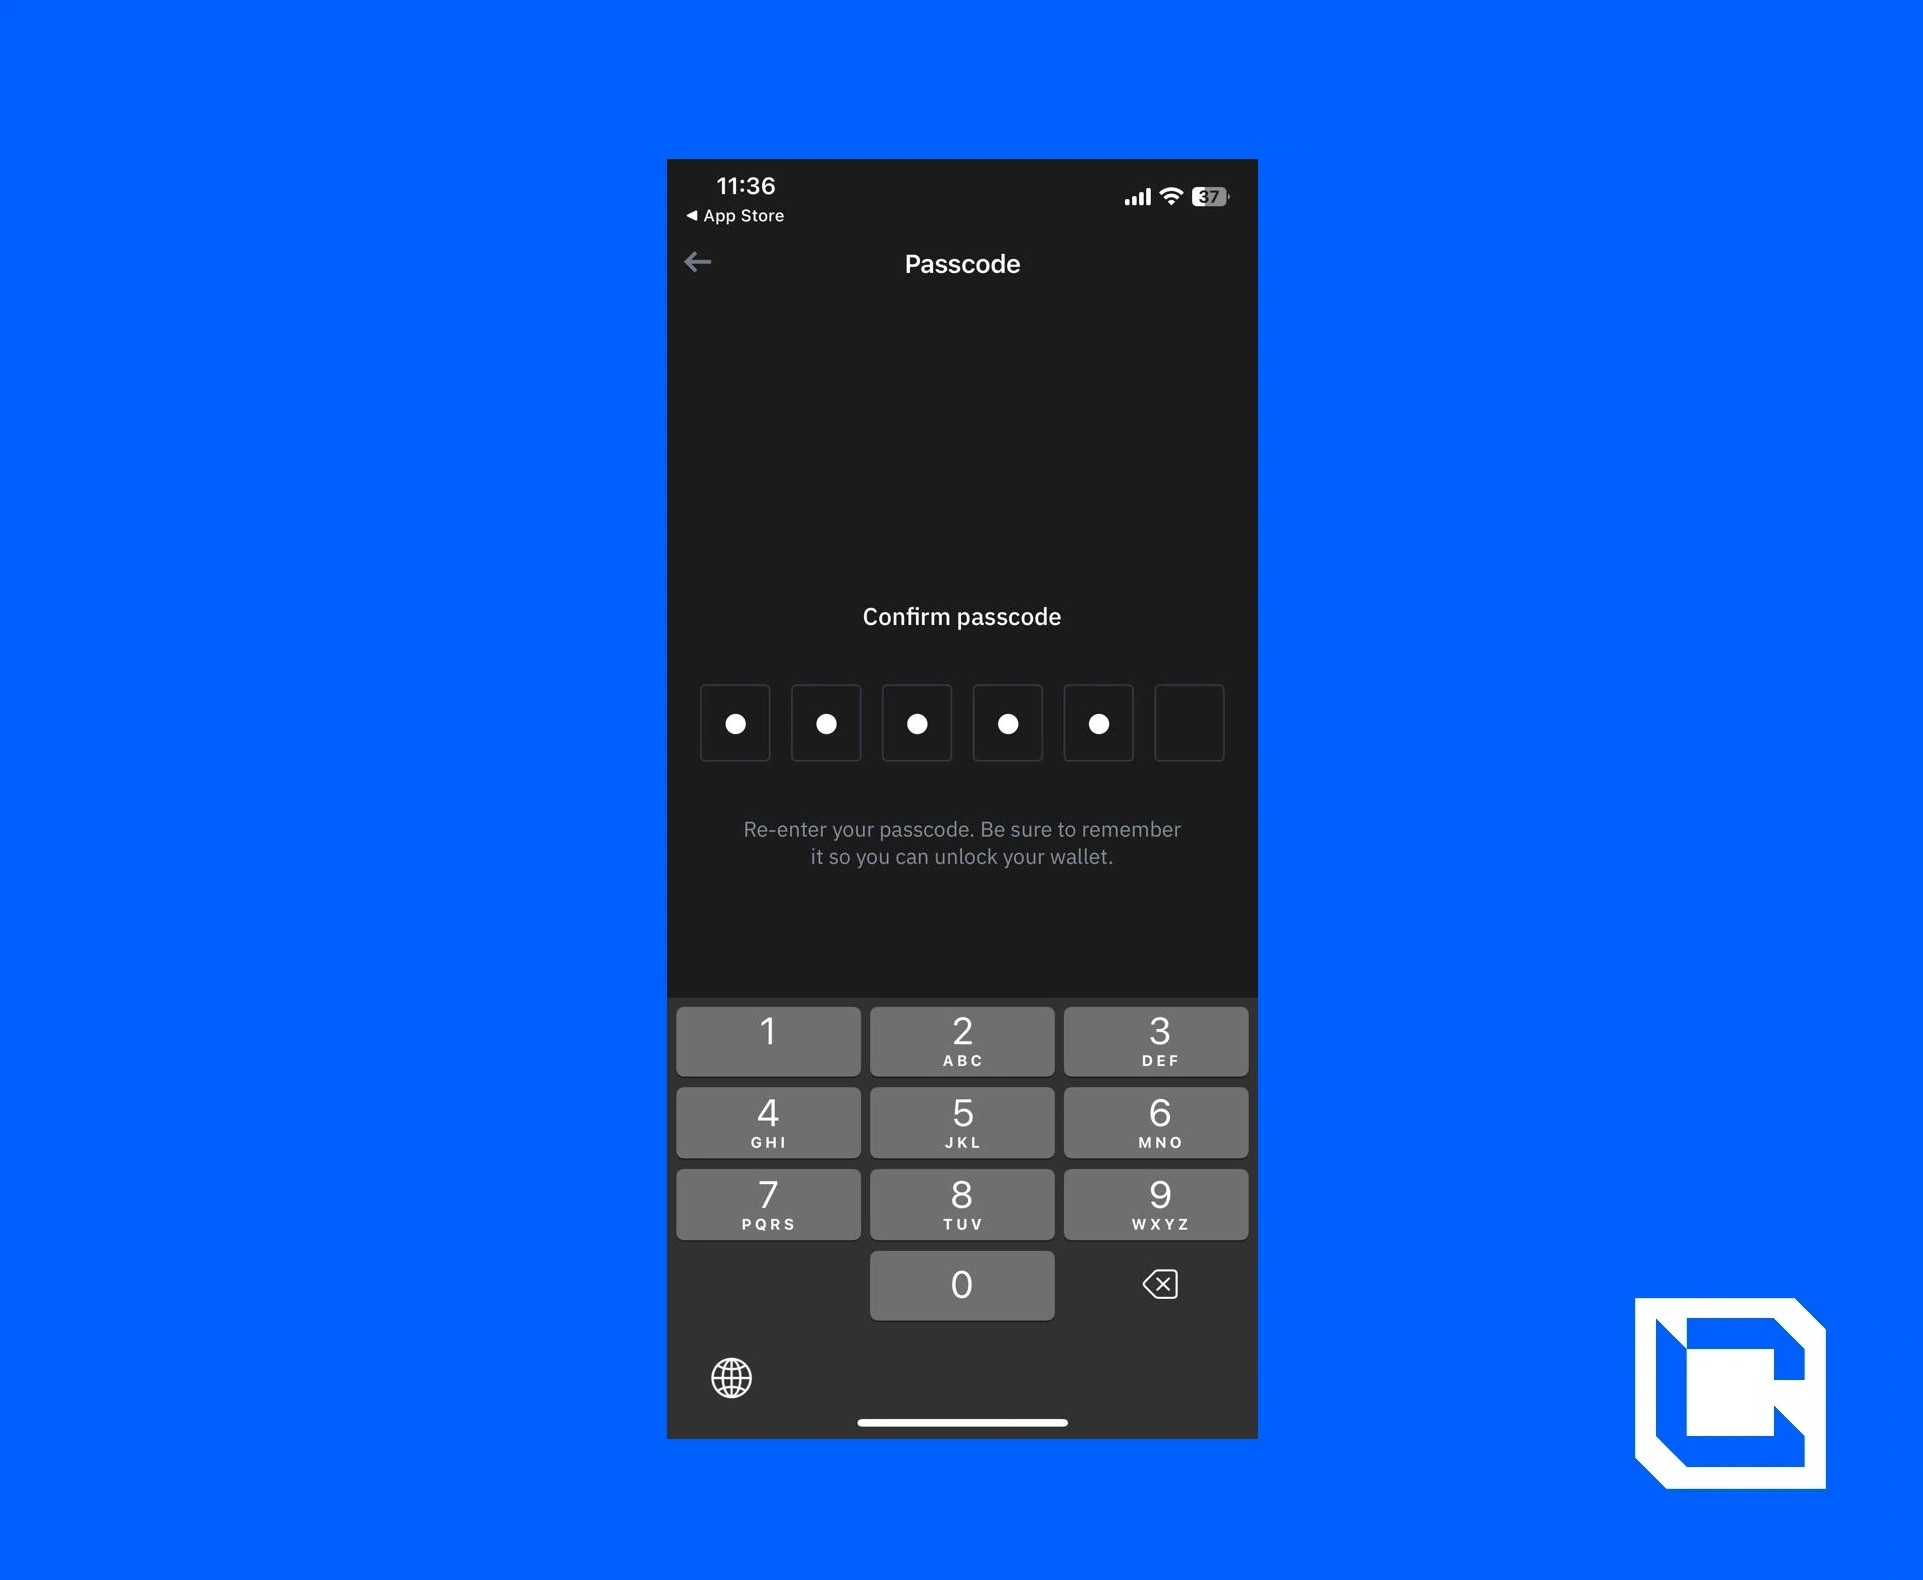
- Create a 6-digit password for your wallet.
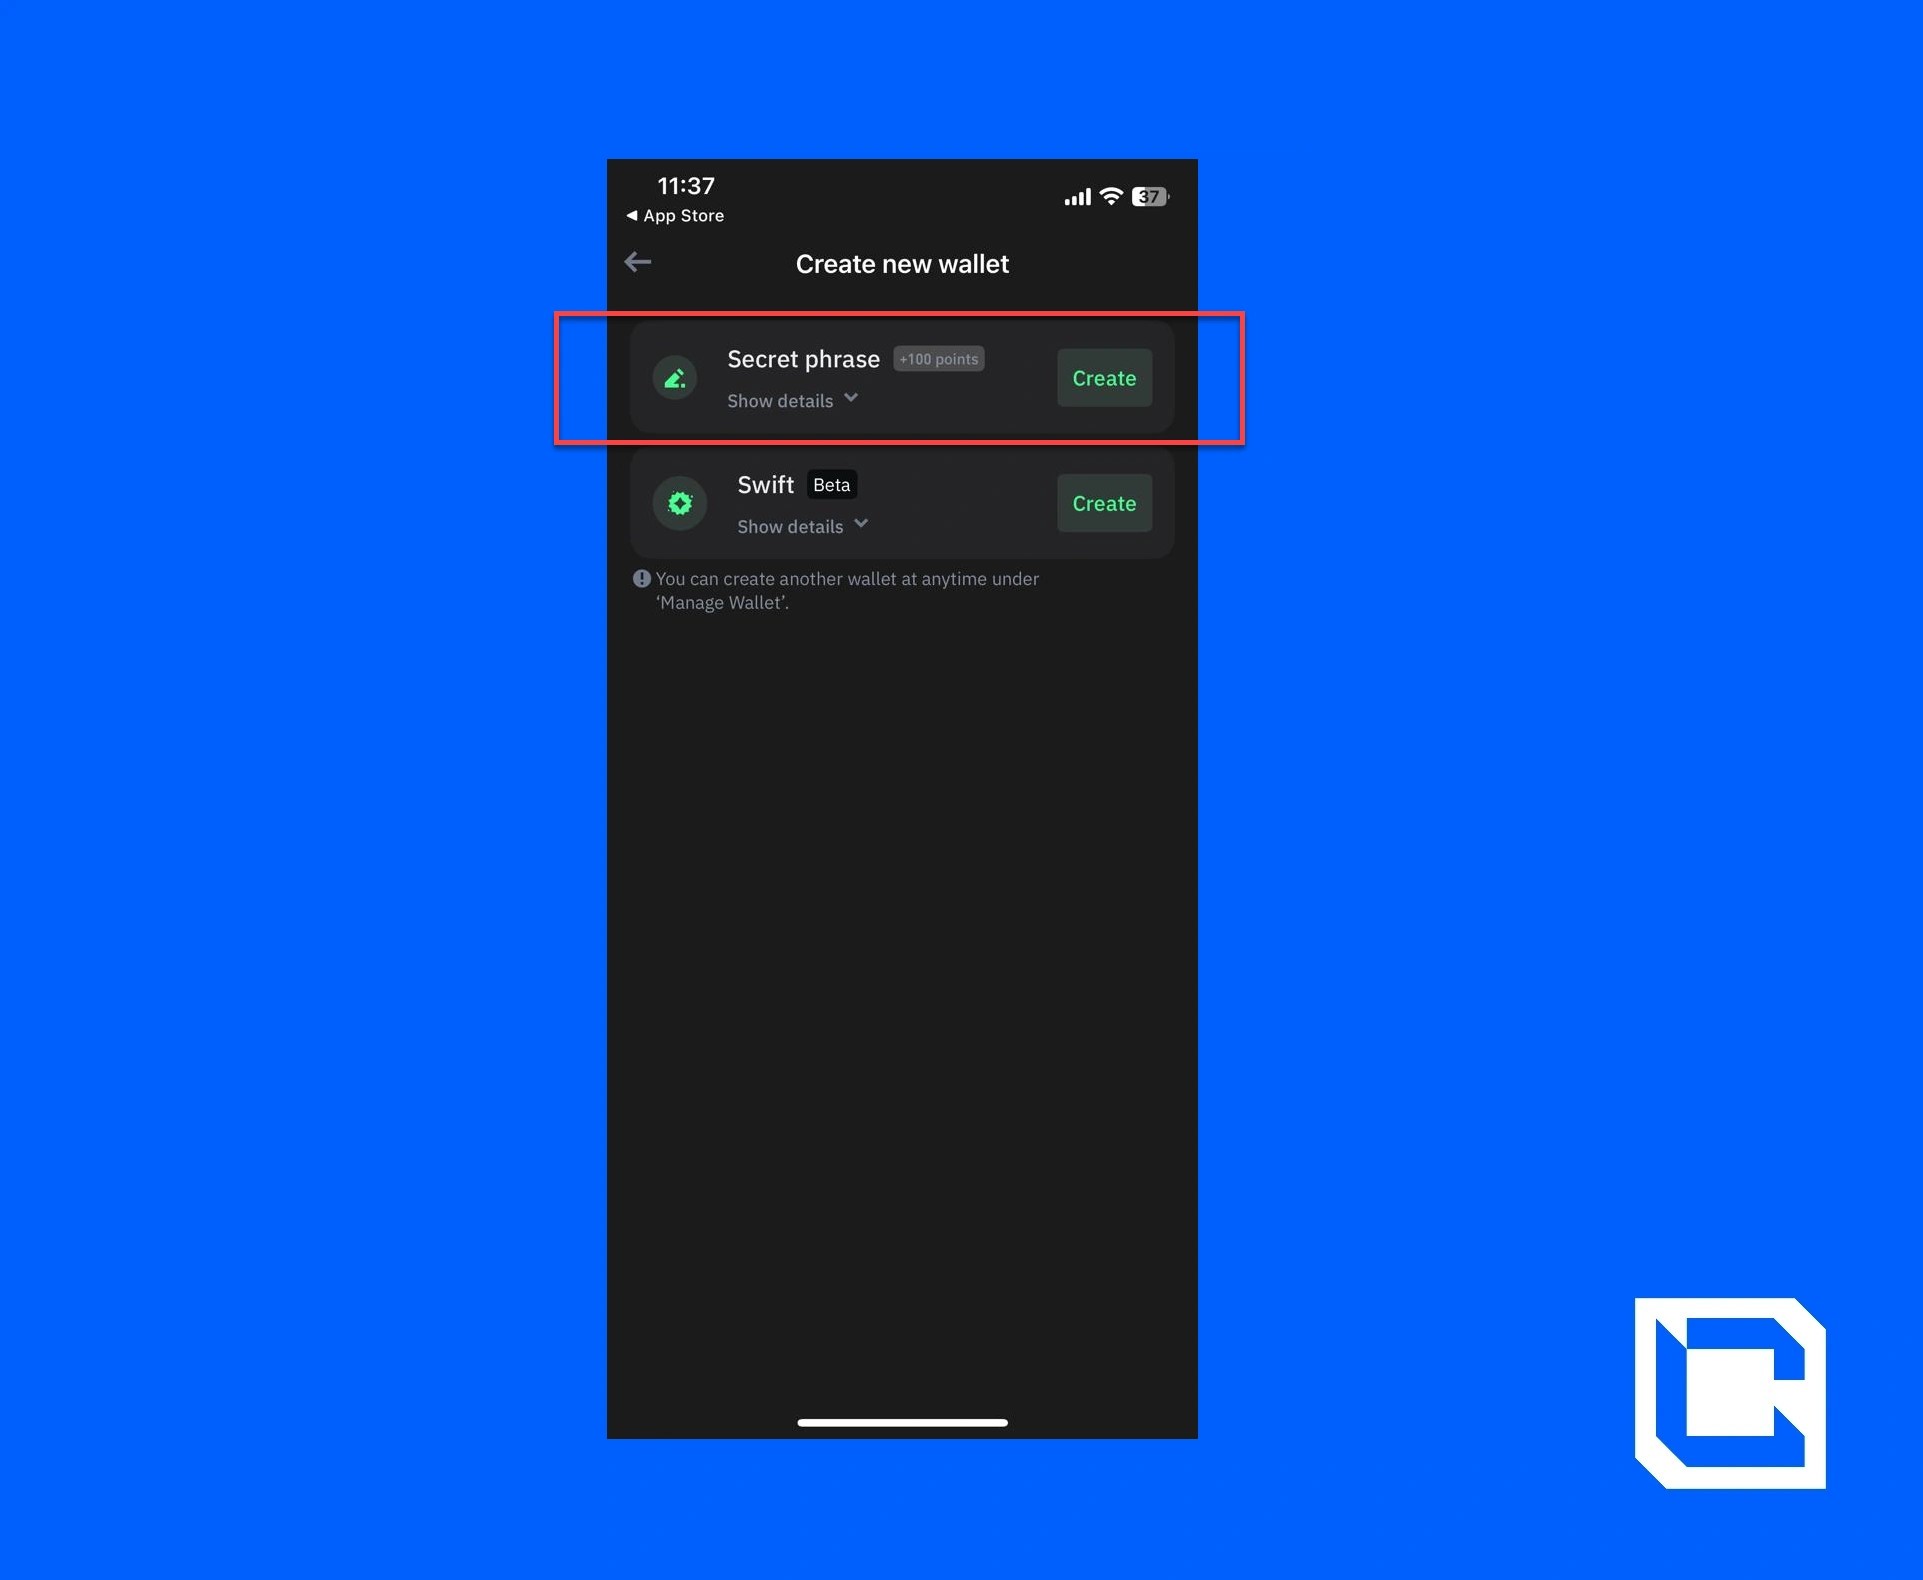
- Tap on the “Create” button for the “Secret phrase” option.
- Tap on the “Back up manually” option to store it as a text on your phone.
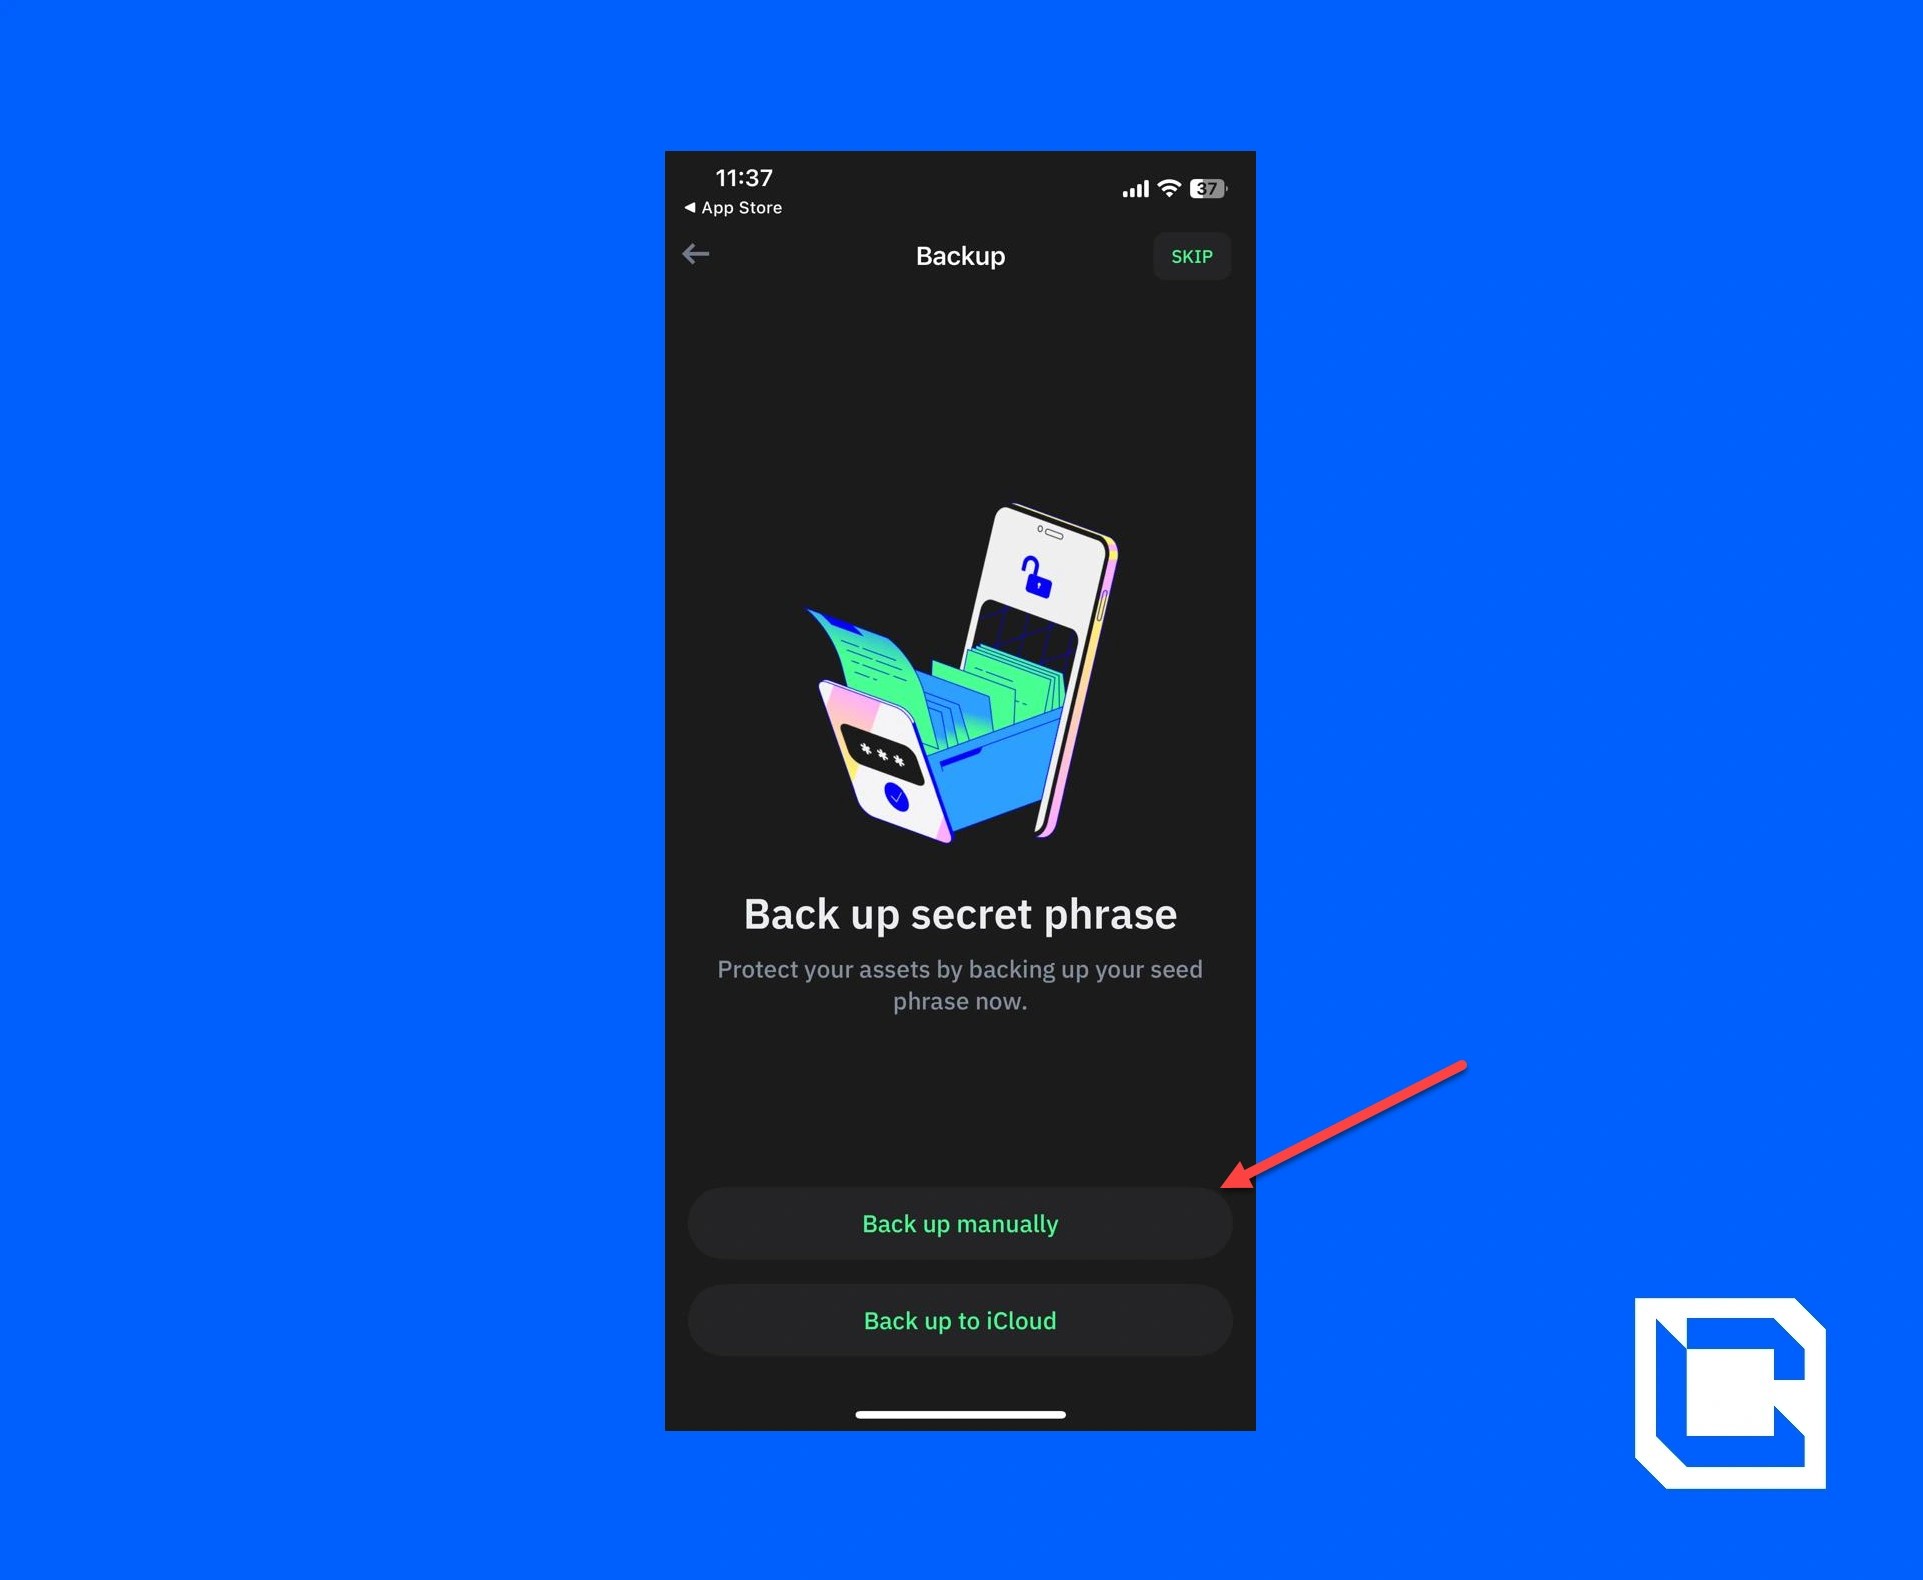
Note: You can also store it on your iCloud if you’re using it on an iPhone.
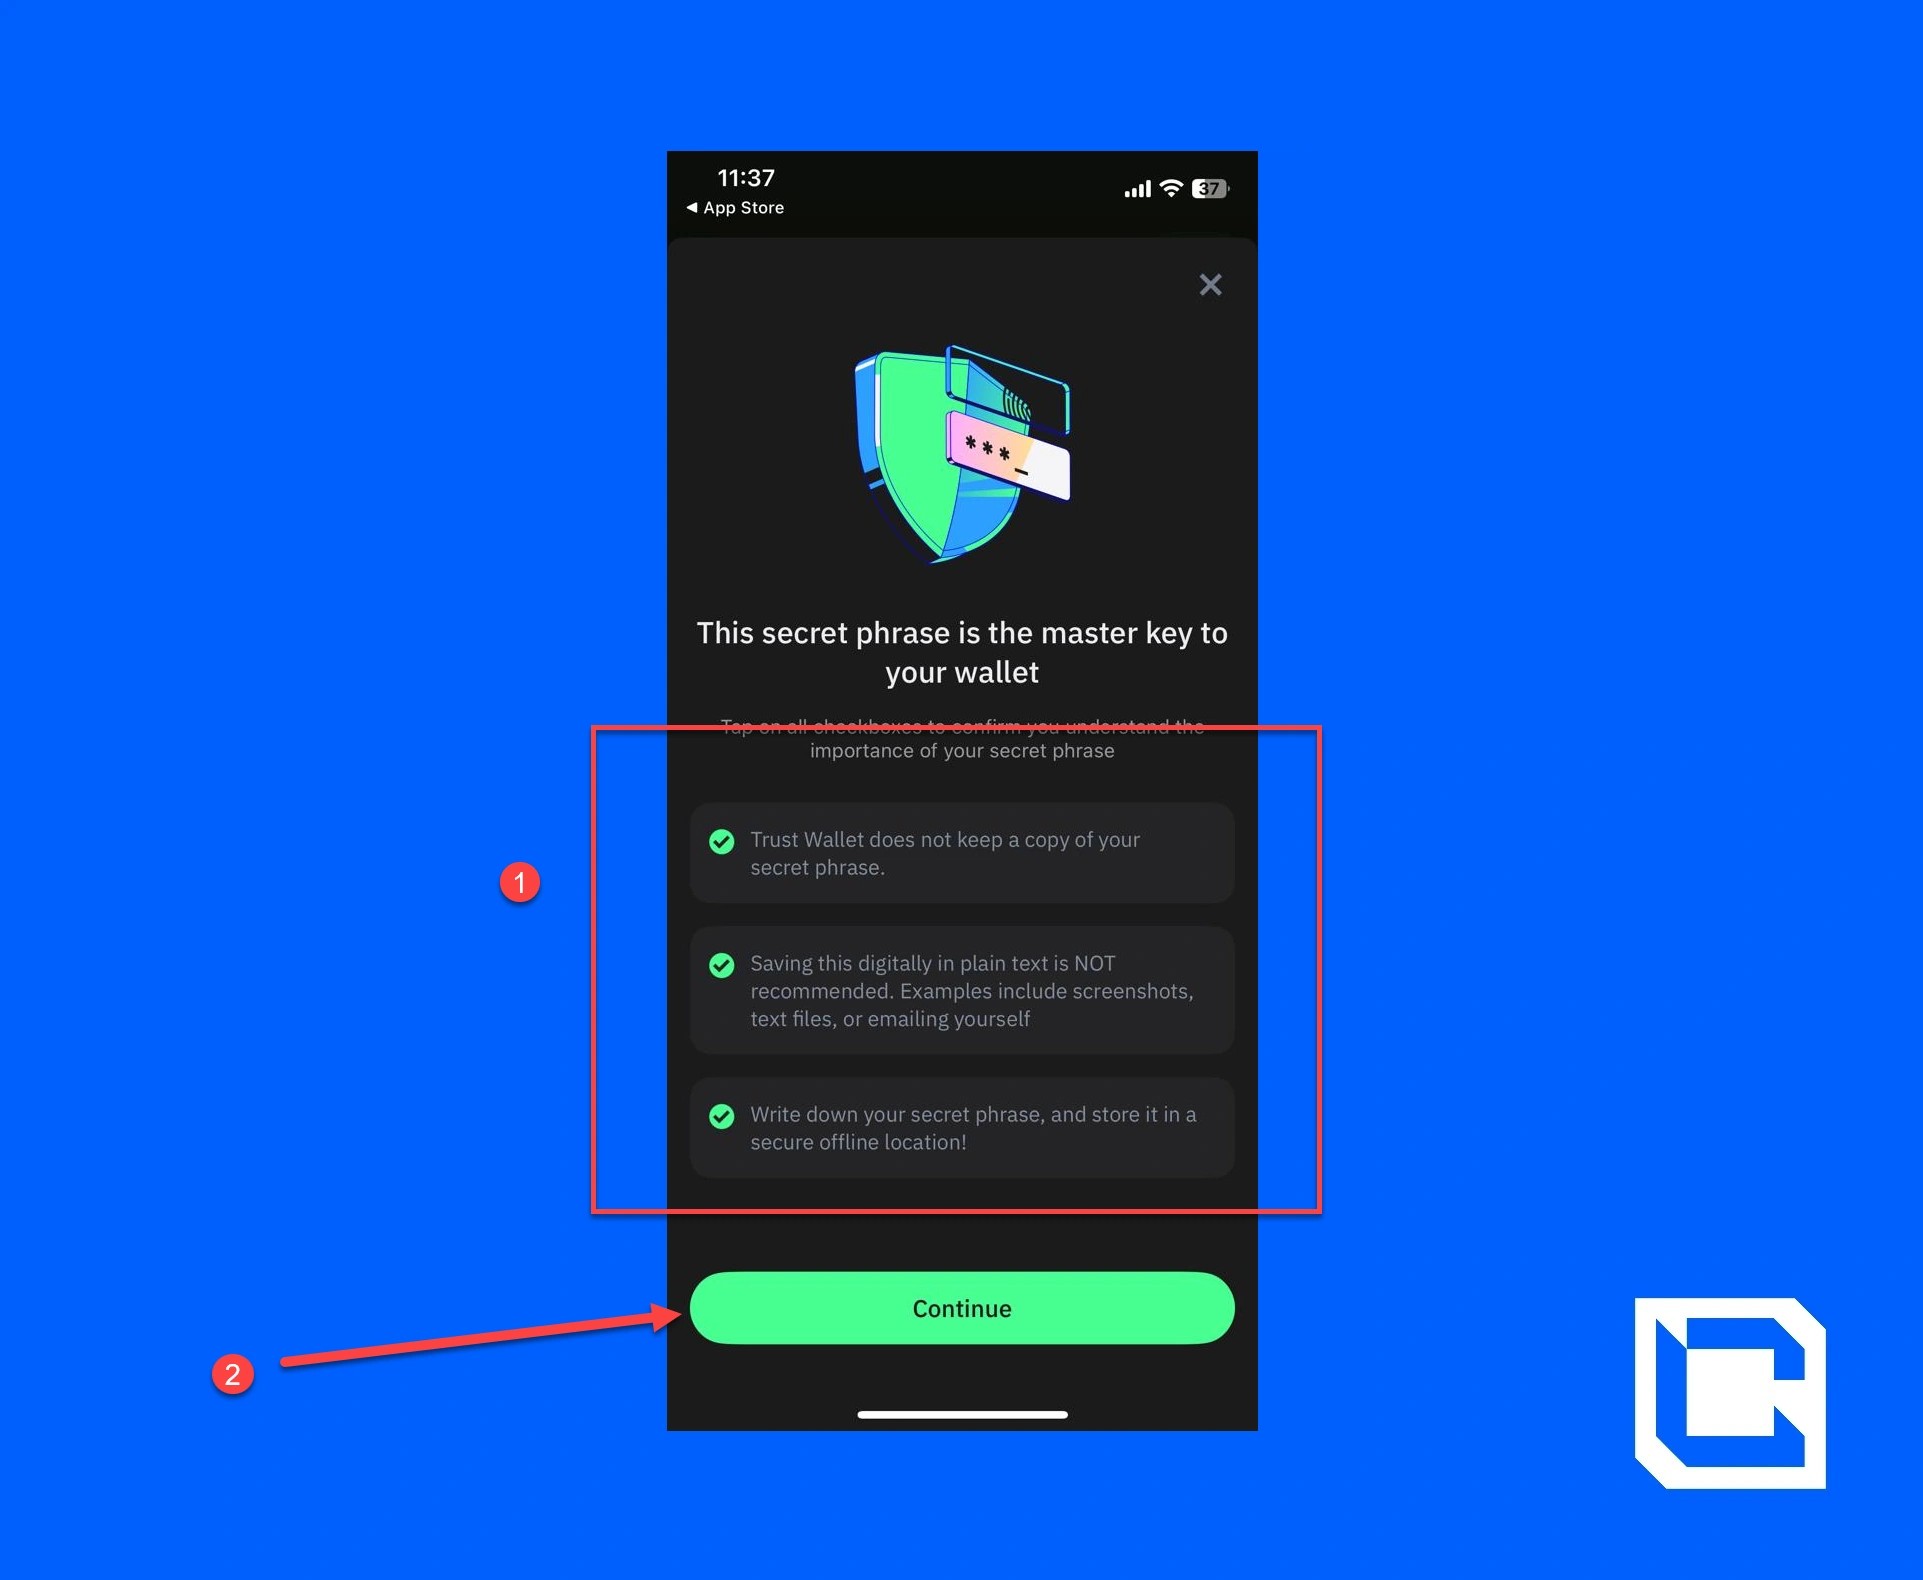
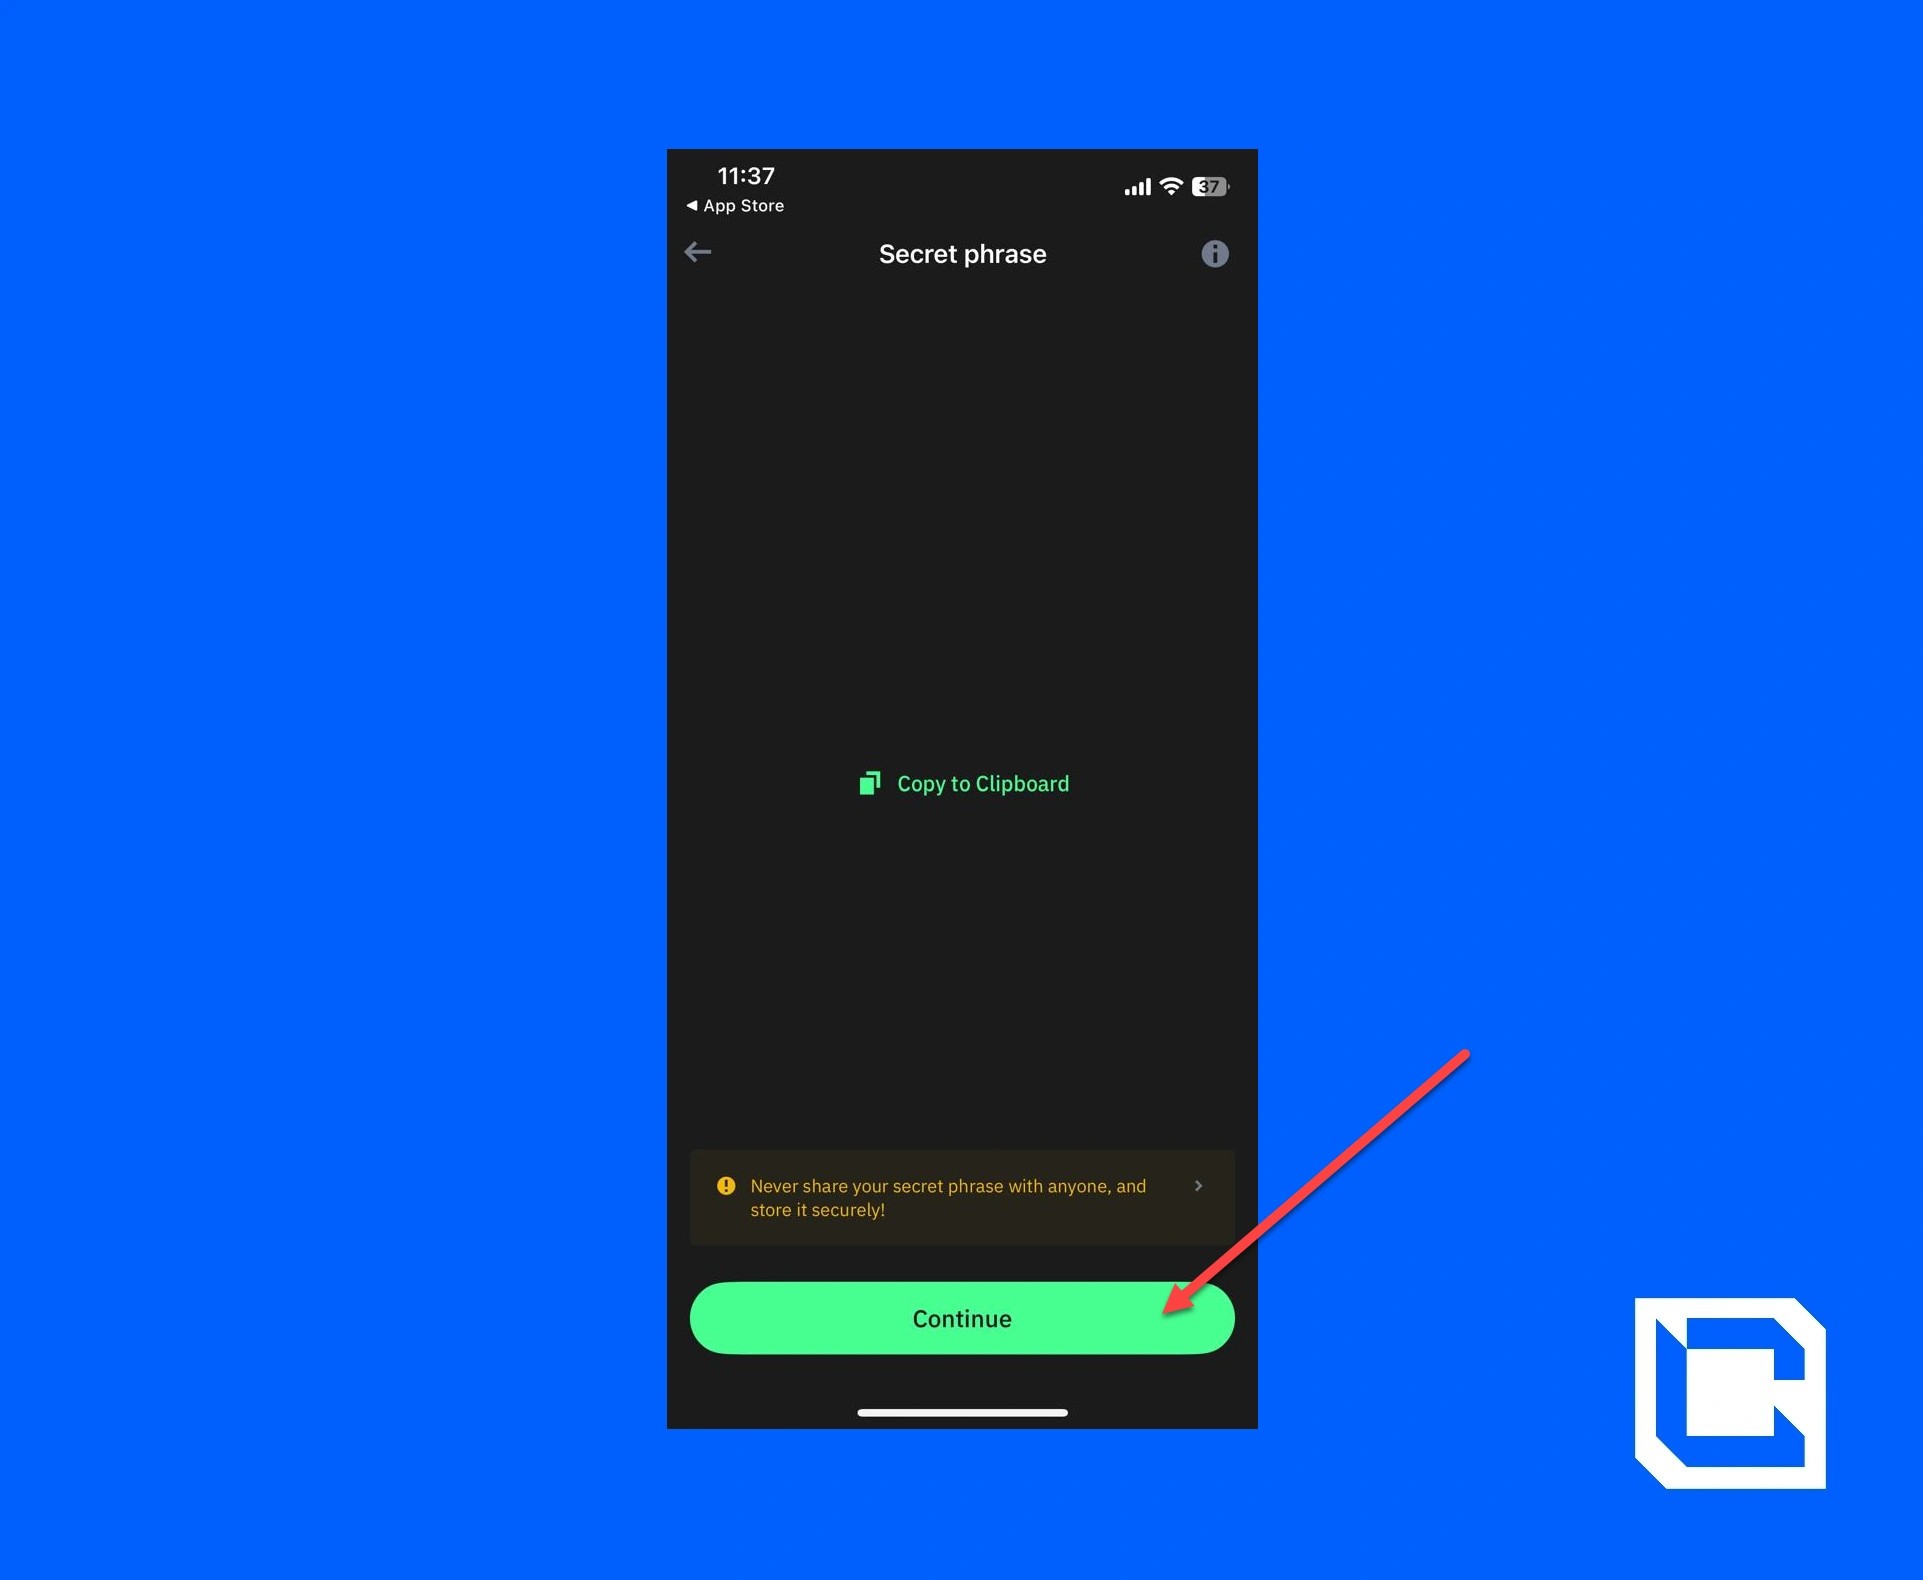
- Tap on all of the checkboxes and tap on the “Continue” button.
- Copy the phrases to store them somewhere and tap on the “Continue” button.
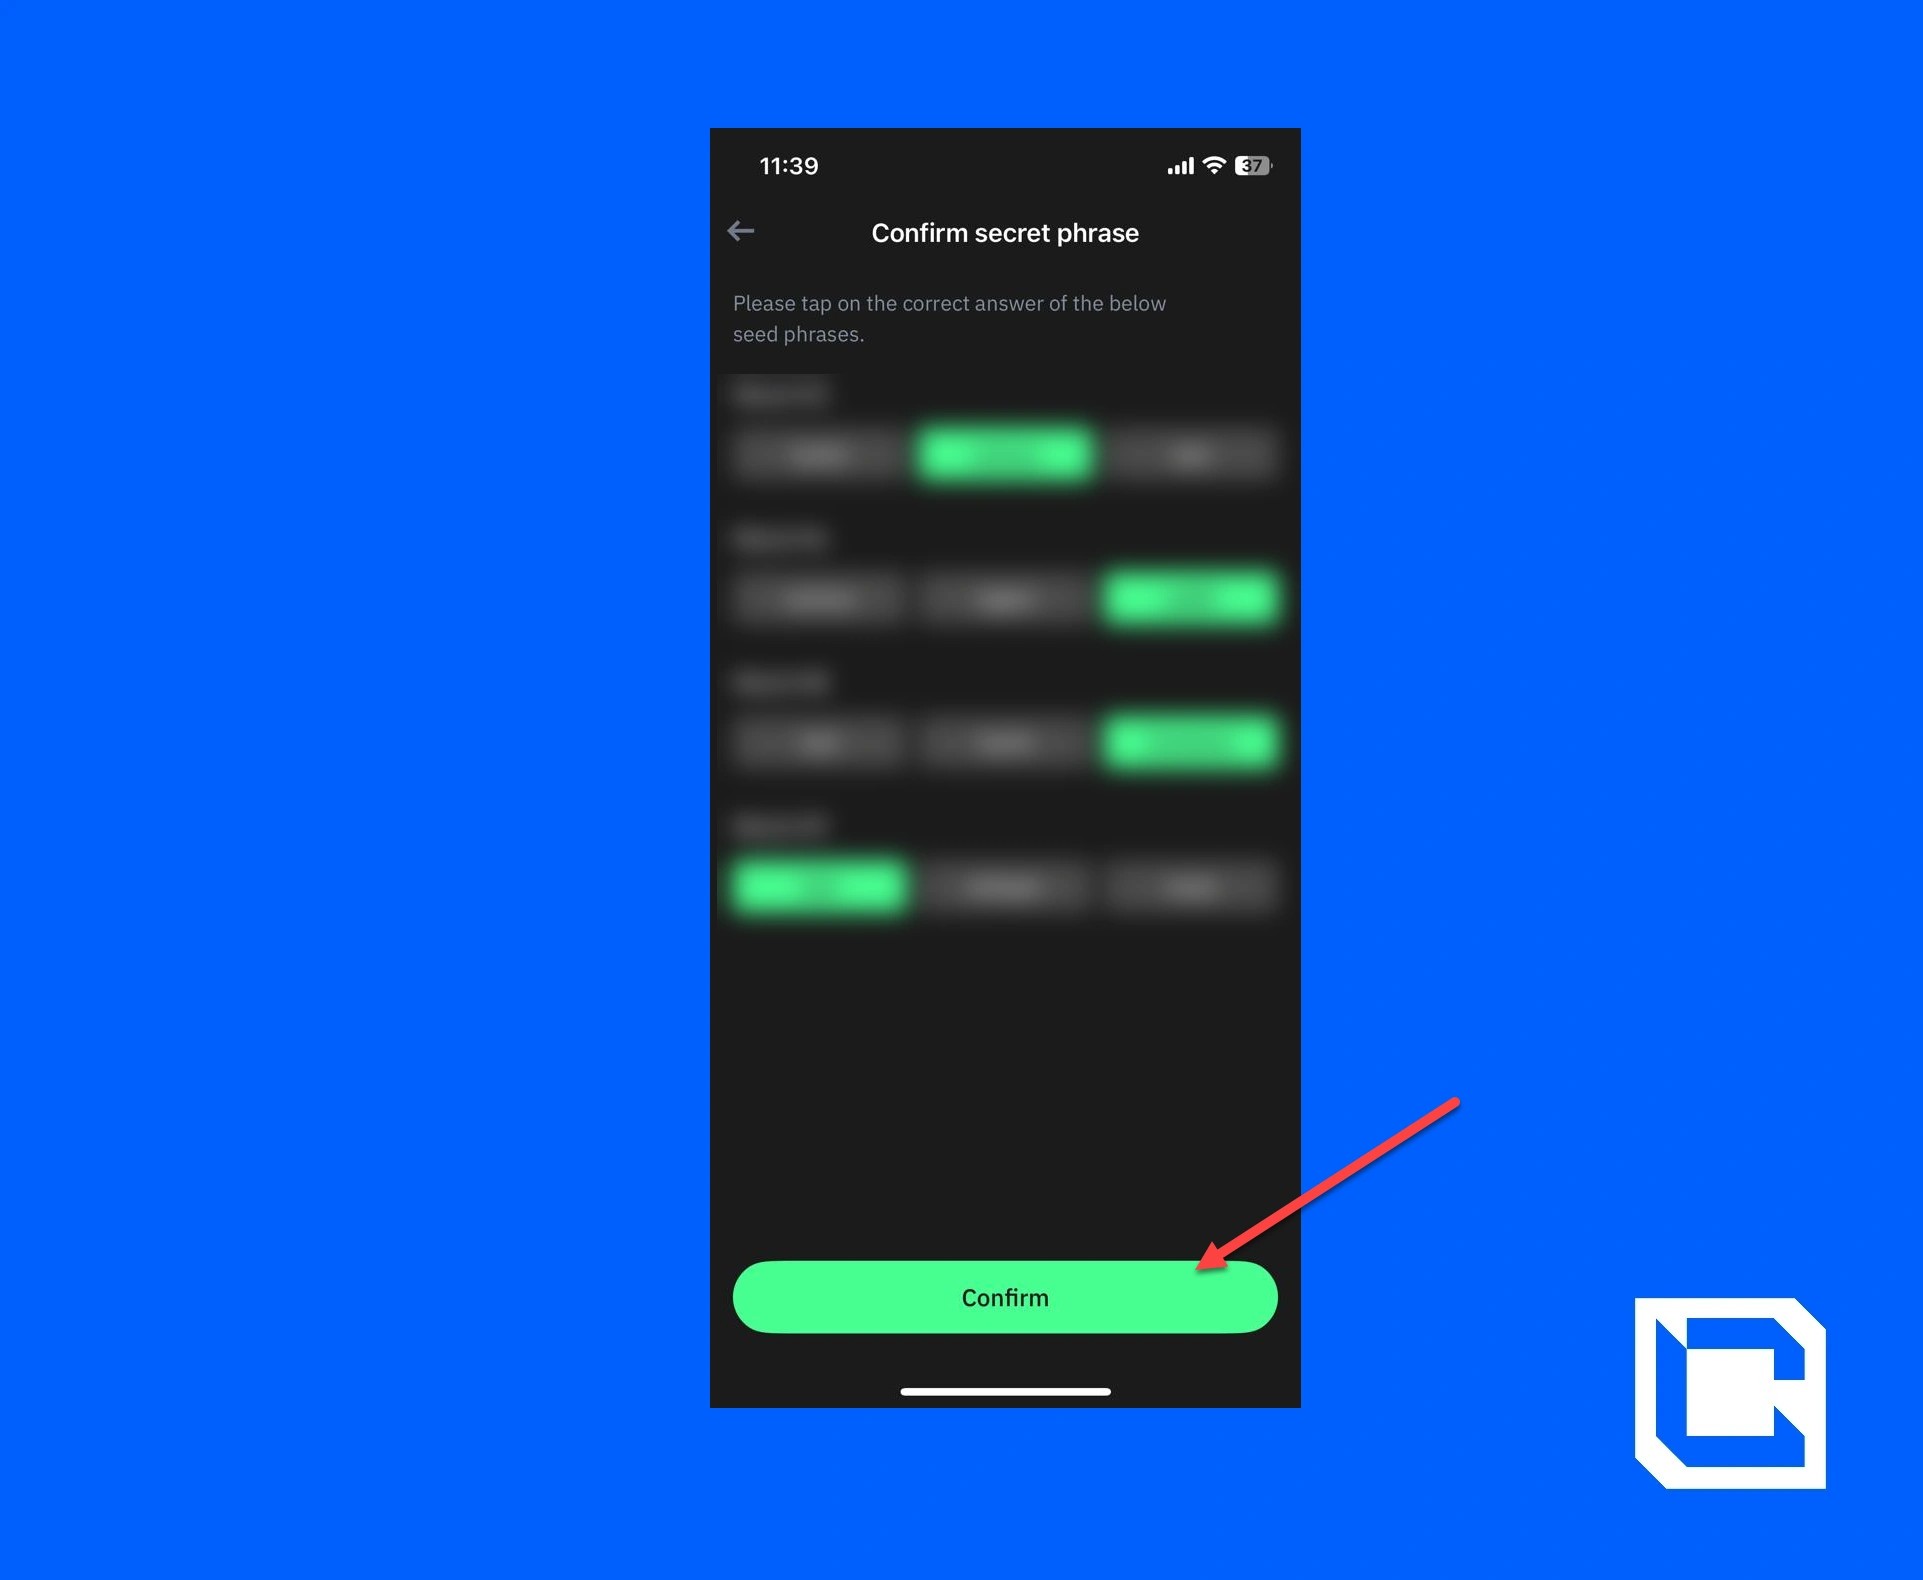
- Now, select a few phrases in the order they were generated and tap on the “Confirm” button.
Now that your wallet is created, the next step is to add funds in the form of USDT to your account.
The procedure is identical to the one used in Phantom Wallet.
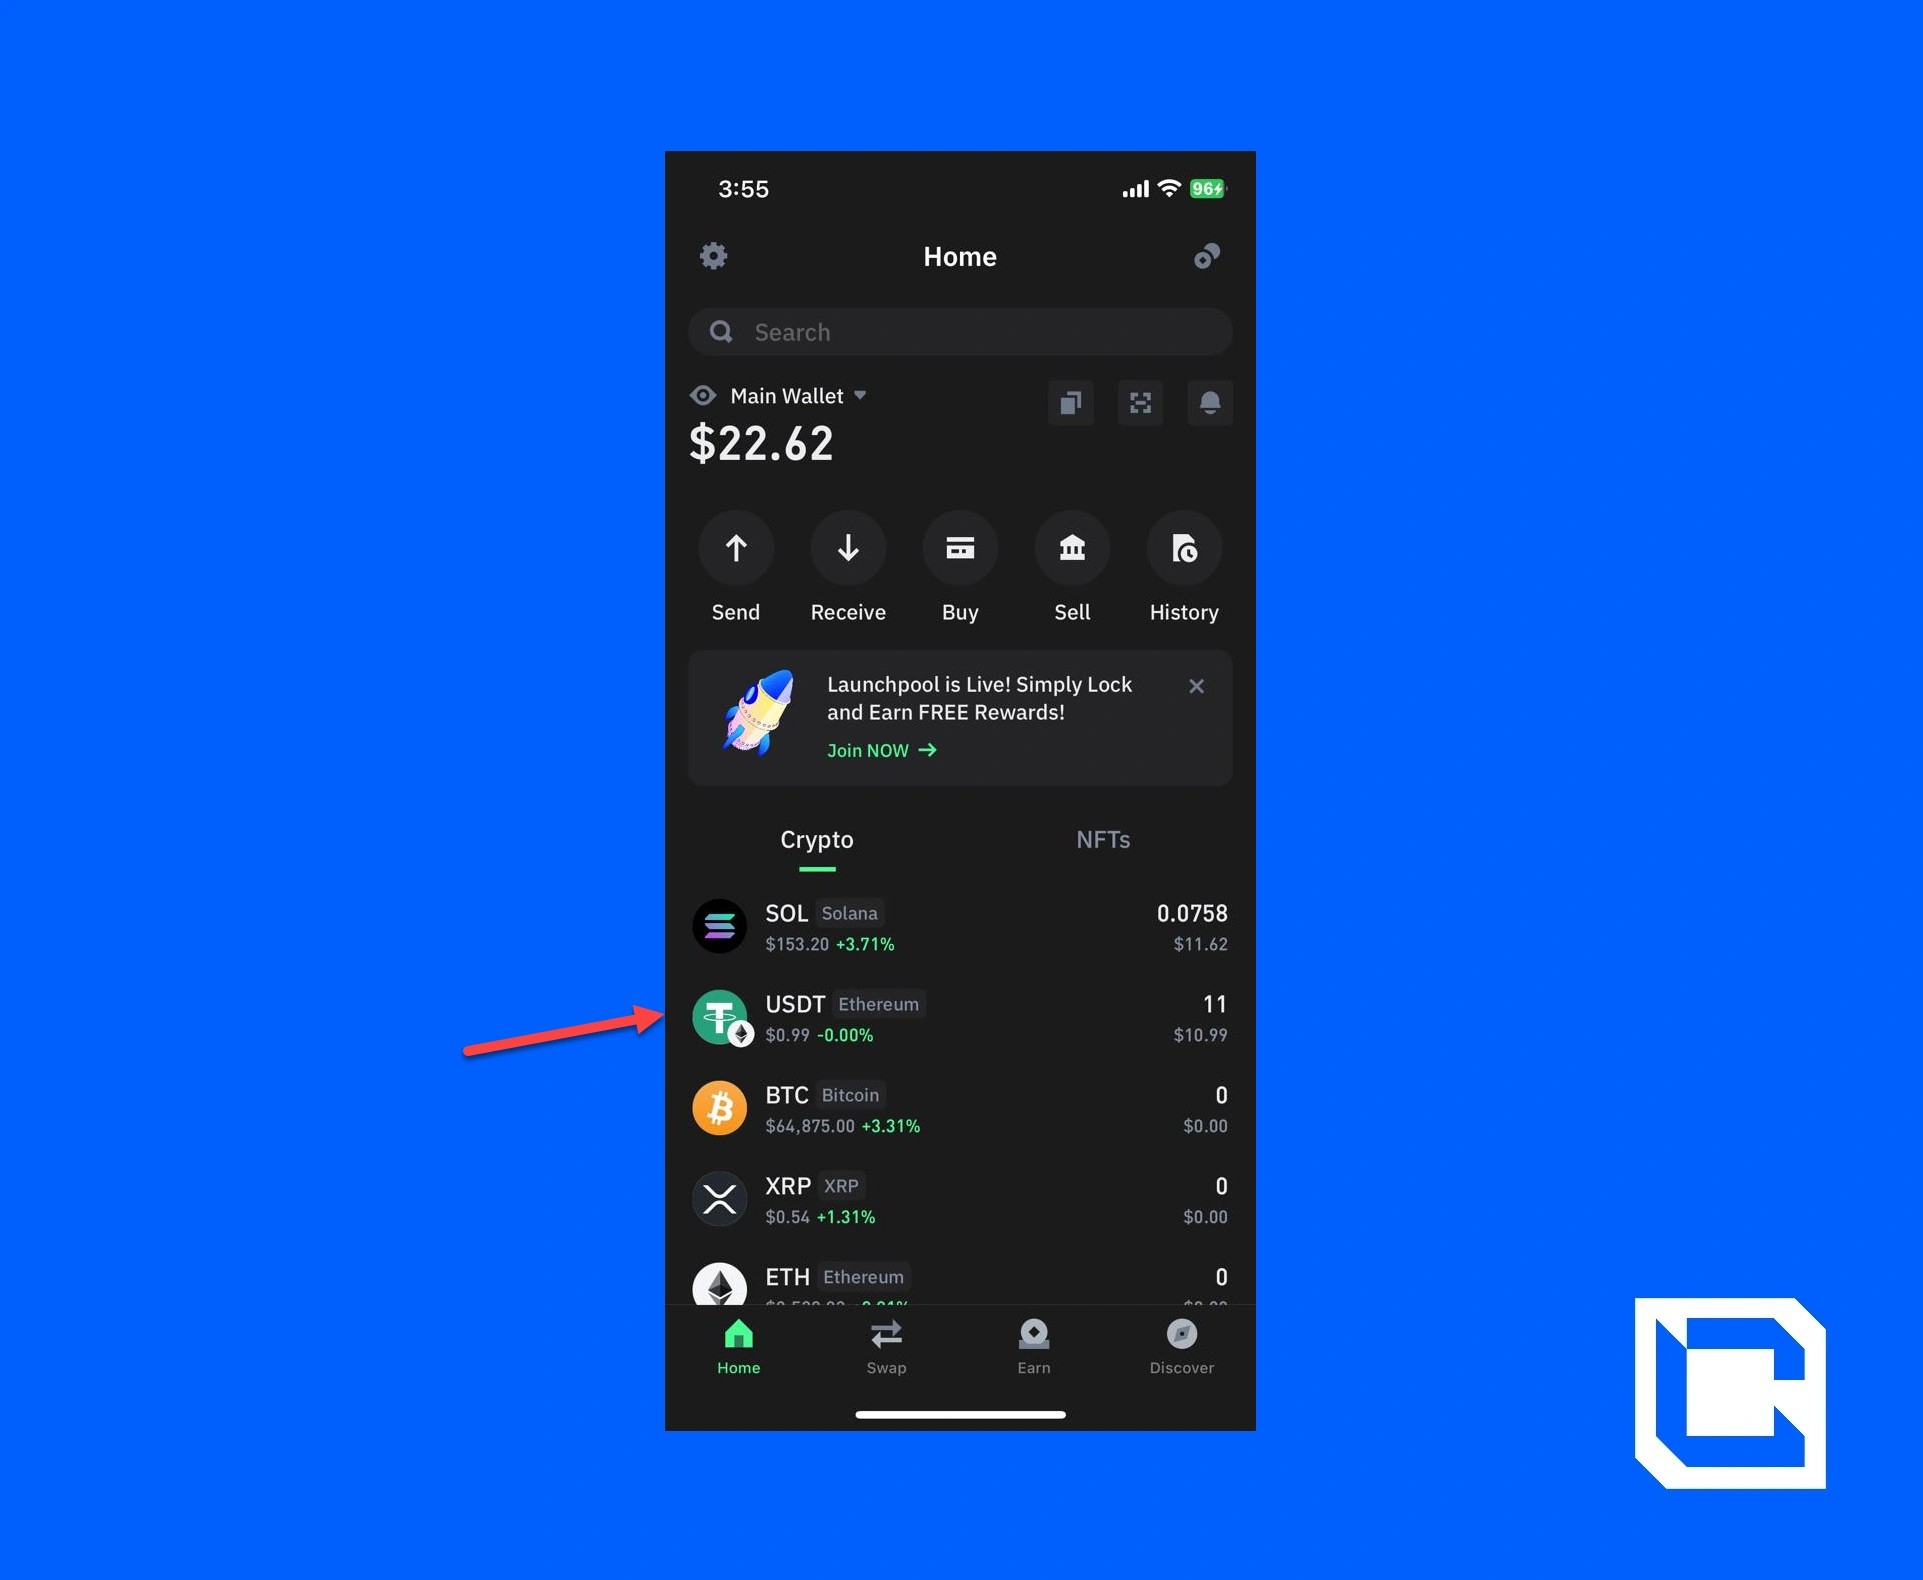
- Start by opening your Trust Wallet and taping on the “USDT” option.
- Now tap on the “Receive” icon.
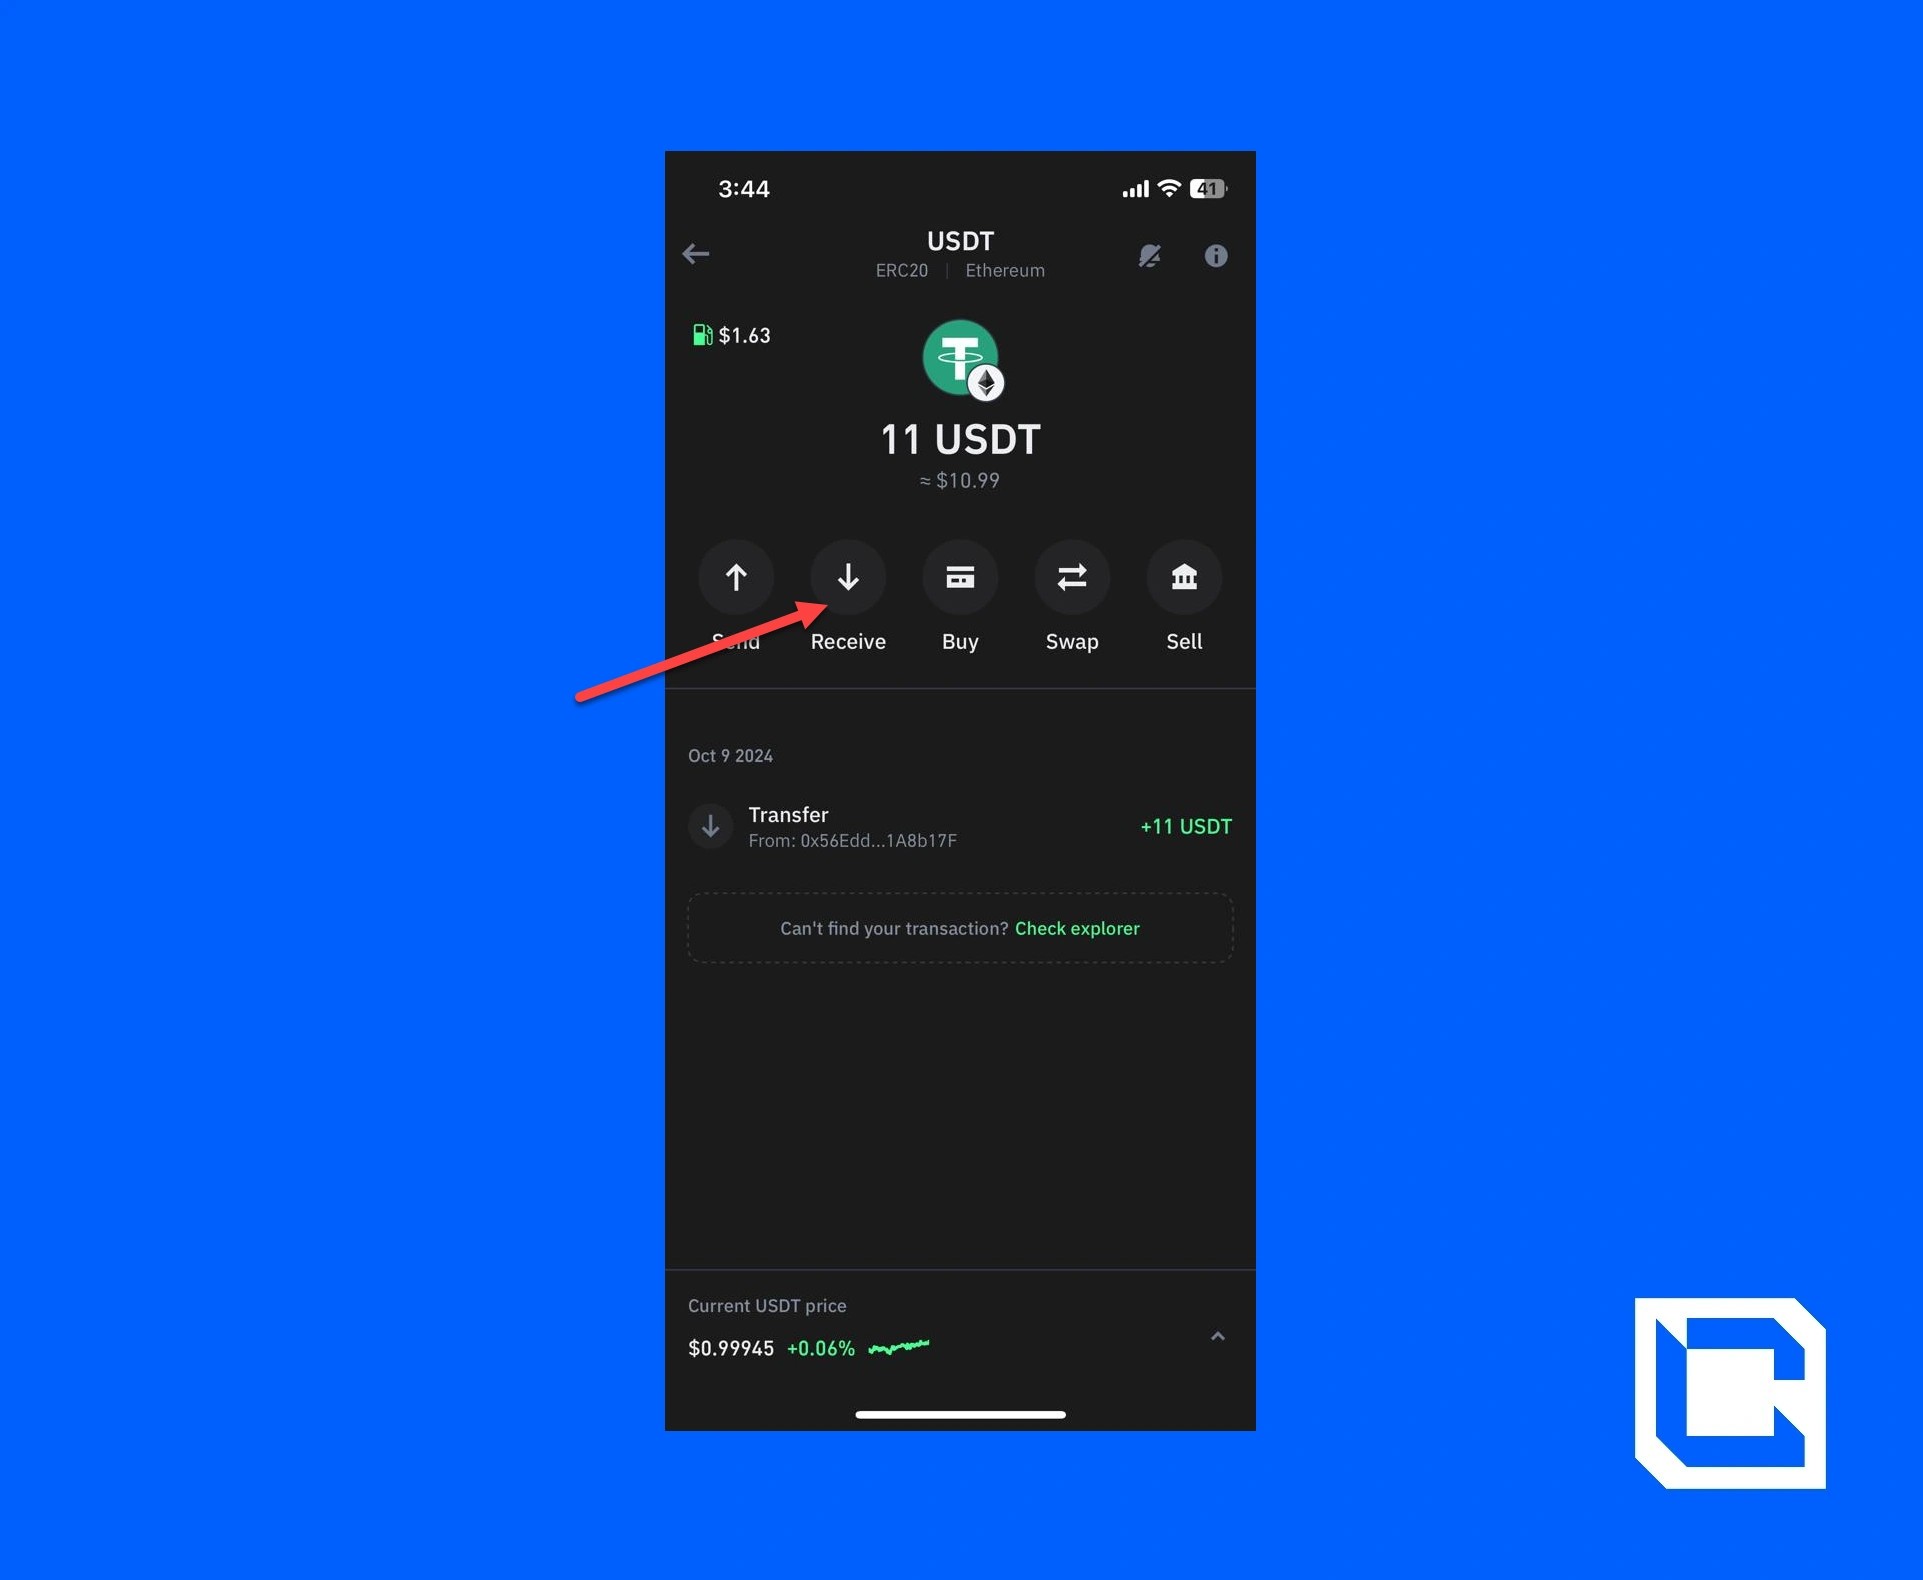
- Copy the address for USDT.

- After that, go to the Binance app and tap on the “Withdraw” icon.
![]()
- Again, tap on the “Withdraw” option.
- Choose the USDT option.
- Tap on the “Send via Crypto Network” option.
- Go back and paste the previously copied USDT address of your Phantom Wallet.
- Select the network by which you want to send this USDT.
- Enter the amount of USDT you want to send and tap on the “Withdraw” button.
- Tap on the “Confirm” button.
- Complete the authentication process for both Email and the Authenticator App.
After the verification process is complete, the USDT on the Ethereum network will be transferred to your Trust Wallet.
- Start by opening your Trust Wallet app and tap on USDT.
- Tap on the “Swap” icon.
- Now, set the bottom coin to Ethereum.
- Enter the amount and tap on the “Continue” button.
After verifying all of the details, simply tap on the “Swap” button, and the coin will be added to your wallet.
Note: Make sure that you have the gas fee in the form of ETH.
Conclusion
If you manage to follow the entire procedure correctly, you’ll see that Ethereum is now available in your wallet. To further keep your ETH secure, use a hot wallet like Argent Wallet. One thing that you should always keep in mind is to do your research before buying any kind of coin.Even though ETH is a popular coin, you should stay up-to-date with the market to maximise your profit. That’s why if you need any kind of guidance, Cryptonary is here to help. No matter if it’s a guide on the safest ways to buy crypto or recent market updates, we’ll make sure to provide you with the most accurate information.
Continue reading by joining Cryptonary Pro
$1,548 $1,197/year
Get everything you need to actively manage your portfolio and stay ahead. Ideal for investors seeking regular guidance and access to tools that help make informed decisions.
For your security, all orders are processed on a secured server.
As a Cryptonary Pro subscriber, you also get:
3X Value Guarantee - If cumulative documented upside does not reach 300% during your 12-month membership, you can request a full refund. Terms
24/7 access to experts with 50+ years’ experience
All of our top token picks for 2025
On hand technical analysis on any token of your choice
Weekly livestreams & ask us anything with the team
Daily insights on Macro, Mechanics, and On-chain
Curated list of top upcoming airdrops (free money)
3X Value Guarantee
If cumulative documented upside does not reach 300% during your 12-month membership, you can request a full refund.
Our track record speaks for itself
With over 2.4M tokens and widespread misinformation in crypto, we cut through the noise and consistently find winning assets.
Our track record speaks for itself
With over 2.4M tokens and widespread misinformation in crypto, we cut
through the noise and consistently find winning assets.


Frequently Asked Questions
Can I trust Cryptonary's calls?
Yes. We've consistently identified winners across multiple cycles. Bitcoin under $1,000, Ethereum under $70, Solana under $10, WIF from $0.003 to $5, PopCat from $0.004 to $2, SPX blasting past $1.70, and our latest pick has already 200X'd since June 2025. Everything is timestamped and public record.
Do I need to be an experienced trader or investor to benefit?
No. When we founded Cryptonary in 2017 the market was new to everyone. We intentionally created content that was easy to understand and actionable. That foundational principle is the crux of Cryptonary. Taking complex ideas and opportunities and presenting them in a way a 10 year old could understand.
What makes Cryptonary different from free crypto content on YouTube or Twitter?
Signal vs noise. We filter out 99.9% of garbage projects, provide data backed analysis, and have a proven track record of finding winners. Not to mention since Cryptonary's inception in 2017 we have never taken investment, sponsorship or partnership. Compare this to pretty much everyone else, no track record, and a long list of partnerships that cloud judgements.
Why is there no trial or refund policy?
We share highly sensitive, time-critical research. Once it's out, it can't be "returned." That's why membership is annual only. Crypto success takes time and commitment. If someone is not willing to invest 12 months into their future, there is no place for them at Cryptonary.
Do I get direct access to the Cryptonary team?
Yes. You will have 24/7 to the team that bought you BTC at $1,000, ETH at $70, and SOL at $10. Through our community chats, live Q&As, and member only channels, you can ask questions and interact directly with the team. Our team has over 50 years of combined experience which you can tap into every single day.
How often is content updated?
Daily. We provide real-time updates, weekly reports, emergency alerts, and live Q&As when the markets move fast. In crypto, the market moves fast, in Cryptonary, we move faster.
How does the 3X Value Guarantee work?
We stand behind the value of our research. If the documented upside from our published research during your 12-month membership does not exceed three times (3X) the annual subscription cost, you can request a full refund. Historical context: In every completed market cycle since 2017, cumulative documented upside has exceeded 10X this threshold.
TermsRecommended from Cryptonary